DIY Reading Pillow

My child’s bedtime is precious. Once 7 o’clock hits, without a doubt, it’s been a long day for all of us. He’s tired, we’re tired, and he’s snuggly, which is not the case for the other 23 hours of the day.

Before his nightly bath we always read books as a way to help him wind down. Like most parents, I have a very favorite book to read before bedtime. “I’d Know You Anywhere, My Love” by Nancy Tillman is the kind of book that just resonates with me. We started reading that to him when he was just a few weeks old and he has read it just about daily ever since.

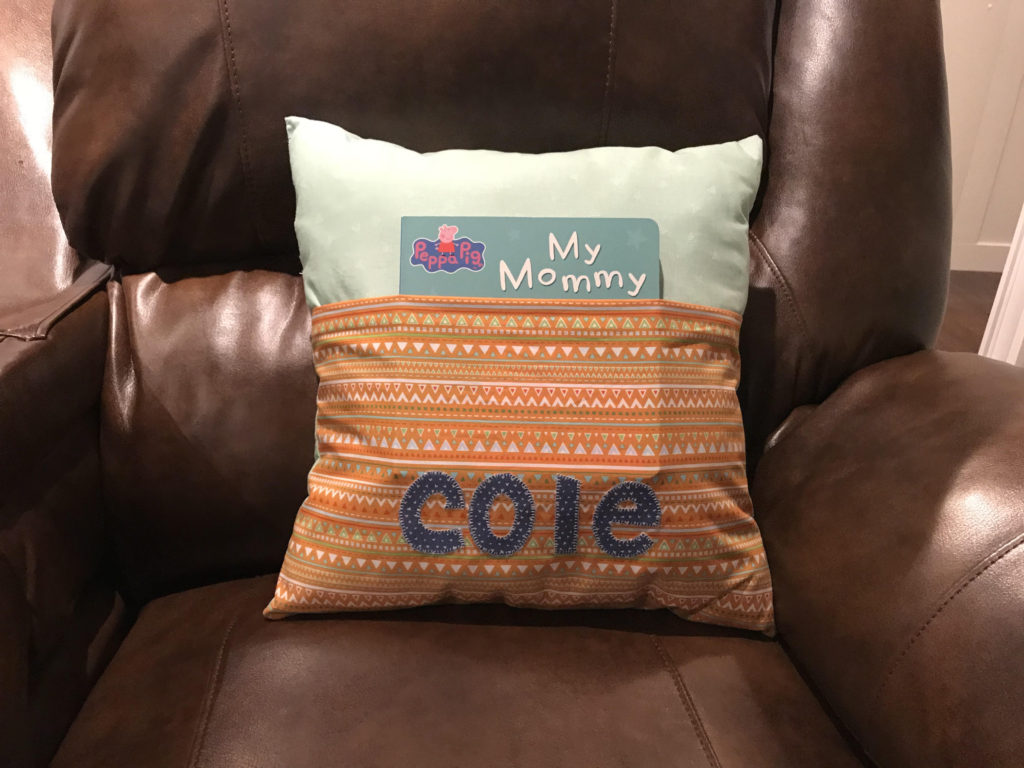
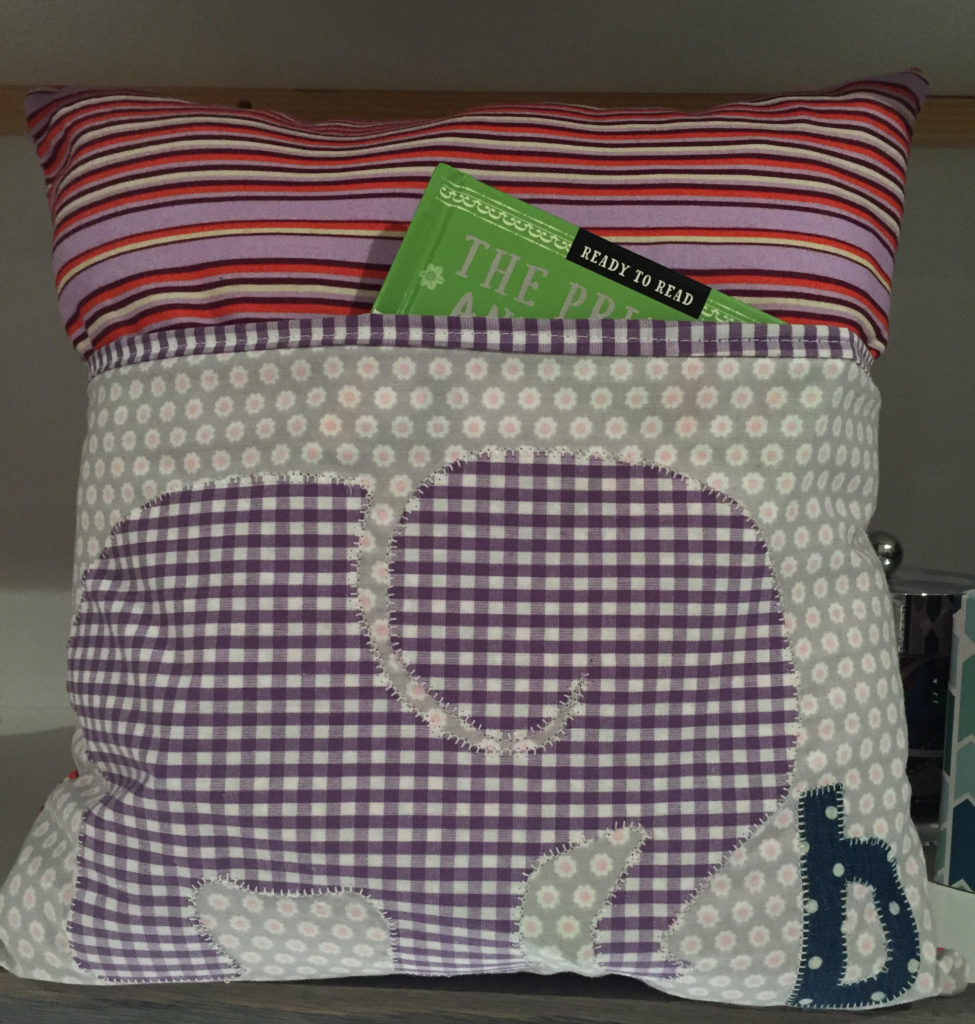
I love giving books as gifts for babies and kids. Today’s tutorial is for a reading pillow – a pillow you can keep on a rocking chair, in a playroom, on a child’s bed, you name it. It has a little pocket to hold that very special bedtime book, and it’s a gift that is really easy to personalize.

Materials needed for this tutorial:

  • Cotton fabric
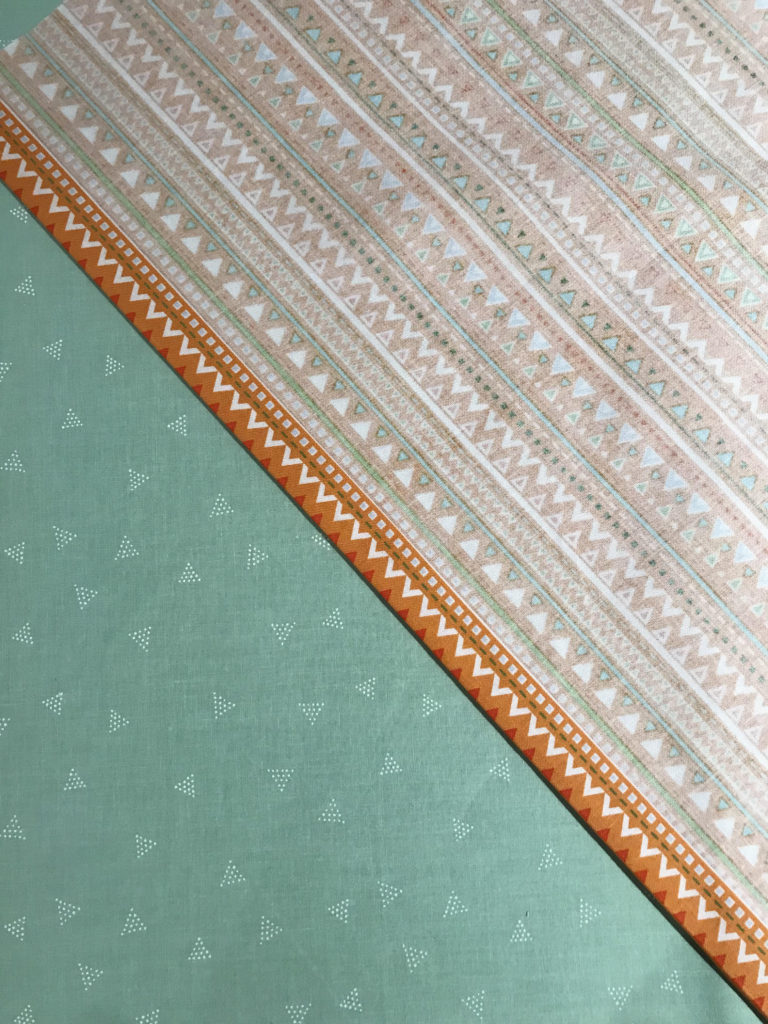
  • 2 contrasting cotton fabrics
  • Applique paper (Heat’N Bond Lite)
  • Stuffing

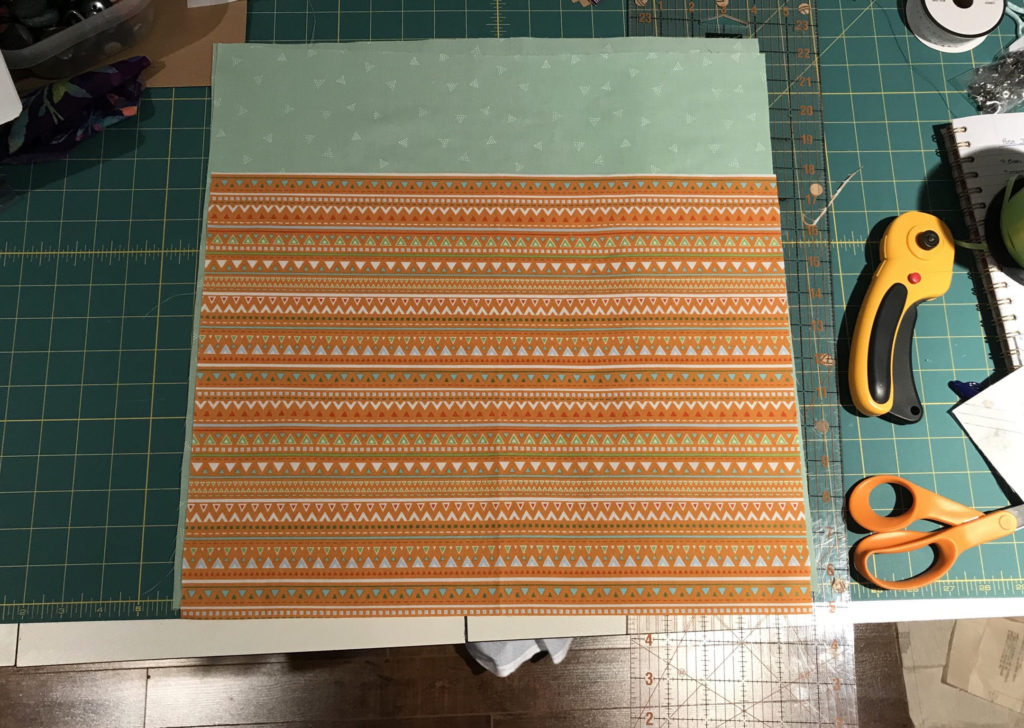
I start by cutting two 17″ squares of fabric. Iron, if needed. Out of your first contrasting fabric cut a rectangle 17″ wide X 13″ long.

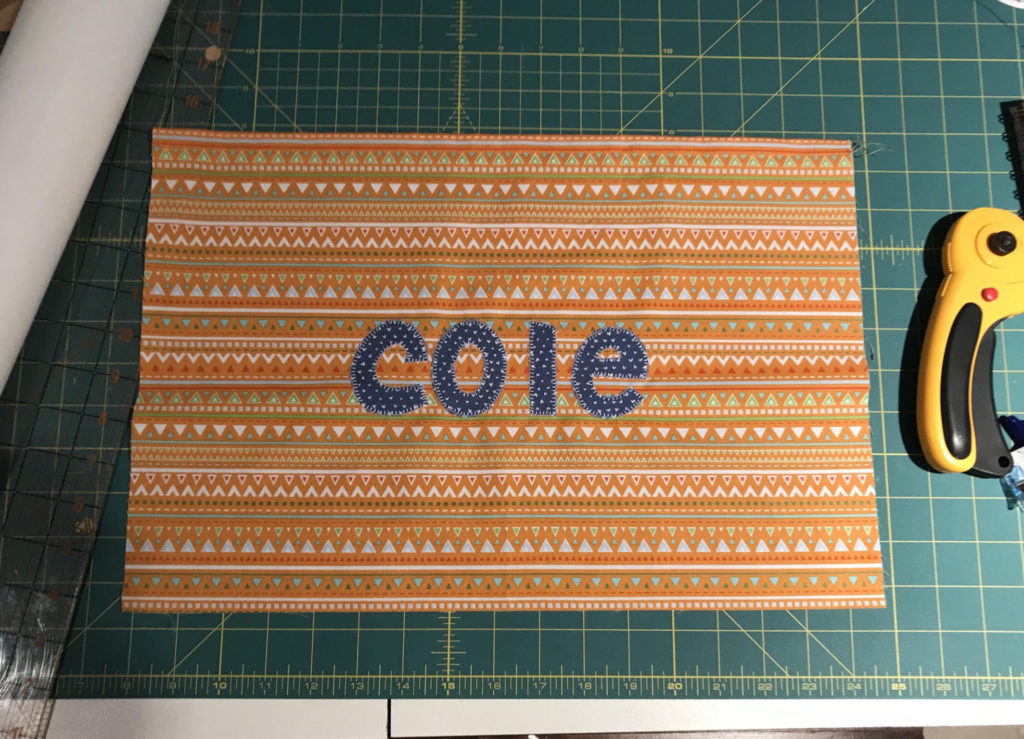
For the applique, you can really use any design. I typically applique the child’s name or an initial on the pillows pocket, but you can use any design you like.

I usually make a sheet of applique cotton (attach the Heat’N Bond Lite per instructions on the package). Cut out your design.

Take the first contrasting fabric and press with a hot iron. Lay the fabric out (17″ wide). Fold down the top of the fabric, about 1/2″; press. Fold down again the same amount, press. Using your sewing machine, sew along the folded section. Press.

Applique your design onto the pocket. A little tip: Don’t applique anything too close to the edge of the fabric or a corner. When the pillow is stuffed you want the design to be on the flattest part of the pillow, not on the curved edge.

Next you will lay out 1 of the 17″ squares flat, right side facing up. Lay the pocket you’ve just sewn on top of the fabric, lining up the bottom and side edges. Then lay the other 17″ square on top of the pocket, right side facing down.

Pinning along the edges, leave an opening at the top of the pillow about 4- 5 inches long. You will need to leave this opening so you can turn the pillowcase right side out and stuff the pillow.

Stitch along the edge, using a 1/2″ seam allowance. Turn the pillowcase right side out. Stuff the pillow, starting with each of the corners. I find filling the corners before you fill the rest of the pillow saves time in the long run.

Once it’s stuffed, add a bit of extra stuffing inside the open edge. Pin. Stitch by hand.

Once you’ve finished stitching, put a sweet book in the pillow and it’s ready to gift!

This is another one I did a few months back.

I hope you enjoyed this tutorial! This pillow takes about an hour to make and it’s a very sweet gift for your favorite bookworm!

Heather

An Apron Pattern to Love

Friends, it has been TOO long since my last post. About 6 weeks ago I returned to work following a 14 month maternity leave. My husband was travelling for work and life has been nothing short of hectic.

I do have a big project on the go right now, but tonight I want to talk a bit about my very favorite apron pattern.

Aprons are my go-to gift for housewarming parties, bridal showers, Christmas and birthdays. I love gifting personalized items, and aprons are a fun and functional gift to give or receive. For bridal showers I often embroider the bride’s new last name (if applicable) onto the apron. I make aprons out of cotton or light/medium weight denim fabrics, and I add lace or ribbon to the pocket to make it stand out a bit.

My go-to pattern is by Simplicity and it’s #2555. This pattern comes in ladies and misses, and you can choose between a gathered skirt apron or a flat front apron. The apron is pretty much a blank slate – you can add in details but otherwise it’s very plain. It’s a solid pattern that allows you to use your imagination. I should note as well that this pattern makes an adjustable apron, which I love because if you have your hair done you don’t have to pull a tight apron strap over your head – just tug down on the apron bib and the neck opening becomes longer.

I estimate that I’ve made this pattern over 40 times. The instructions are clear, the design is beautiful, and the finished product is fantastic. I’ve made the gathered apron and the flat front apron, but the gathered is a pain so I just stick with the flat front now.

Over the years I’ve tailored the pattern to include extra detail around the top and the tail. I’ve used contrasting fabric for those pieces, as well as the pocket and tie. I typically make this with just 1 pocket but I have made it with 2 as well.

So for this apron I added a 6 inch section along the bottom of a contrasting fabric, and a roughly 2 inch (finished) section along the top. I used contrasting fabric for the tie and the pocket. A little lace detail finished the pocket, and now this is ready for gifting! This is made in size Medium.

This version was from Christmas 2017. I used a fabric with red and plaid deer for the body of the apron, and the trim is done from a complimentary fabric with small blue deer heads, snowflakes and trees. Again, I used it for the top section, bottom, ties and pocket. I didn’t use any ribbon or lace on the pocket for this apron, mostly because I felt the fabric was lively enough. This is made in size Large.

This is the basic pattern without any add-ons. The fabric shown here is from my stash and it really just needed to be put to good use. I think it’s perfect for an apron. Not sure what else I had in mind when I picked it up….story of my life! This is also a size Large.

I love the size of this apron and the fact that it’s adjustable just makes it perfect! No more messing up your hair when it’s time to take the apron off. Perfect if you’re having company for dinner.

In terms of sizing, the small is true to size, medium is definitely suitable for up to size 10 or 12, in my opinion. The large is generous, and the XL is as well.

I’ve made some more decorative aprons and some child-size aprons but tonight I really just wanted to talk a bit about Simplicity 2555 as it’s my go-to.

You could dress this up even further with a very decorative pocket, or with more pockets! If you’re really feeling adventurous perhaps a little applique! In fact, in a future post I hope to do an apron with teacup applique.

Thanks for checking out my post!

Heather