DIY Toddler Apron

This weekend I’ve been busy making aprons for toddlers. You might recall a previous post An Apron Pattern to Love and this apron follows a lot of the same instructions, however there are some differences for sure.

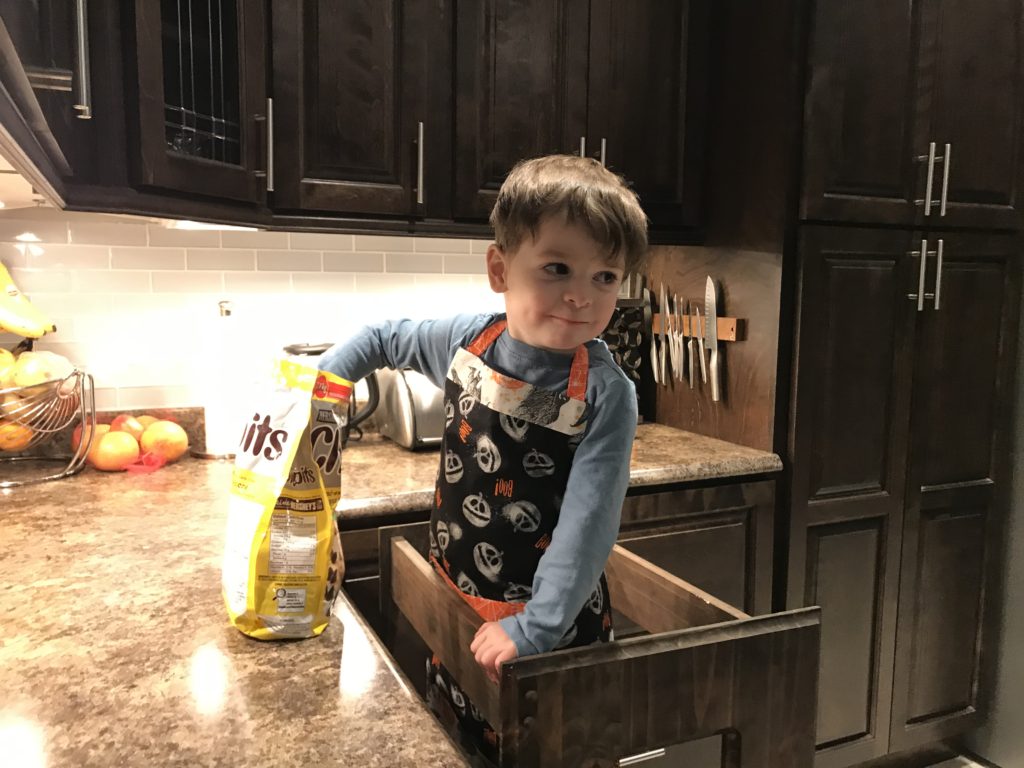
My son is nearly 3 years old and absolutely loves to bake and help prepare meals. He’s got a little learning tower in the kitchen so he can reach the countertop, and I often find him reaching for my aprons to wear. I made this one in a 3T-4T size.

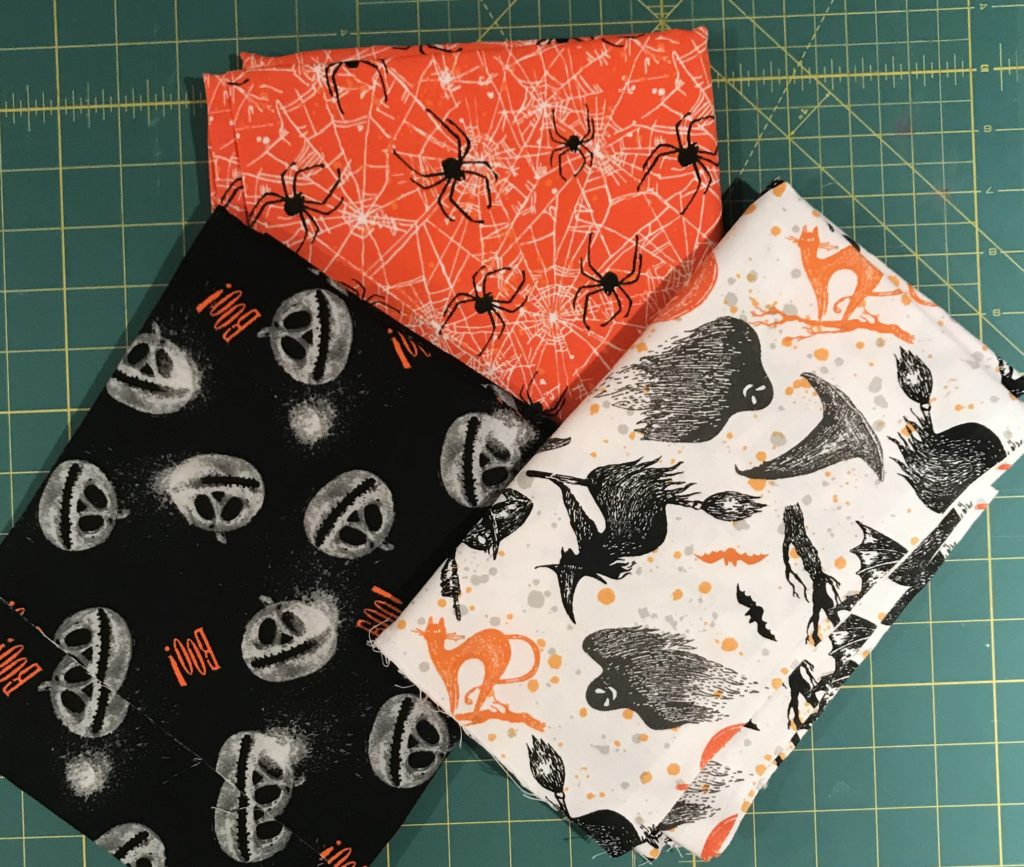
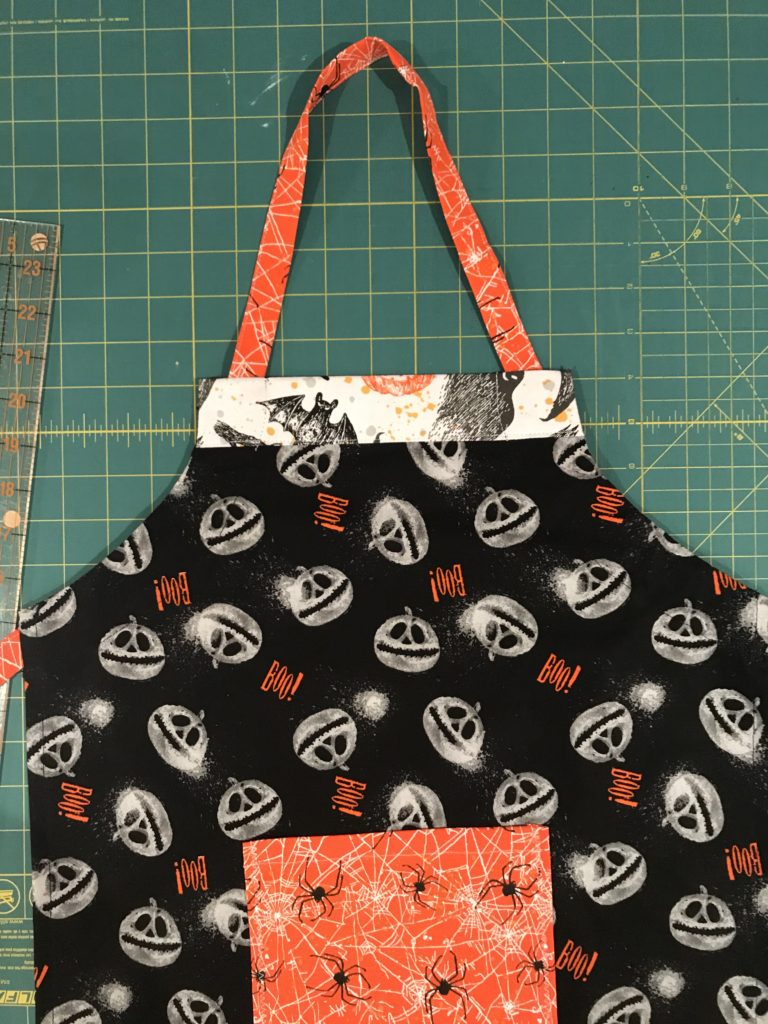
My family is Halloween-obsessed. No joke. We spend weeks preparing costumes every year, and we go a bit nuts with decorating the outside of our house. The little one has caught the Halloween bug and just loves anything spooky!

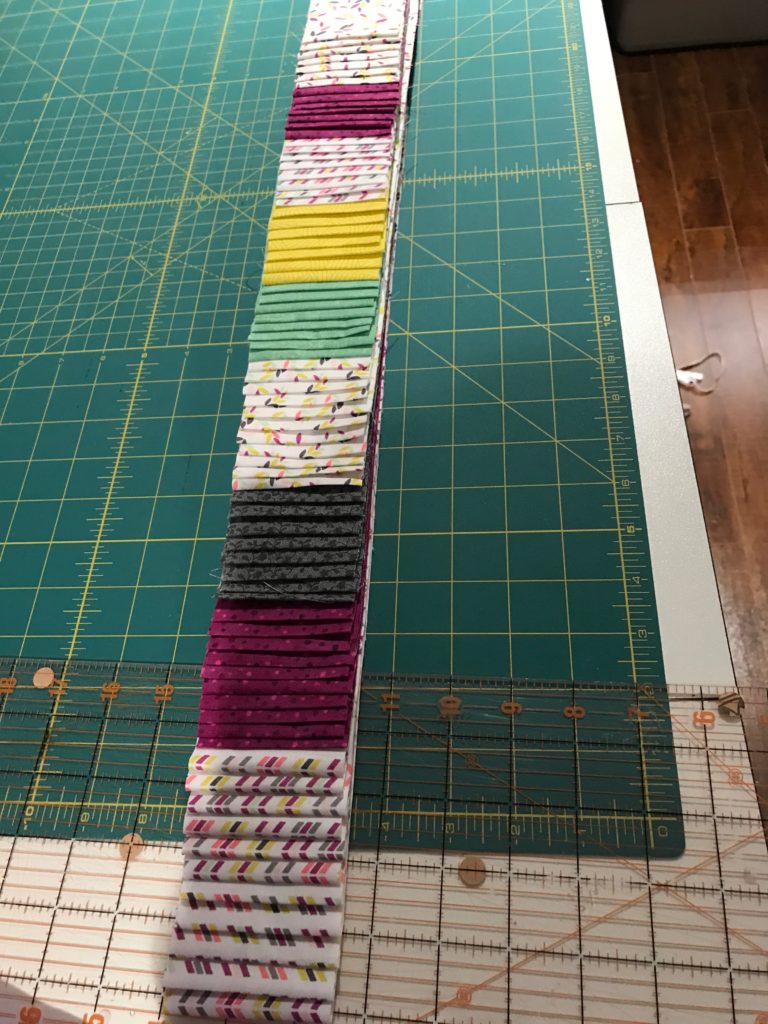
One way I make sewing a bit more economical is by buying seasonal fabric (Christmas, Halloween, Easter, etc) on clearance at the end of each season, to use the following year. I have a stash of Halloween fabric from years gone by, so there couldn’t have been a more perfect time to use my spookiest prints than for my sons first apron.

Materials needed for this tutorial:

  • 3/4 meter of fabric (I used cotton, and I used 3 coordinating fabrics in smaller quantities)
  • Safety pin
  • Ruler
  • Cutting wheel
  • Cutting mat
  • Pins

In keeping with quilting rules, I did not pre-wash the cotton for this tutorial. If you’ve ever pre-washed cotton you will know that it frays and gets terribly tangly around the edges after going through the dryer.

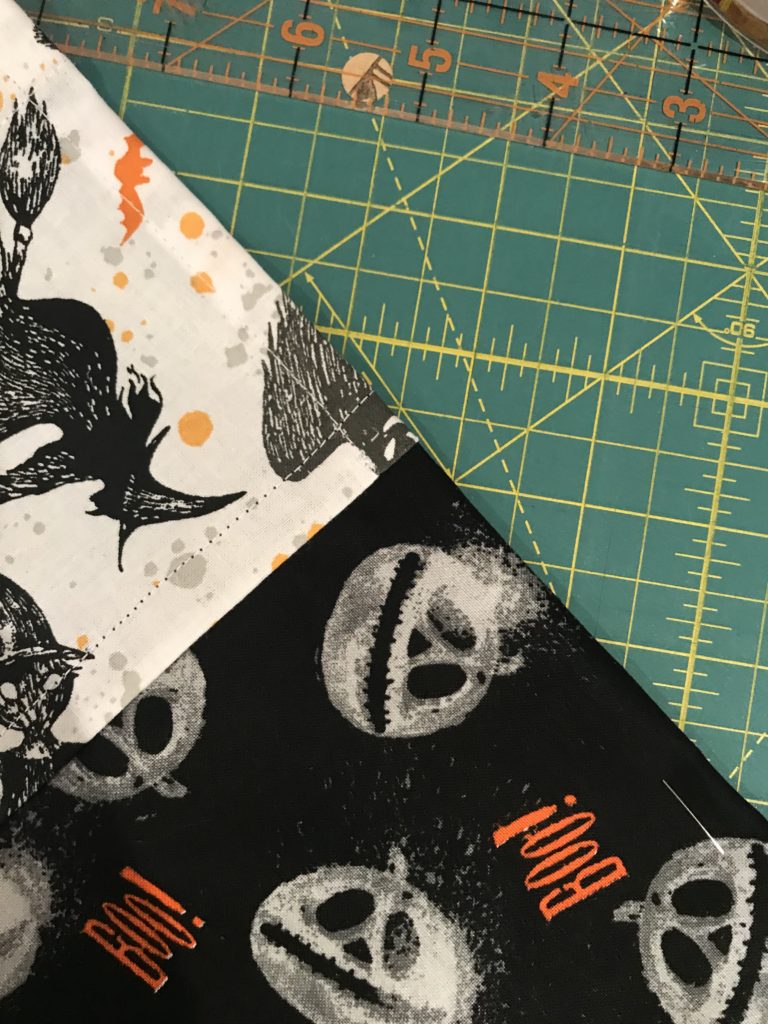
I started by ironing my fabric to get the creases out. I was using 3 coordinating Halloween fabrics so I selected one for the body, one for the trim (around bottom and top of apron), one for the pocket and tie.

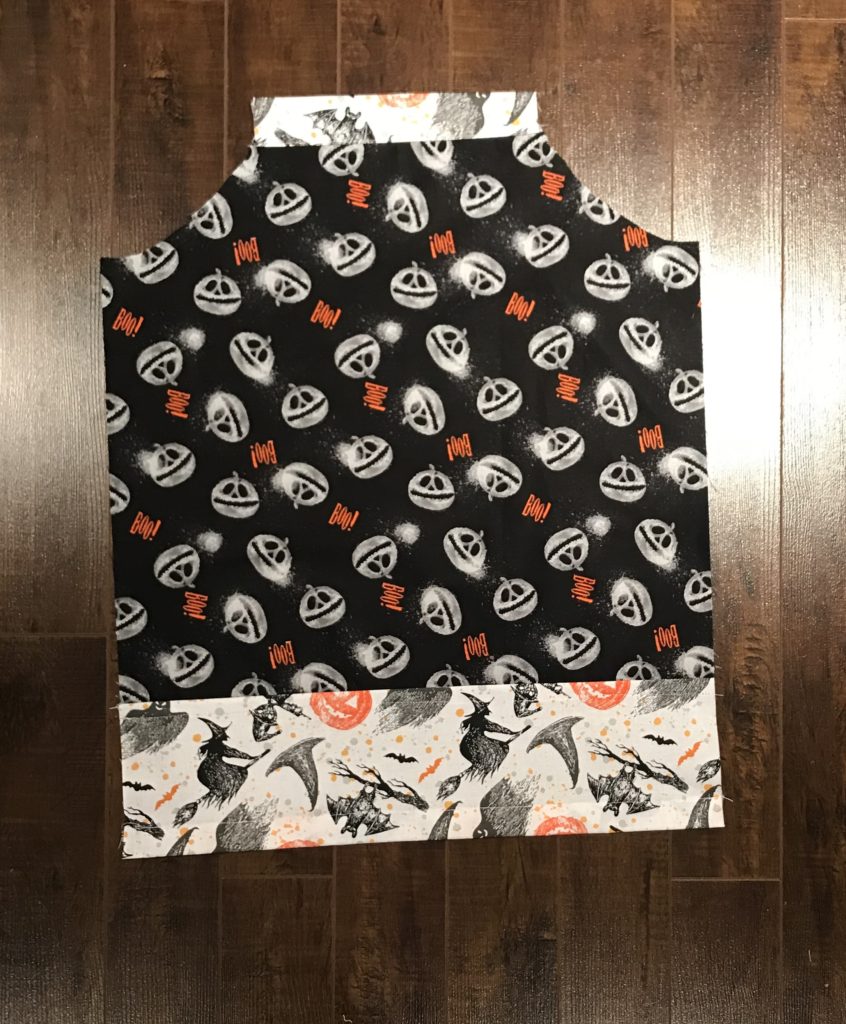
Using my cutting mat I laid out the fabric for the body of the apron. Being aware of the direction of the print on the fabric, I cut a rectangle that was 19 inches wide and 28 inches long. In hindsight I probably could have gone with 25 inches long because the apron did end up being a bit long on my son, but as he grows it will still work for him.

Once I had the 19WX28L rectangle cut I folded it in half lengthwise (the folded piece would now be 9.5WX28L). Working from the cut edge I measured down from the top 5 inches, placing a pin. Working now from the folded edge at the top of the apron body, I measured across 4 inches and placed a pin. The area between those two pins is the armhole.

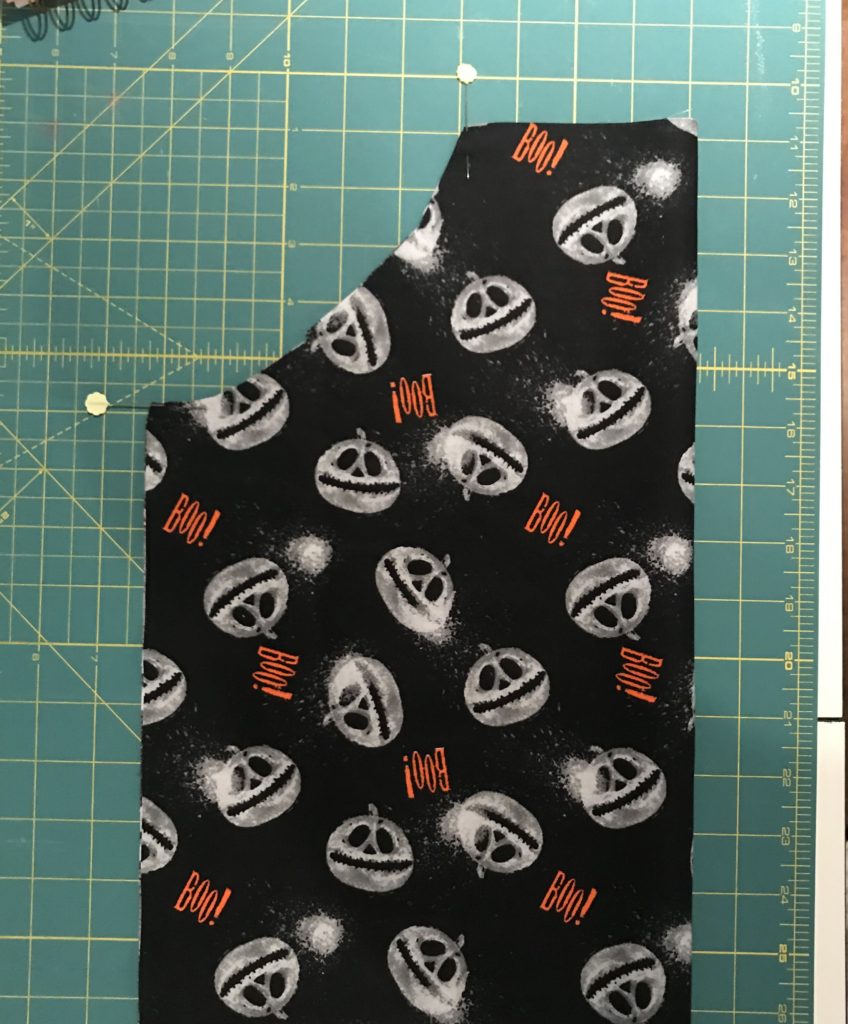
Next you need to cut between those two pins. I’ve included a photo here so you can see the shape I use. If you make it too rounded it won’t fit nicely under the arms.

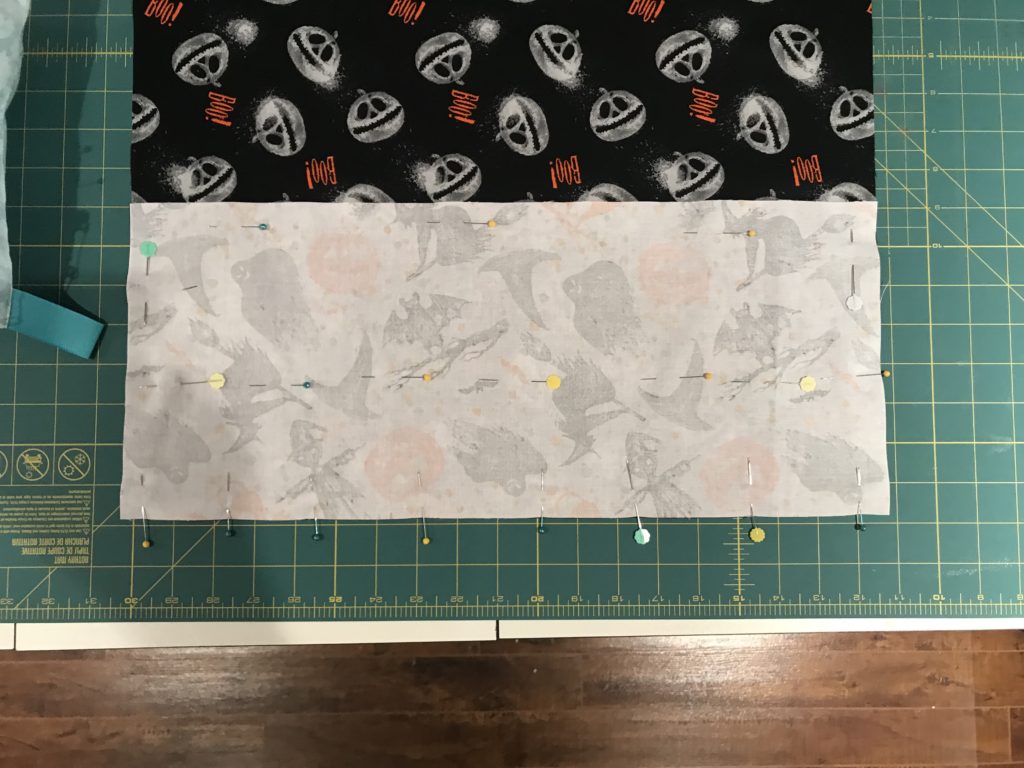
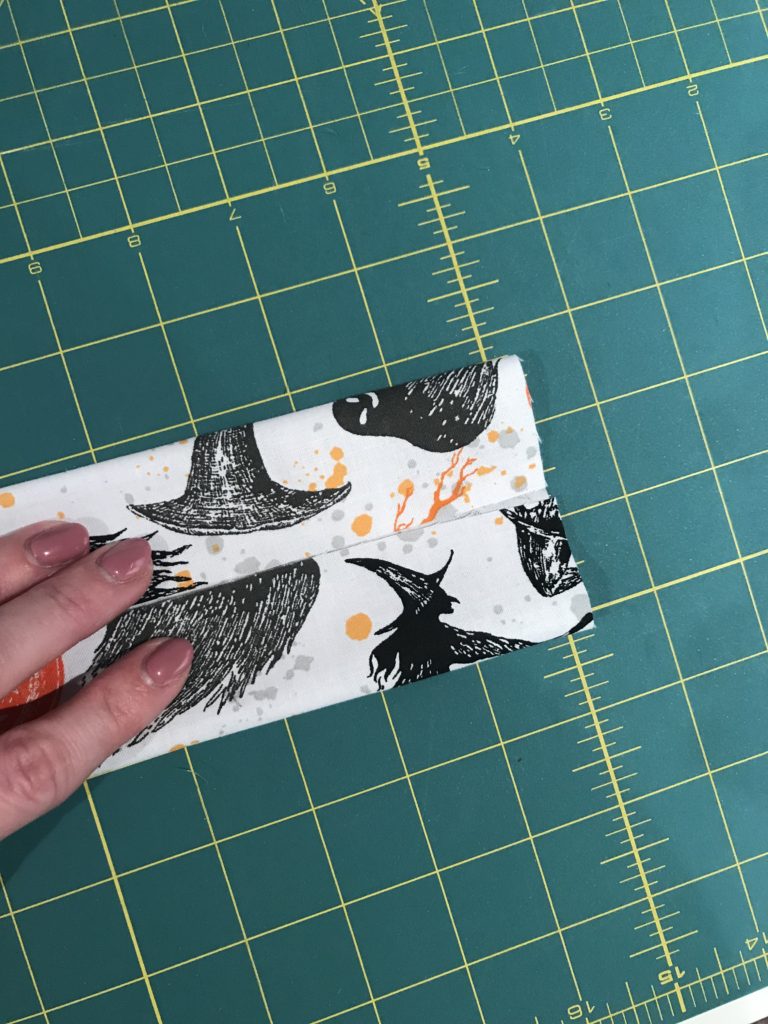
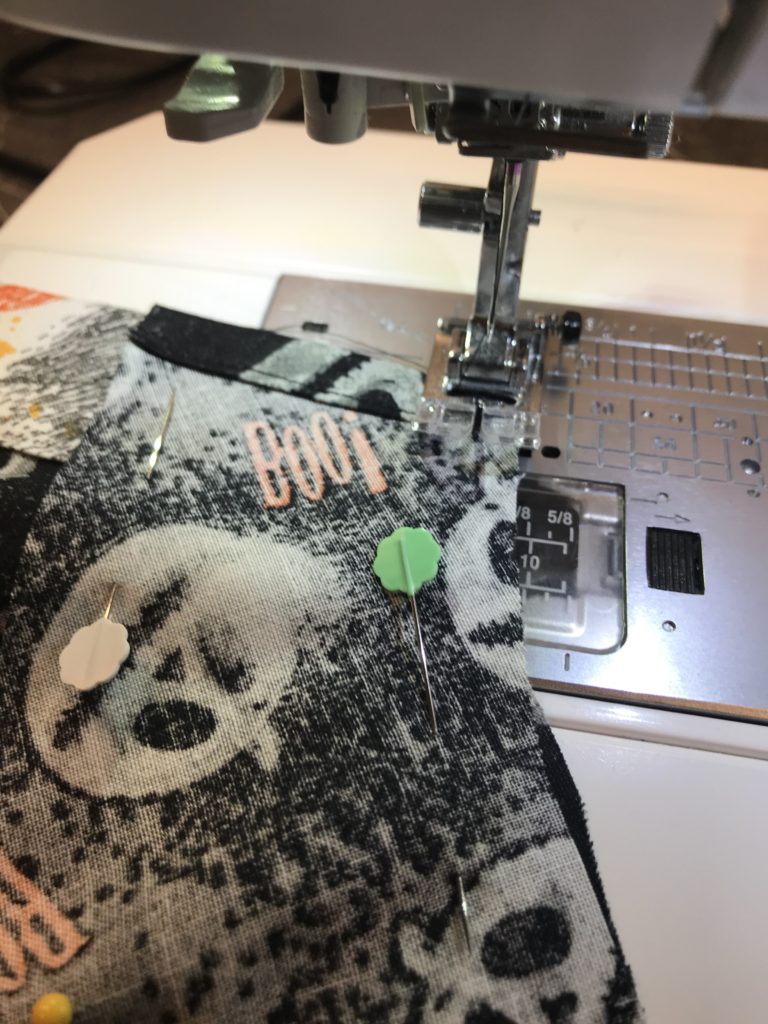
Once you’ve cut the armhole, you will start the trim piece for the chest and bottom of the apron. For the bottom (again, mind the direction of the print on your fabric!) I cut a piece that was 8 inches long and 19 inches wide. For the top I did 9 inches wide and 6 inches long.

To attach the bottom piece I ensure both pieces of fabric are pressed and wrinkle-free. Then I flattened out the body of the apron and placed the rectangle for the bottom trim over top, with right sides together. I lined them up and pinned along the edge.

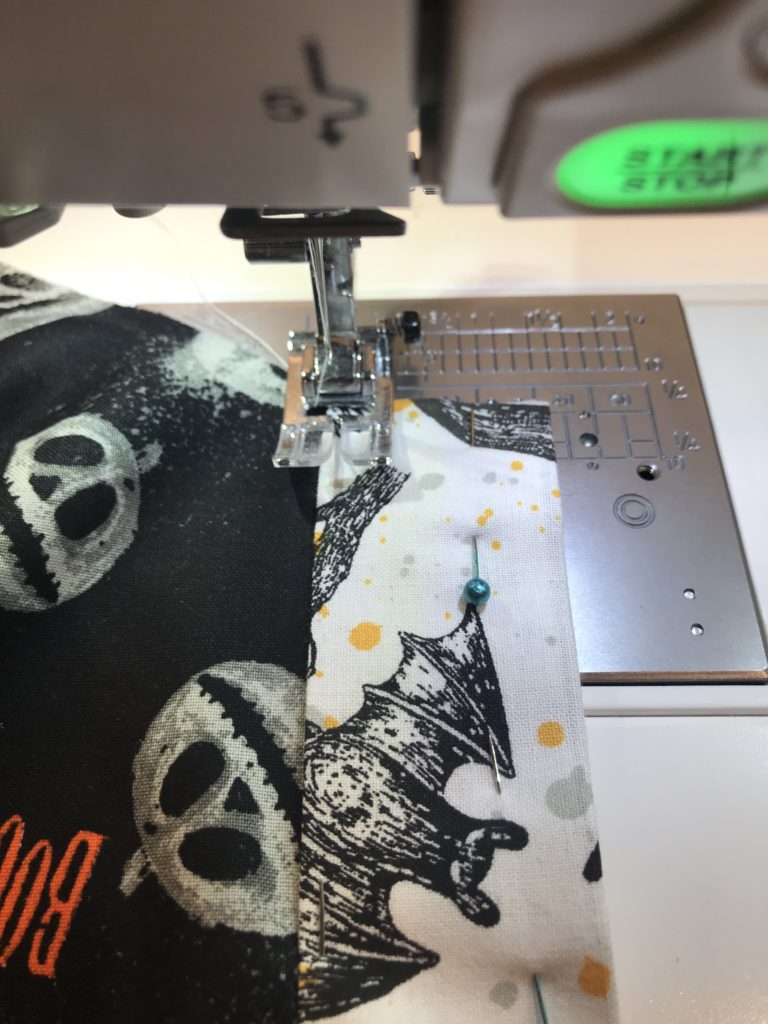
When I sew along this edge I use a 1 inch seam allowance, which is a lot but you’ll be making a bit of a pocket with this shortly so you will be thankful you’ve given yourself lots of fabric to work with.

Stitch along the edge. Once you’ve stitched, your 1 inch seam allowance is now 2 pieces of fabric, but we want to trim the lower piece.

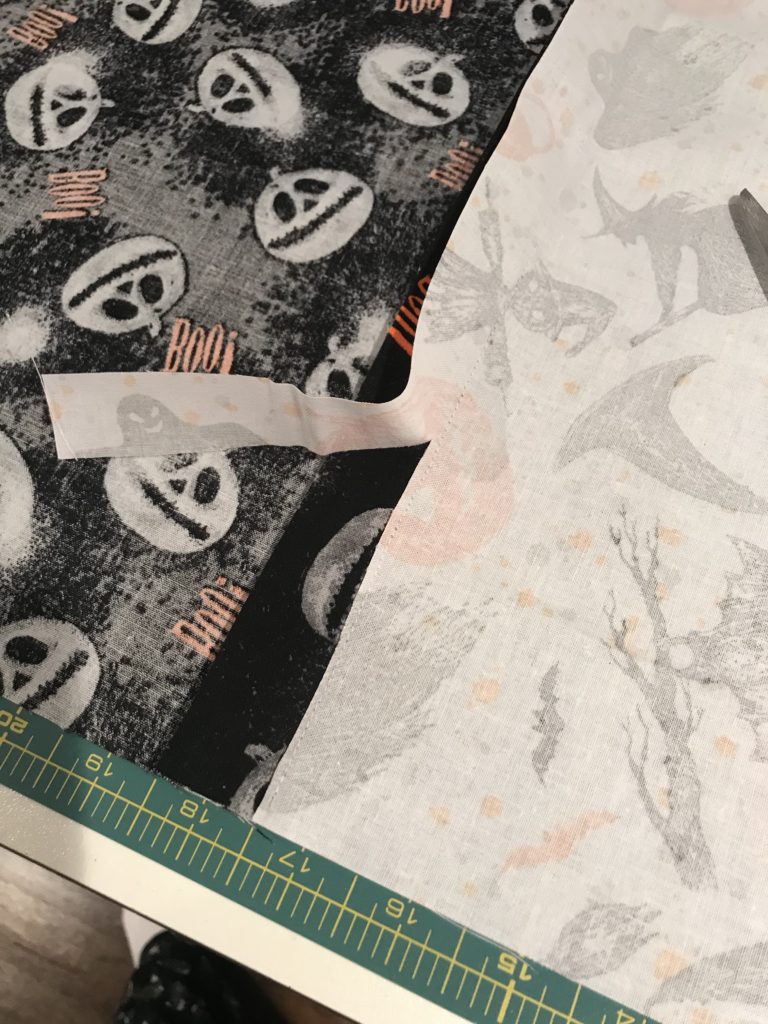
Next you want to press the main body piece of fabric (the seam allowance) downward, to cover the piece we just trimmed. Give it a good press, using steam.

The seam allowance will now be tucked up under itself, encasing the cut edge of the lower fabric.

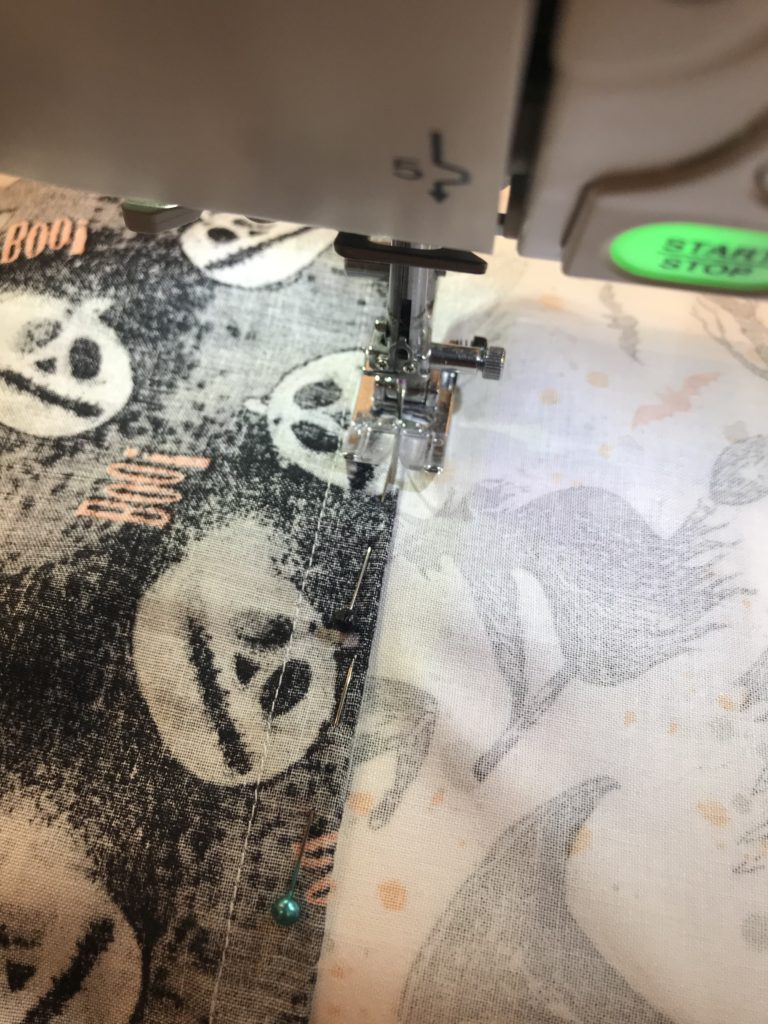
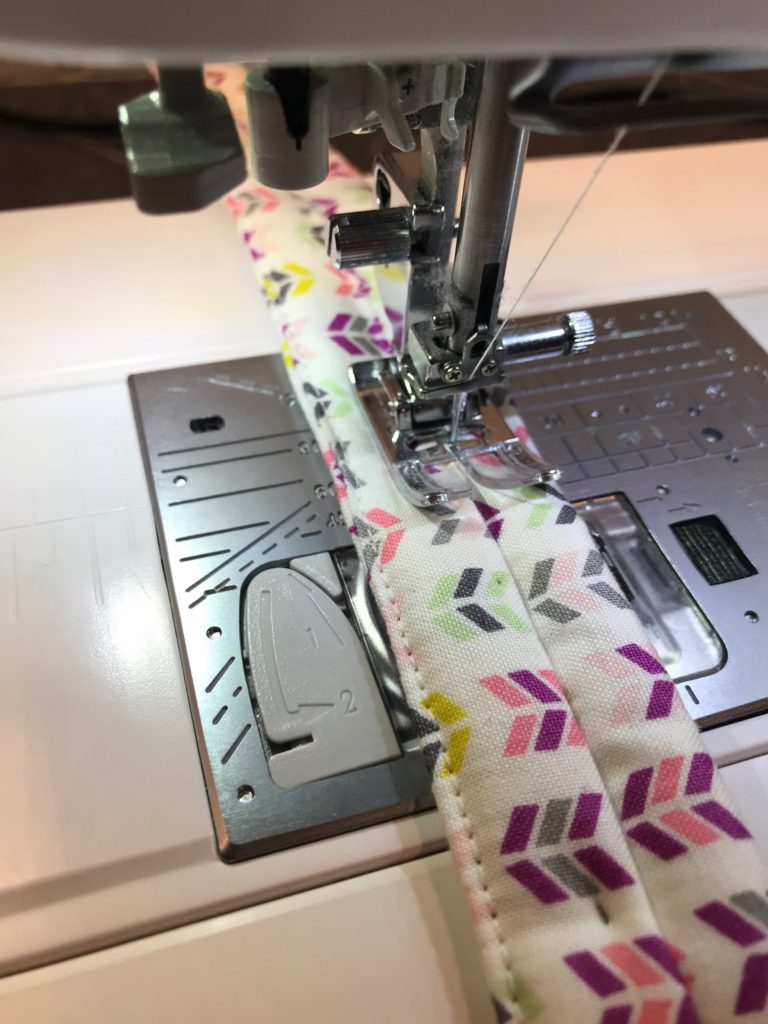
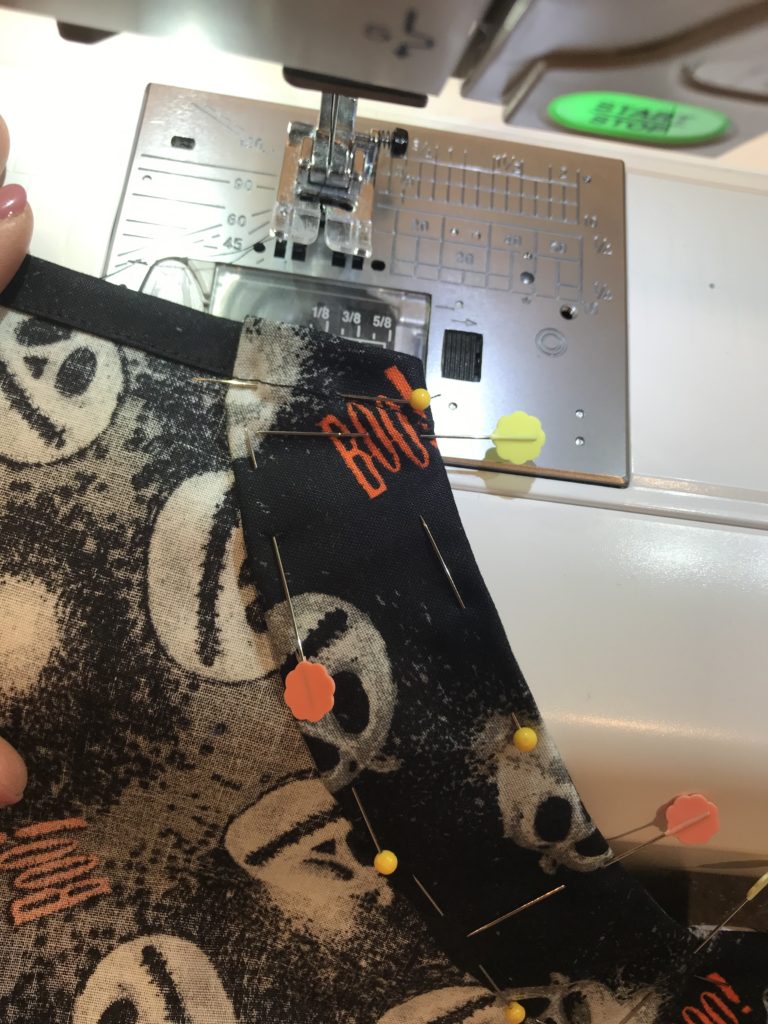
So you can see I tucked the main fabric under, pinning as I go, ensuring the other fabric is entirely covered. I then stitched along the folded edge. Note: For this stitching you will want to ensure you are using the matching thread and bobbin. The stitches will be visible from the front. Sometimes, for simplicity, I use whatever thread is already in my machine for non-obvious stitching, but from this point forward you will want to ensure you have spools and bobbins to coordinate.

Next I fold up the bottom edge of the apron to form the hem. I turn the hem up twice, 1 inch each time. I like the look of a thicker hem. So you are losing 2 full inches from the length of the apron by doing this, but it does give a nicer look.

Next step is to attach the top piece of trim. So we’ve cut a piece that’s 9 inches wide by 6 inches long. Fold it down lengthwise (so the rectangle is now 3 inches by 9 inches) and give a good press. You’ll then take each of the cut edges and fold them inward.

Give it another good press, then fit it neatly over the top of the apron bib. Stitch.

Once that’s in place, give a good press with the iron. Your apron is now really starting to take shape!

Next step is to sew the sides of the apron. You will want to use a narrower tuck here than we did for the hem. I use 1 inch for the sides, pressing, then tucking it in half to ensure no raw edges are visible.

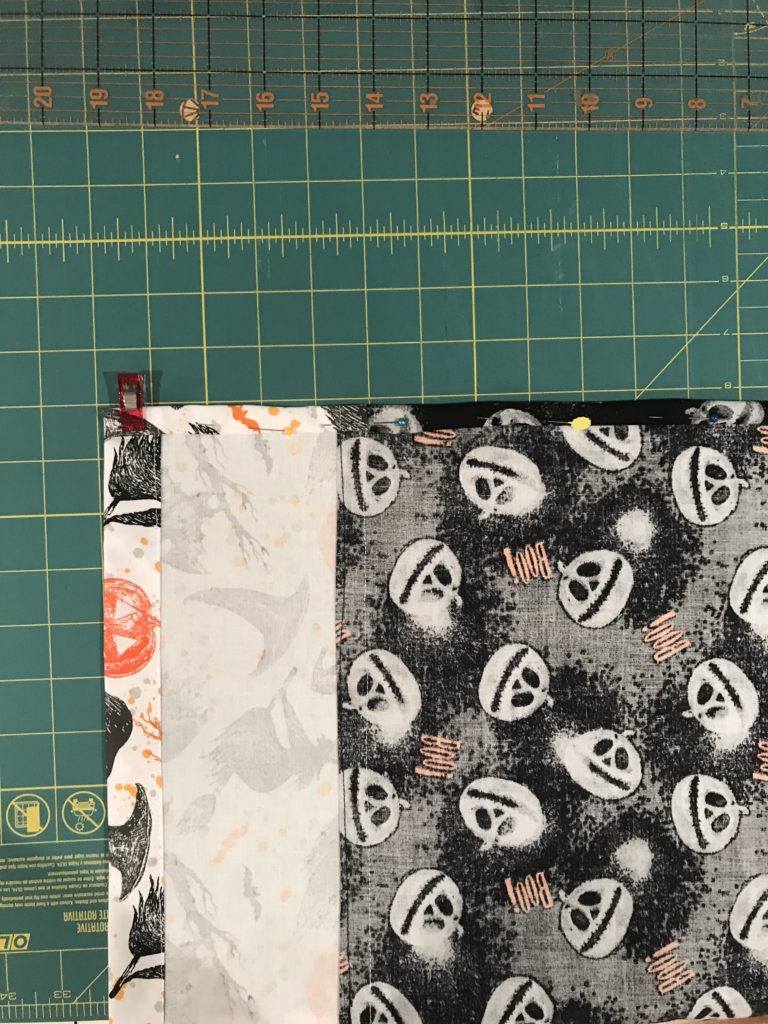
When you are stitching the sides it’s important to remember that you have a different color for the trim than the body. This means you will want to switch out your spool and bobbin part-way up the sides. I usually start with the trim first (as the thread is still in there from doing the hem and the bib). So you’re just stitching to where the fabric changes to the main body on each side.

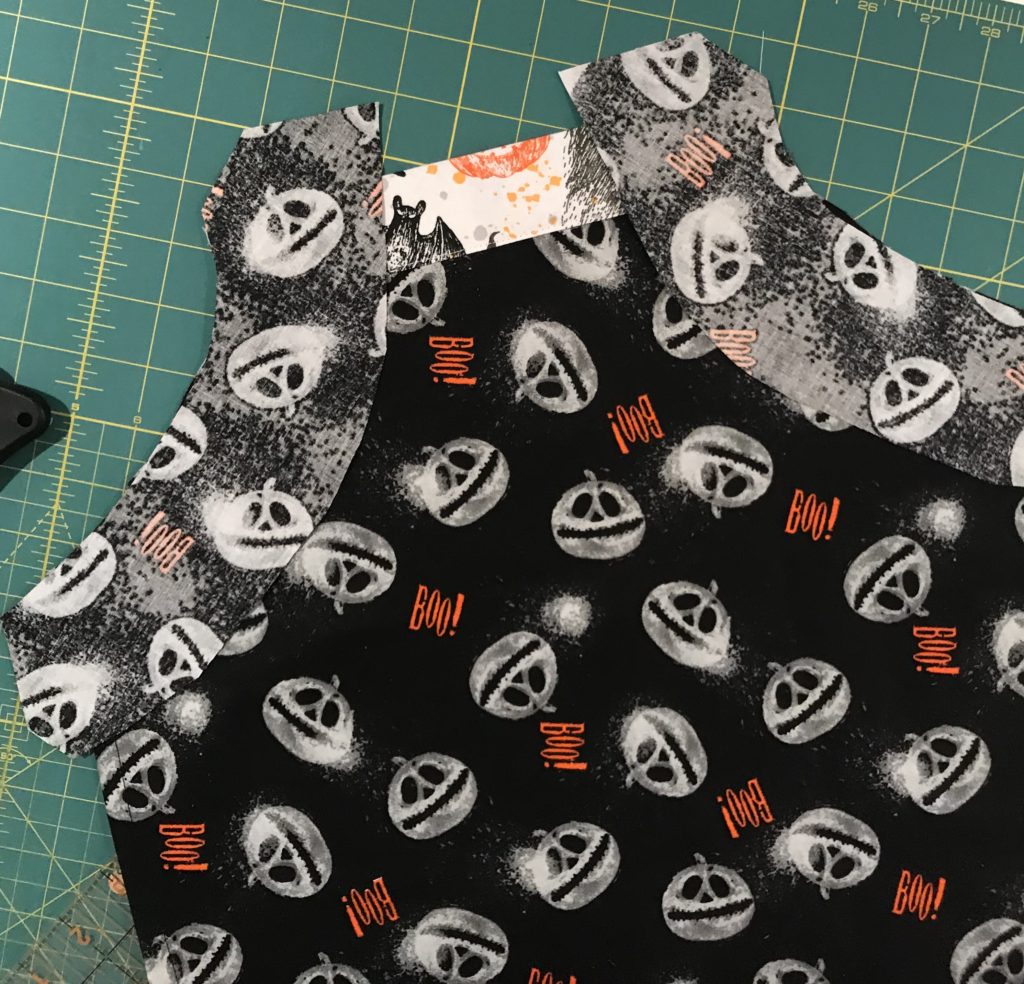
Now the body of the apron is sewn except for the armholes. This is the part I despise every time, but it’s a must. Some people use lining for their fabric for the armholes, but I rarely do that extra step. This apron is for a toddler who grows like a weed – it won’t be around long enough to worry about lining it.

Here is the general shape you need for the armhole casings:

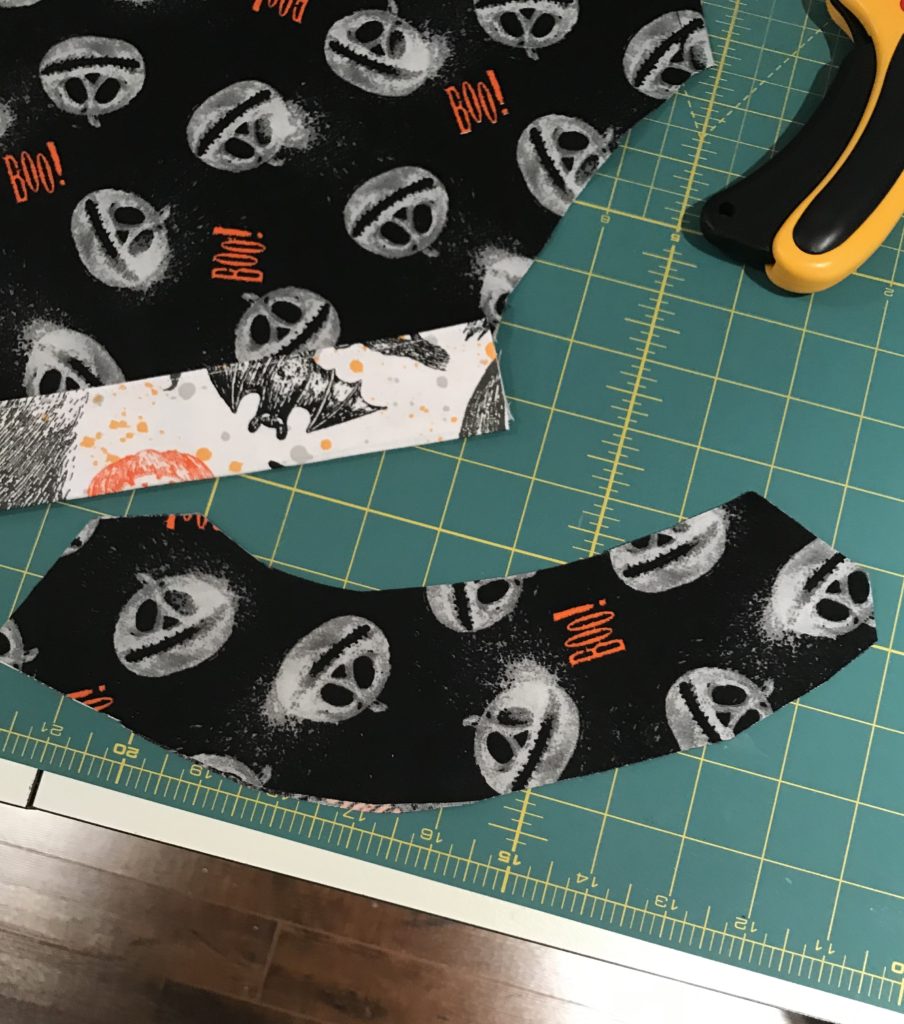
To make my own armhole casings (lining is optional here) I just take a rectangle of fabric and lay it flat against the front of the fabric (right sides together). One edge will follow the shape of the armhole you created, and then you basically measure out 2 – 2.5 inches and cut. You need to leave the ends about an inch longer so you can sew them under.

So for this next part, I’ll do my best to put it into words: You have to take that extra length and turn the ends in, and sew them shut. This facing will eventually have the apron strap fed through it, so you want to ensure the edge is not going to fray.

This next photo is where I am closing up the end of the facing (with the body folded away from the machine so I don’t accidentally stitch them together:

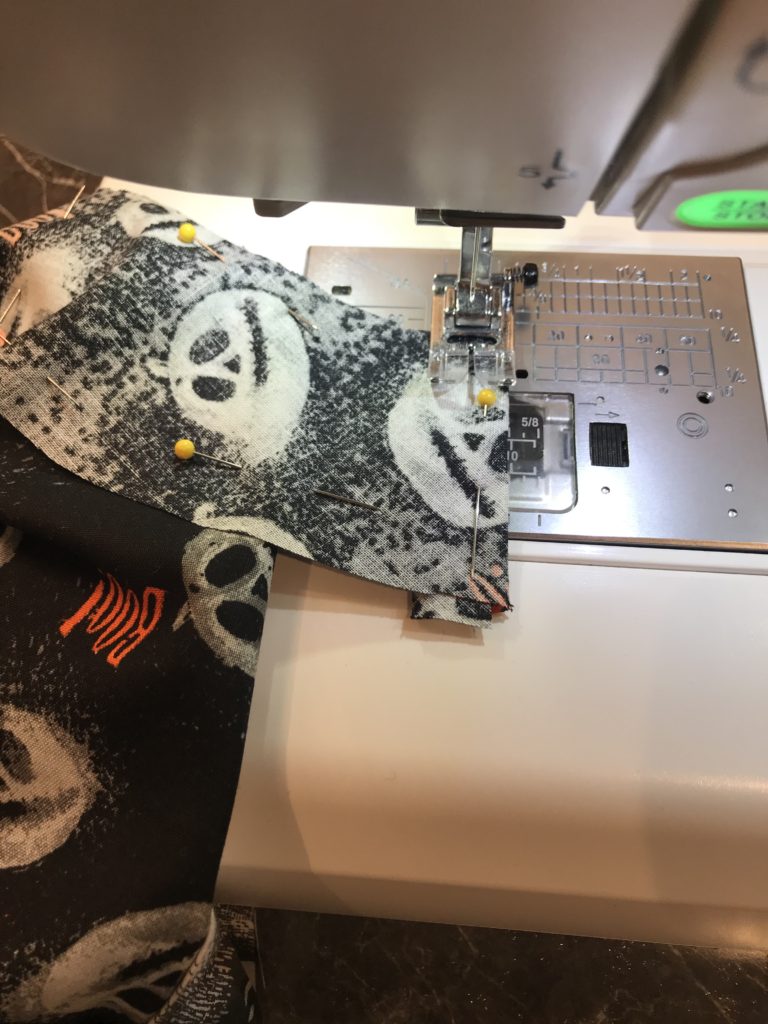
Then once the ends are all stitched, I attach to the armhole. I use about a 1/4 inch seam allowance here.

Once it’s attached to the body of the apron, you will turn it right side out, and press the seam firmly with an iron. Next you turn in the edge of the facing about 1/4 inch and pin along as you go. You will be leaving the ends open, again to thread the apron strap through.

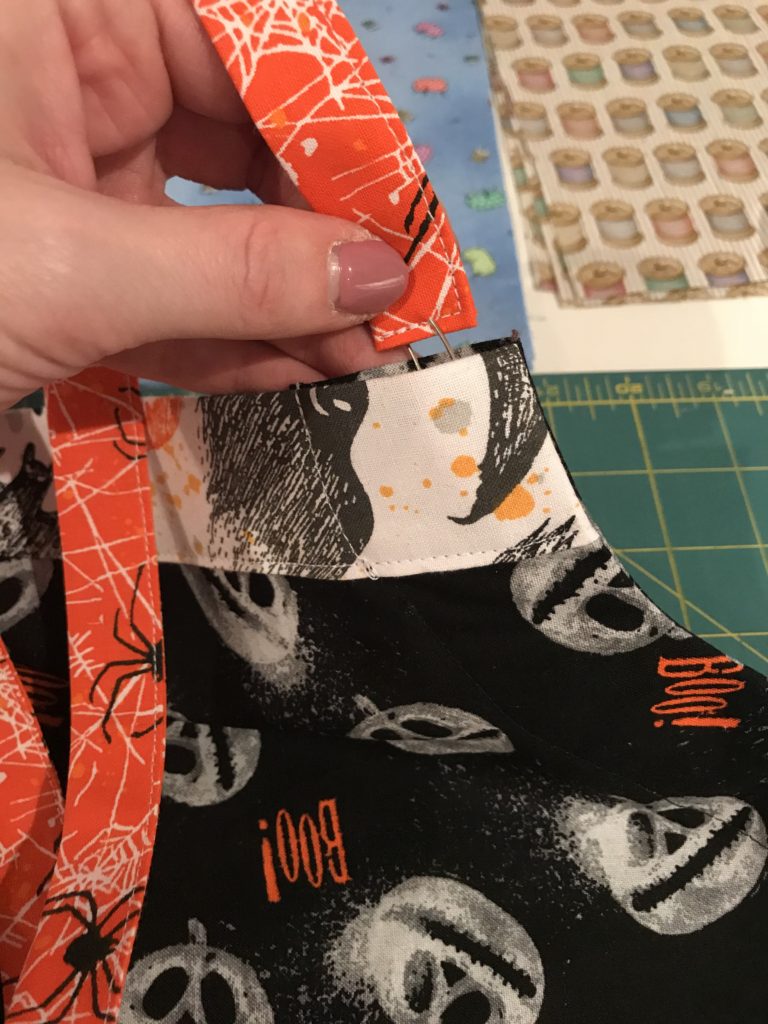
Not unlike when we did the bottom trim, the top trim has two different patterned fabrics so you need to switch out thread and bobbin part-way through. If you look at the front of your apron you will notice your upper trim is about 1.5 inches. As you’re sewing the facing to the body of the apron, you are stitching over that trim. So I recommend switching out threads to give the best look.

The hard part is officially done now! You’re ready to add a pocket and sew the apron strap.

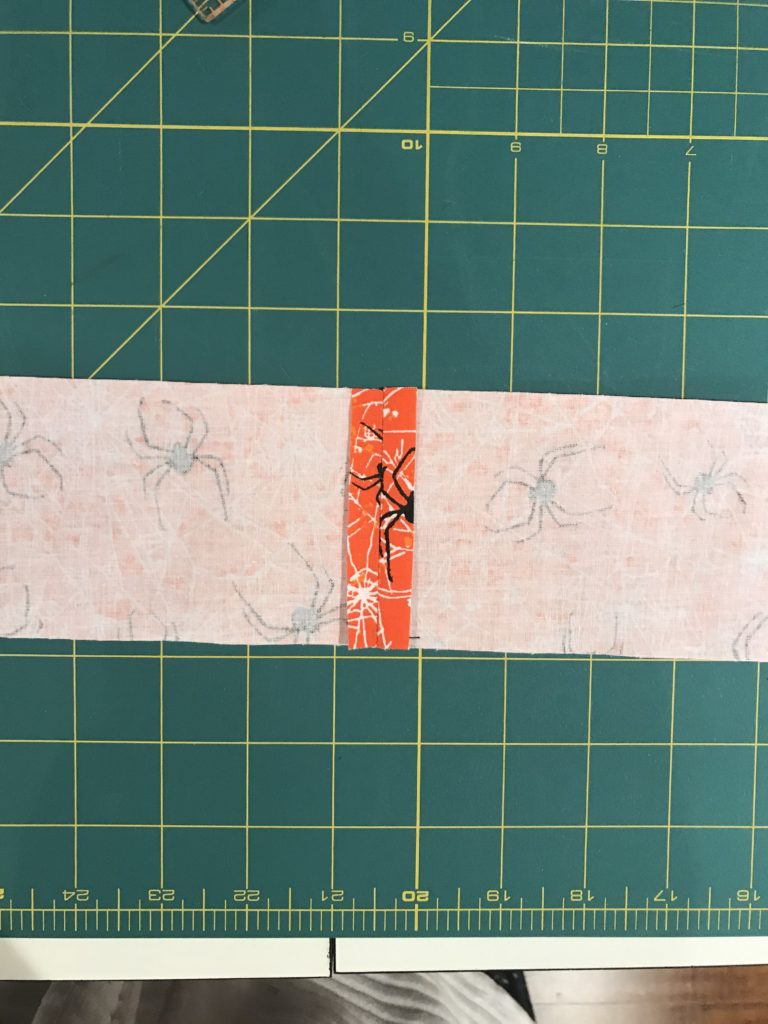
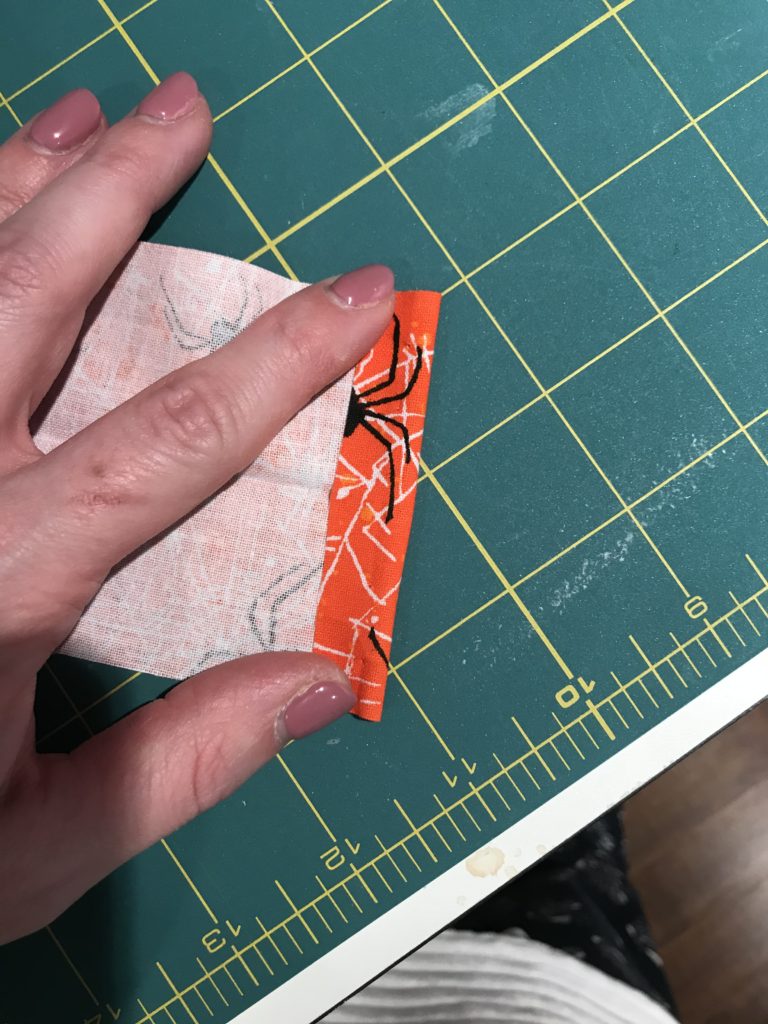
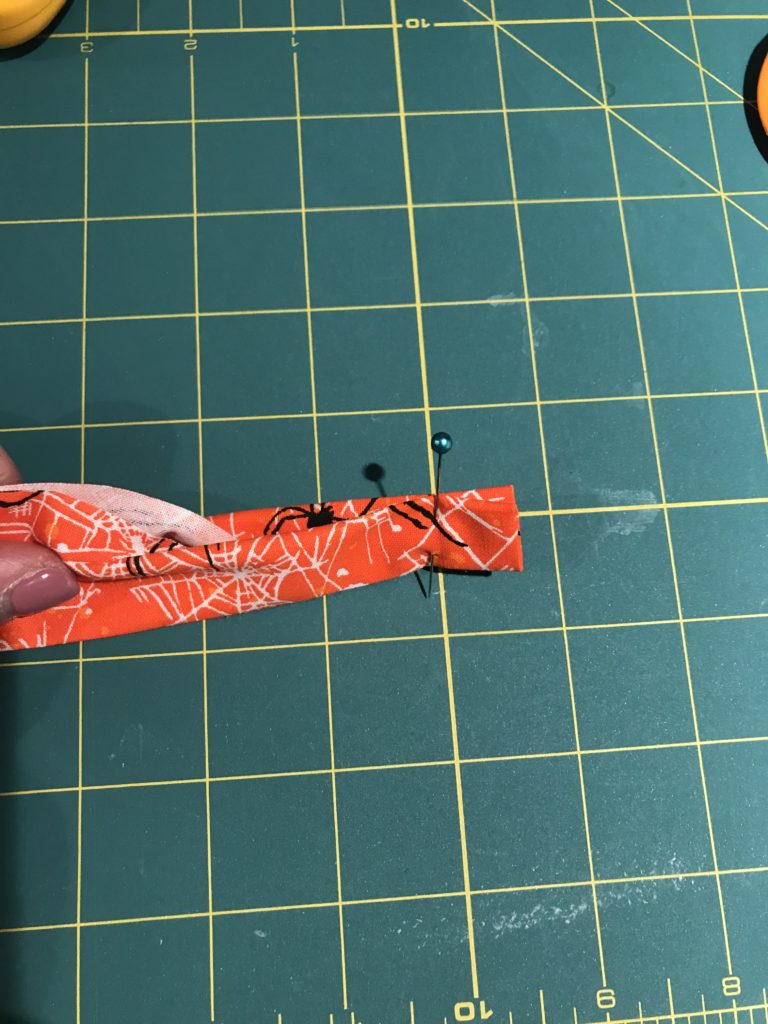
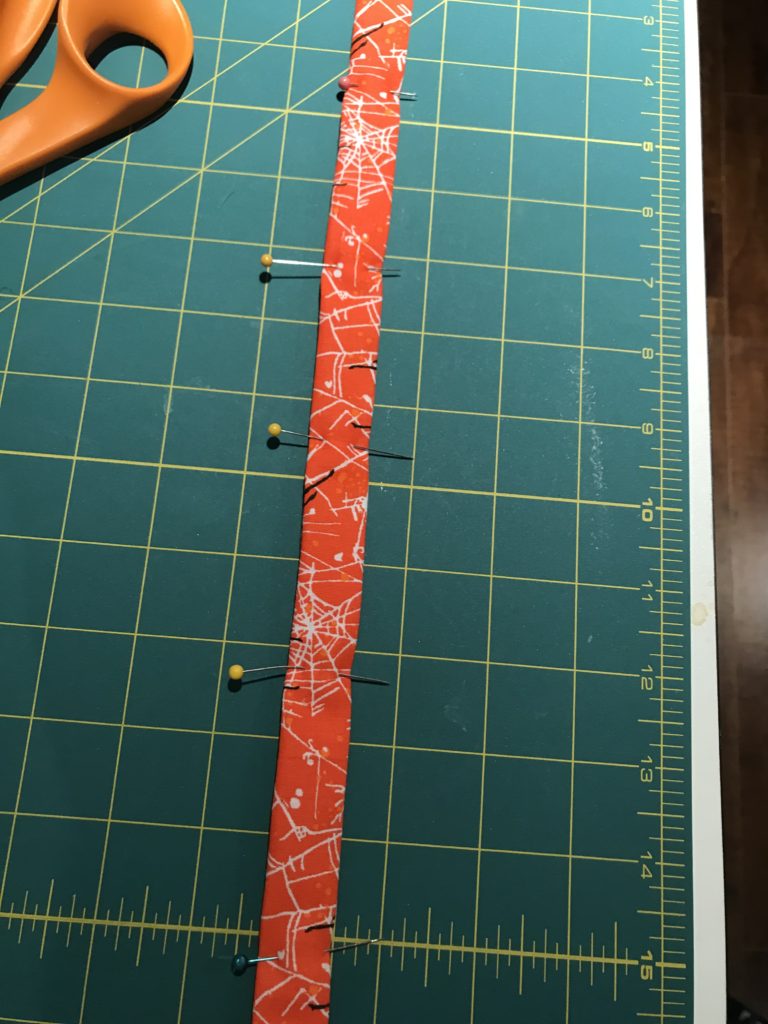
For the apron strap I cut two straps, about 36 inches each in length and 3 inches wide. Join them, right sides together. Press the seam open.

Press the ends of the strap over so no raw edge is visible.

Next you need to fold the strap in half (so now your dimension will be 1.5 inches X 72 inches). Press. Then tuck each of the cut edges under a second time.

Set aside the strap and we’ll move onto the pocket. You can be really creative with pockets. You can do a big pocket, a small one, many small ones, a pocket on the bib, whatever you like. Add lace or ribbon to the top of the pocket to really dress it up.

I cut a square 8 inches by 7 inches wide. For the top of the pocket I fold down about 1/2 an inch, press, and fold down again. Stitch across the fold. If you want to add lace or ribbon, pin it on before stitching – two birds, one stone. Just be sure to use the right color thread, whichever option you choose. I like the look of the wide seam there. Then I press about 1/4 inch around the rest of the pocket.

Lay the pocket on the apron wherever you like. Measure across or from the bottom of the apron to ensure it’s straight.

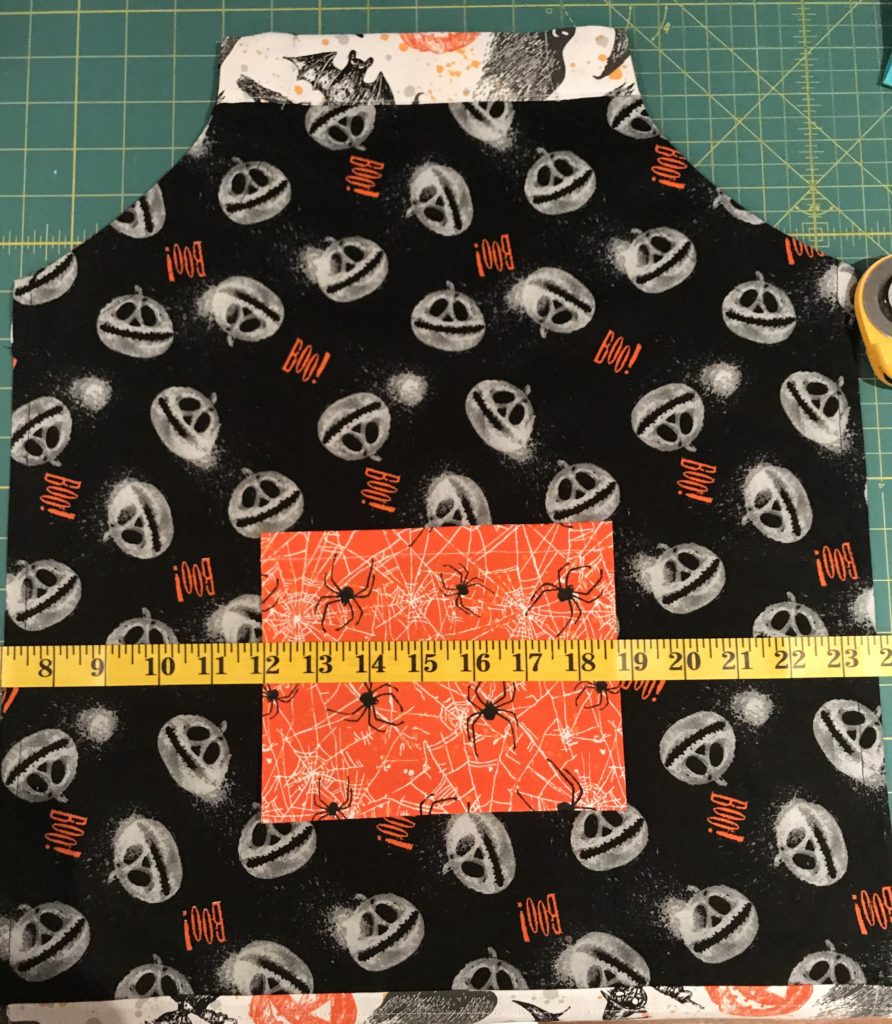
Once it’s pinned in place, stitch around the three remaining sides, ensuring you backstitch properly at the top of the pocket where there’s likely to be more strain on the seam as the pocket gets used.

Give the apron a good press, using steam, and you’re ready to put the apron strap through the facings.

Back in my early years when I began sewing my mom taught me how to do this – attach a safety pin, close it up, and feed it on through. This is a great trick if you pull a string out of a hoodie or a drawstring out of pants.

As you do this, ensure your strap stays flat and doesn’t twist.

And you’re done! This is such a fun little project and once you’ve done it a couple of times, you can get these out in about an hour. They are a great stash-buster and they make great gifts.

You can personalize aprons by appliqueing a name or initial on it. I’ve also seen people applique things like mixing spoons or cupcakes on them. One day I’ll find time to try that out.

Other ways to personalize would be including decorative stitching, embroidery, decorative ribbons or lace, buttons, etc. The possibilities really are endless.

My little Halloween-loving toddler, on his learning tower modeling his new apron!

Thanks for stopping by and checking out my post today!

Oh, and when you go to wash this apron it’s best to knot the strap together because it’s adjustable, so it can come out in the vigorous washing machine. If it comes out you can always use the safety pin trick above to thread it back through.

Heather

DIY Personalized Ornament

Happy New Year! I hope you had an amazing holiday season, with plenty of R&R. I was fortunate to have a nice, long break from work over the holidays and I spent an awful lot of my free time sewing and crafting. It recharged my soul, I swear.

About 7 years back I saw a baby block ornament on Pinterest and decided to give it a go. There were several varieties of these ornaments online but I knew immediately I wanted them to be photo ornaments. My brother had a very young child and several of my friends did as well, so I set out to make these as Christmas gifts. A few years back I inadvertently advertised these on Facebook and sold over 50 in the month of December alone! These are SO fun to make, and you can get really creative with them.

Materials needed for this tutorial:

  • 2″ wooden block
  • Paintbrush
  • Acrylic paint
  • Mod Podge (Satin finish)
  • Cardstock
  • Eye hook
  • Ribbon
  • Ornament hook
  • Wallet-sized photos
  • Paper cutter or a ruler and scissors

I used to buy 2″ wooden blocks at Michael’s but they were frequently out of stock, so my family started making them with wood and a saw. I keep a sanding block handy to ensure the surfaces are smooth on the block.

I print photos for these ornaments at Walmart online because they offer wallet sized prints that are available by next day. Wallet size is 2X3 so they just need a little trimming and they’re ready to go!

I start by painting the block. Most frequently I do metallic gold, Christmasy red or teal, however any color works! I’ve even done plain woodgrain, and I’ve done a watered-down chestnut and almost stained the block so it looked like dark wood. They were all lovely! I’ve done pink, purple, green, blue, you name it. Can’t go wrong. Sometimes I look at the photos I’m going to use and try to find color inspiration from there.

You only need to paint the perimeter of each side because most of the block will be covered with photos and paper.

Generally I say two sides of the block will be covered with photos, two sides with cardstock, and the remaining two sides will be cardstock with print.

I cut the photos and cardstock to 1.75″ as this allows the paper to sit just inside the edge of the painted block, so you get a bit of a border.

Using a paintbrush, apply a layer of Mod Podge to one side of the block, and place one of the photos in the center, ensuring the border is even. I tend to do the photos on opposite sides of the block. Adhere the second photo to the block, and the apply the decorative cardstock to the top and bottom sides of the block. You will now have two blank sides. Let the block dry for at least a couple of hours.

For the other sides of the block, I tend to have a quote or verse printed on paper, which I layer over cardstock. I don’t love printing on cardstock, and the layered look is pretty.

If you are using thin cardstock or paper, be aware that Mod Podge can cause rippling in the paper. When thin paper gets wet from the glue, it can go wavy and it doesn’t necessarily sit flat on the block anymore. You can fool around with it and try to get it to flatten out, but it can be a chore. Using heavier paper offers a much more consistent result.

Once you have all 6 sides glued, you will now start the process of layering Mod Podge over each side to create a sealed, satiny finish. You want to ensure you don’t get any dust or dirt (pet hair, etc) in the Mod Podge because once it’s there, it’s there for life.

I apply Mod Podge in a generous layer, starting around the perimeter of the photo or paper. Sealing up all of those edges is important so you don’t get lifting.

Once the edges are covered, I coat the entire side with Mod Podge. Not too thick, but if it’s a little thin don’t worry about it because you’ll do 2-3 coats on each side anyhow.

Ensure as you drag along the paintbrush that you are getting rid of air bubbles as you go. Try to move the paintbrush lightly over the surface so you don’t get too many brush strokes. Flat, foam paintbrushes can also help here if you have them.

My recommendation is to do 5 sides, then stand it on the 6th side to let it dry. My rule of thumb is to let each coat dry for at least a few hours before putting on another coat.

Once the block has 2-3 coats of Mod Podge on every side and it’s fully dried, you’re ready to drill a hole in the top center of the ornament. I use the smallest drill bit that we have.

Once the hole is drilled, put in a hook.

I take a piece of ribbon and loop it around the base of the hook, and tie a small bow. Trim the edges of the ribbon to make sure they are even.

For the purpose of this tutorial I used my sons photos on a block but didn’t add any text, which is always a cute option too.

What started as baby blocks turned into SO much more…I’ve done 1st Anniversary blocks, blocks for kids, memory blocks, pet blocks, you name it! They have become a very versatile gift that people seem to love receiving.

Thanks for checking out this tutorial today!

Heather

DIY Christmas Bulb Wreath

The holidays are in full-swing, which means I am suffering minor burns from my glue gun pretty much daily. Few things make me more excited than wreath-making though, so it’s all worth it.

I’ve made this wreath a number of times in a few color combinations, mostly reds with silver and/or gold. The first bulb wreath I made is currently hanging on my front door. Sure, I’ve glued a few bulbs back in place over the years, but I’m proud to say it’s about 5 years old and going (mostly) strong.

I purchase foam wreaths from Michael’s when I have a 50% off coupon because these things are expensive for what they are. I also usually wait for the bulbs to go on clearance because otherwise the cost of this wreath gets really out of hand.

Materials needed for this tutorial:

  • Foam wreath
  • Glue gun with many, many glue sticks
  • Regular plastic bulbs
  • Small plastic bulbs, bells, etc for filler

The stem on plastic bulbs typically comes off pretty easily, which is convenient because for the base layer on this wreath you’re going to need to take the stems off in order to puncture the foam and glue the bulbs in place.

I take stems off as I go, that way I don’t remove too many. Often times the plastic stems break as they are coming off so I can’t count on them going back on nicely (if at all).

Next I heat up my glue gun. I use a mini glue gun because I find the size really comfortable for prolonged use. That said, I go through mini glue sticks like it’s nobody’s business. A tremendous amount of glue is used in the making of this wreath.

With the wreath laying flat on the floor I take a bulb that has the silver stem removed and puncture the foam. I do this to essentially make a pocket for the glue.

Next you can either fill the hole up with hot glue or you can put glue directly on the bulb before you push it in. I’ve not noticed a difference in either technique.

I leave a small gap between each bulb as I continue to add bulbs to the face of the wreath.

I do the entire face of the wreath, then I start the inside and outside rings. It’s important to be careful when you are doing this next step because you want the wreath to lay flat on your door, so if your bulbs are placed too low around the sides of the wreath it simply won’t lay flat. I very slightly angle the inner and outer bulbs upward.

I do my best to stagger the bulbs along the sides, however it’s not perfect.

Once the inside ring is done I move to the outside of the wreath. Same process – take off the silver stem, puncture the foam wreath, add glue, push ornament stem back into wreath. Also, the amount of glitter on my floor in this next picture is what nightmares are made of. (Pro tip: dry Swiffer cloths are amazing at cleaning up glitter)

Once you’ve covered the wreath with bulbs you will notice lots of gaps – there’s plenty of foam visible. Not to worry! First I use more regular sized bulbs to fill in space. Once you’ve filled with regular bulbs, you can fill smaller spaces with small bulbs, small ornaments, bells, etc.

I keep adding small filler ornaments until no more foam is visible. Then I take more glue (!!!) and add wherever it seems necessary. I would rather over-glue than have ornaments falling off every time the door shuts.

When gluing ornaments to other ornaments, I try to glue each item in 3 places. If it’s a star, for example, I want at least 3 pieces of the star to make contact with other bulbs.

This wreath takes me about 2-3 hours to make, but it’s SO worth it. It’s eye-catching and unique, and it can be made with whatever color combo you can dream up! I like to stay away from big contrasts (black and silver, for example) because bulb placement gets really tricky, as you don’t want to be too dark or light in areas. Balance is key. If you add a dark blue ornament to one side, try to add one to the other to balance it out.

I hope you’ve enjoyed this tutorial. Happy holidays!

Heather

DIY Poncho

With fall in the air here in St. John’s I’m dreaming of all things cozy! Fluffy, furry throw blankets…knit cowls…cozy ponchos. So much to do and so very little time!

I picked up a stretchy, black knit fabric a few years back with the intention of making a cardigan, however it’s been sitting in my stash untouched ever since. A couple of weeks back I decided to turn it into a poncho for work (when the air conditioning gets the better of me).

I forgot to take pictures along the way so I’ve drawn out a diagram of the fabric for your viewing pleasure (sarcasm!)

Here’s what you’ll need for this tutorial:

  • 1 meter of fabric
  • medium or large buttons (optional)

I started by laying out the (folded) meter of fabric on the floor, with right sides together. When I say folded I mean the selvage edges are together (see diagram below). I evened up the cut edges to ensure I had clean lines to work with.

A meter of fabric will make a rectangular poncho, so it will be asymmetric. If you want a symmetric poncho, measure the width of the fabric and then cut the length of folded fabric to that same length. I like the asymmetric look.

If your fabric frays easily, you will want to consider serging around the whole piece of fabric now, or you can zigzag.

Starting from the folded side of the fabric, I measured down 9 inches from the corner and marked it with a pin. Then I measured 9 inches in the other direction along the cut edge and marked that with a pin. The area between the two pins is the neck opening.

You will want to leave one side folded , which is one less seam to sew! Pin along the cut edge from the 9 inch mark to the end. Sew along that seam using a 1/2 inch seam allowance.

Turn the garment right side out.

You can pick up your poncho now with just one seam sewn, and ready to wear! For the neck opening, you can either fold the triangles of fabric inside (as I do) or outside, whatever you think looks better.

Depending on your fabric you may choose to hem the bottom of the poncho as well, but this fabric didn’t need it.

I dressed up this basic black poncho with some buttons I had in my stash. I placed them evenly down the shoulder seam. Since they are only decoration, it’s about 10 minutes work to do this piece but it really does change the look of the poncho.

I’ve made this poncho in plain fabric, plaids, tweeds, etc. Every version has been cute. The key is to choose a fabric that isn’t too stiff or heavy as you want it to hang and have good movement.

Using a slightly heavier wool-blend fabric can provide a bit more warmth for outdoor wear, but this one is perfect for the office.

If you use a fabric that frays nicely (think: plaid) you can also intentionally fray along the bottom edges, which takes a little time but looks really cute as well.

Thanks for stopping by today! Happy Tuesday!

Heather

An Easy and Adorable Shirt Pattern

If you’re a regular of Make Life Crafty you may notice that I cycle through periods of intense crafting followed by periods of rest. Well, though I haven’t posted in awhile I have in fact been a busy little sewing bee! I’ve been quilting a lot lately but haven’t finished a single piece, so once I’ve got a final product to show off I’ll certainly share my patterns with you.

But for now……..I simply HAD to pop on to share this……..

A week ago on Instagram I came across Indoor Shannon, who is a sewist, blogger, wife and mom of 4 beautiful kids. If you are on IG you should take a moment and look her up for sure. While browsing her posts I noticed this gorgeous yellow top that she made from an Athina Kakou (AK) pattern. I hadn’t heard of AK so I looked her up…..just amazing! Her designs are modern and practical, and I immediately knew I wanted to try this top pattern.

The pattern is called Sheona and it’s for a top and a dress: https://athinakakou.com/product/sheona-dress-and-top-pdf-sewing-pattern/

Don’t let the photo fool you – this is a top to fall in love with! On her site she shows sewing hacks for this pattern where you can add fancy elbow patches, ruffles, fancy sleeves and collars, but the one that I fell for was the front-tie version! Off I went to Fabricville to get a knit (or two).

I purchased the pattern and printed it out. It was fairly easy to tape together and then cut out the individual pieces. I love printable patterns for the following reasons:

  • Computer paper is much more stable than traditional pattern paper
  • I don’t have to drive to the store to purchase a pattern, or wait for one to arrive by snail mail
  • You can just print the pages you need – less paper waste

I picked up a burgundy knit fabric, printed the pattern and got down to business. Taping the pattern together was easy, and the shirt only required 3 pieces – front, back and neckline. Quick project, I guessed. I was right.

Because the original pattern is a straight-bottom top you need to add on the ties, but otherwise it’s very straight forward.

The top took less than an hour from start to finish, and it’s absolutely adorable! I used the measurements in the pattern and the size 14 worked perfectly for me (I usually wear a small-medium in shirts).

I will be making this top again this weekend in black, but I’ll definitely add on some length. I’m 5’5″ and I found this shirt hit right at the button on my jeans, and I prefer shirts to be just a couple of inches longer.

My little ray of human sunshine posed with me for this awkward, early-morning picture.

Another hack would be to make a sleeveless version of this top. To do this I would cut a piece similar to the neckline and add it to the armholes using the same process.

I’m looking forward to trying more versions of this shirt, and I’m also looking forward to trying more AK patterns. If you’ve ever tried one yourself, hit me up in the comments section and let me know which one was your favorite.

Hope you have a great weekend! Thanks for stopping by today.

Heather

Tutu X2

Last year I had the pleasure of making a tutu for one of my favorite little babies who was turning 1 year old ( https://makelifecrafty.com/diy-tutu/ ). 2019 brought another opportunity as her sweet little sister celebrated her first birthday, so I jumped at the chance to take on another tutu project!

These photos were taken by Melanie Courage Photography and are being used with her permission.

In making the first tutu (above) I focused more on texture and the color pink – little Emily’s favorite! In making the second tutu I went more for color variation and put some purple in there – little Riley’s favorite!

For Riley’s tutu I went with a little less fullness so all of the colors would show a bit more individually. Instead of purchasing tulle on a bolt at Fabricville for this one, I went with tulle on a roll (conveniently cut into 6″ wide strips) that I found at Michael’s. This certainly reduced the time it took to create the tutu. It was perhaps a little bit stiffer to work with than tulle on a bolt, but I think you will agree that they are both adorable.

Thanks for checking out my post today!

Heather

DIY No-Sew Scarf

Scarves are such a versatile accessory and can transform an outfit instantly, so they are high on my list of favorite things to make. For awhile I was really into infinity scarves but I’m over that. I moved onto blanket scarves but often found them challenging to style because they were so big and bulky. I like a statement scarf but not something that feels suffocating.

I never was one for plaid but I can tell you that when I spotted this fabric I couldn’t put it down. The colors make it perfect to wear with jeans and black tee, but it also isn’t a bad choice to pair up with a leather jacket or a long sleeved dress.

One very nice thing about flannel is that you do NOT need to finish the edges, so no-sew all the way if you want. As you wash and dry it you may notice it frays, but typically that only makes it look even better. It’s possible the first time you wash and dry this scarf you may need to trim a few random threads around the edges, but fraying won’t be an ongoing issue.

Materials needed for this project:

  • 1 meter of flannel fabric (makes 2 scarves)
  • Scissors
  • Rotary cutter and ruler (completely optional)

After bringing this beautiful plaid home I pressed it with an iron to get all the wrinkles out, then laid flat on the foor. I placed my ruler along the diagonal (from top right corner to bottom left corner) so as to form 2 large triangles.

Cut along that diagonal line. Here I did take a moment to kind of square-up the fabric because the width of this particular fabric didn’t form a symmetrical triangle.

Once I had the two triangles cut I tugged gently at the loose threads along the unfinished edges and pulled to cause a little fraying.

That.Is.It. End of tutorial. You now have two beautiful scarves. Keep one for yourself and pass the other along to a friend. 15 minutes and you’re done.

If the scarf feels too bulky you can trim it down a bit and keep trying it on until it feels right for you.

Thanks for stopping by! Happy no-sewing!

Heather

DIY Centerpiece

You might remember a number of months ago I did a tutorial on DIY cloth napkins, as I’ve always had this vision of a perfectly set, ready-for-company kinda table. Tasteful place settings, polished silverware, napkins and rings. Reality is, though, with a toddler the dining room table is usually covered in his artwork or dishes from the previous meal. The dream lives on….

I used to love a good table runner but a few years back we bought a really rustic wooden table and I haven’t had the heart to cover it up like that. Browsing Pinterest I came across a bunch of different centerpieces that I figured I could try out, just to bring some color and life to the table.

For some reason I’m really feeling the color pink right now. It’s not typically a color I use in my home at all, but something about the shades of pink I’m seeing lately just appeals to me. Last week I made a pink wreath for the front door:

Here are the materials you will need for this tutorial:

  • Mason jars
  • Wooden box
  • Flowers (and floral accents, if you wish)
  • Twine
  • Acrylic paint
  • Paint brush

Initially I thought 3 large mason jars would be good for this project, until I saw the box that would fit 3 large mason jars and realized how massive the dining table kinda is. I then decided it might be worth trying a box to hold 5 large mason jars, and I think you’ll agree it worked! I decided to paint both, as I just know the smaller one will go somewhere in my house or it will make a fantastic gift.

I started by painting the box. I used dollar store acrylic paint and an inexpensive paint brush, so nothing fancy there. As I didn’t see the exact shades I had in mind, I picked up a couple of paints I was drawn to (both happened to be deep shades) and grabbed some white paint to tone them down. I often find myself mixing paint colors for projects – the exact shade I want just doesn’t ever seem to exist!

I painted the box going with the grain. Plain wood is thirsty so I made sure to add a small amount of water to my brush before picking up paint each time. Too watery and the color retention won’t be good, but a little water helps the paint stretch a bit, and it helps the paint glide over the very dry surface.

After the box was painted (including on the inside) I set it aside to dry. Acrylic paint dries very fast, especially on a dry surface like wood. The paint just gets absorbed and, in no time, you can handle it without smudging.

For the jars, I had selected a pile of flowers and feathers from Michael’s. I pulled out the wire cutters and started snipping stems. I removed the huge leaves on the stalks of the blooms, but left the small leaves on the feathery pieces. I initially left the stems long so I could test them out in the jars to see how short I wanted them. I left the feathers and accent pink flowers a little longer than the white blooms.

After settling on flower placement and height, I wrapped some twine around the top of the jar (4 times) and tied a small bow at the front of the jar.

Once I had all jars done, the box was dry and I was ready to put the centerpiece together. This project took less than an hour, and I think you’ll agree that it really does add a nice little touch to a plain table.

The 3-jar box was small and fit nicely on this little mirrored table in our living room. I did try it out on our table and it was so pretty, but just too small:

Next up was the turquoise box, which I felt would be the perfect size for this table.

Ultimately either centerpiece would have worked, without a doubt. The larger centerpiece gave more of the statement look I was hoping for. I had originally wondered if I would paint the jars but I’ve decided to leave them clear. I’ve seen people use chalk paint on the jars and it’s definitely cute, but I’m not going to mess with it.

I think I will change up the flowers for the purple box and perhaps use white with navy accents. I wasn’t in love with the pink flowers and purple box, though I wasn’t totally displeased with it either.

One really nice thing about this project is that you can easily swap out the flowers when the seasons change or when you modify your decor/accent color. Likewise with the box, if something changes you can just paint it a different color.

Another great option is to use fresh cut flowers from your garden, which would also provide a little fragrance. We are more than a little ways from that option here in Newfoundland where our flower beds are still covered in thick blankets of snow and ice.

While I used this as a centerpiece for a dining room table, this would look great on a kitchen island, side table, sofa table, bathroom counter, etc.

I hope you enjoyed this little tutorial! Thanks for stopping by.

Heather

Jelly Roll Rug

A number of months ago a crafty friend of mine asked if I wanted to make jelly roll rugs together! Intrigued by it’s unusual name I looked it up. Well, they are so cute I just knew I needed one for my sewing room.

Gillian picked up a pattern online for $10 at the Fat Quarter Shop https://www.fatquartershop.com/jelly-roll-rug-downloadable-pdf-sewing-pattern-rj-designs and we started looking around for jelly rolls. Gillian got pre-cut jelly rolls and I (somewhat foolishly) picked out fabric and decided to cut and coordinate on my own.

I didn’t bother looking up how much of each color to use, I just started cutting strips and then arranged them in a color pattern I had in my head. I was using a combination of (kind of) solid colors and whites, so I wanted to alternate, and I knew I wanted the dark grey fabric on the outside perimeter of the rug.

The pre-cut version is definitely more cost effective, but I had specific colors in mind. She also used pre-cut batting but I used scrap batting that I had left over from quilts. I am trying my hardest to reduce my fabric stash, so while it’s not as convenient to have to cut and join all that batting it is nice to use up what I already had.

We did this project over the course of 5 evenings, and we were both surprised at just how long it took. The first night we joined the fabric from the jelly rolls. The second and third nights we made the “cording” (sewing the batting inside the fabric). The fourth night we started coiling, and the final night we finished them off. We spent a few hours each night at this, so it took quite a bit longer than expected.

The pattern is easy to follow and it’s repetitive so it’s a great project to do with somebody (ie. the chit chat won’t distract you and cause you to lose your place).

I wanted a larger rug for my room so I didn’t stick to 2 jelly rolls, but Gillian did.

In the end, the rugs turned out great. One of the challenges I had was that the size of the rug was so big it became heavy and a little cumbersome to constantly push through my machine neck.

Also, I didn’t take note initially in the pattern when it said to sew with the rug to the left, which meant my rug “grew” into the neck of my machine. I thought I could make it work until the rug got a bit too big. The picture below is where the neck of the machine started to get a little crowded. I ended up snipping the threads and turning the rug it over so I could get the fabric back to the left of the machine, and then I kept going. Would have been easier had I done it right from the start.

One of the biggest lessons we learned while working on this project was to stop frequently and press the rug with a hot iron, which seemed to help keep things somewhat flat. We used Flatter spray in a delightful Fig scent in hopes that the rug wouldn’t go “wavy” around the edges.

When we were done we did notice both of our rugs were wavy around the edge, but with lots and lots of Flatter spray, a hot iron and some steam we were able to make it work.

This is definitely a project I will repeat again at some point as it turned out really cute for sure. I’d love to find some more jelly roll projects to test out as well. This was my first time using or hearing of jelly rolls, somehow.

Thanks for checking out my post today!

Heather

DIY Memory Pillow

Happy Thursday! I’ve been absent for a couple of months while the busy holiday season was upon our household. I assure you, though, that doesn’t mean I wasn’t sewing.

Today’s post is about a simple memory pillow I made back in December. Armed with a shirt, teddy bear stuffing (Loops and Threads is my brand of choice) and my Cricut, I whipped this up in about 45 minutes.

My sewing machine (Janome Horizon 8200) has text stitching capability but I don’t feel it’s one of the machines best features. The text is a little thin with not much variation, therefore I almost never use it.

Instead of hand embroidering, I decided to use my Cricut Explore to cut vinyl (iron-on) for the text on this pillow. The Cricut Explore is really easy to use and the this part only takes about 10 minutes. I measured the pocket (where I would place the vinyl) and that’s how I came up with the sizing. I used Cricut Design Space and a standard font, entered the text, cut the vinyl. Easy peasy.

I started by pinning the front of the shirt together to keep it stable. Without pinning, you can get pulling in the fabric which can cause uneven cuts. Probably most important here where the fabric is an obvious plaid.

Next I took the shirt and cut off the sleeves and collar. I did so sparingly, though, because the shirt was not overly big and I wanted a finished pillow about 16″ X 16″. Once the sleeves and collar were gone, I took the buttoned halves apart and pressed each piece until all wrinkles were gone.

I stitched carefully down the front of the shirt, securing the two pieces together at the button column. This is important so the pillow doesn’t open up once stuffed!

Next I was ready to adhere the vinyl lettering to the pocket of the shirt. I had not anticipated how difficult this would be. I have used Cricut vinyl many times on shirts, but this shirt was a thicker fabric. I heated up the fabric with the hot iron, placed the vinyl down, ironed over the clear plastic backing, lifted gently but the vinyl didn’t adhere. I repeated this process several times before almost deciding it wasn’t going to work. Eventually I left the iron in place longer, then once the iron was removed I took the shirt over to a firm surface and pressed the clear backing into the fabric, being careful not to burn myself. Because the vinyl was quite hot, this worked better than simply ironing over the clear backing.

Once the lettering had cooled I cut the front and back of the shirt the same size, which was roughly 17.5″ X 17.5″. I put the right sides of the fabric together (wrong sides facing out), pinned together and left about a 6 inch opening along the bottom (middle) of the pillow.

I stitched around the edges, then turned the “pillowcase” right side out through the 6 inch opening. Now it’s time to fill the pillow! I always start by putting small amounts of stuffing in each of the 4 corners of the pillow. I used teddy bear stuffing for this as it’s quite soft and squishy, which is perfect for hugging when you’re missing your favorite person and only have their shirt to hug.

Once I had the pillow filled evenly, I overstuffed the pillow around the 6 inch opening. I then tucked in the edges of the opening and hand stitched it together.

Now the pillow is stuffed, stitched and ready to gift!

This is a quick project but a meaningful one. A lovely gift for a person who’s missing a loved one.

If you don’t have a Cricut and aren’t in the mood to embroider, you could also skip the text and just make the pillow. Another option is to put a note or a card in the pocket.

I hope you enjoyed today’s tutorial. Thanks for stopping by!

Heather