
Happy Monday! I’m back from vacation now and so excited to get crafting again. While I was away I scored some pretty new things from Hobby Lobby and I can’t wait to share them with you.
For today, though, I’m going to share with you the final project from my son’s 1st birthday party.
Since I’m “that mom” I couldn’t just do loot bags for the kids. No, I needed to make something for each little kid. It had to be adorable, relevant, and one-of-a-kind.
I searched high and low for the perfect monster stuffy pattern and came across this free set from It’s Always Autumn, found here: https://www.itsalwaysautumn.com/stl-felt-monsters-to-make-with-your-kids-plus-free-mix-n-mat.html
I used these patterns for the bodies of the monsters and some of the accessories, but I did spice things up with my own monster mouths and eyes.
Here are the materials needed for this project:
- Fabric for the monster bodies (I used fleece)
- Fabric for the accessories (I used scraps of felt, cotton, etc)
- Heat’N Bond Lite
- Stuffing (I used Loops and Threads brand which you can get at Michael’s)
To start I printed a couple of copies of these patterns, as I was making about 30 of them and knew the pattern pieces would get worn out after awhile.
I had some help from a very dear friend during the cutting out phase. (Thanks again, Janet!) First I made sheets of fabric with applique paper attached to the back. Attach the Heat’N Bond Lite to the fabric using the directions on the package, and always remember to turn the steam setting OFF on your iron.
From those sheets we cut out bodies, eyes, mouths, accessories. Then I laid them all out so I could plan out each monster separately.
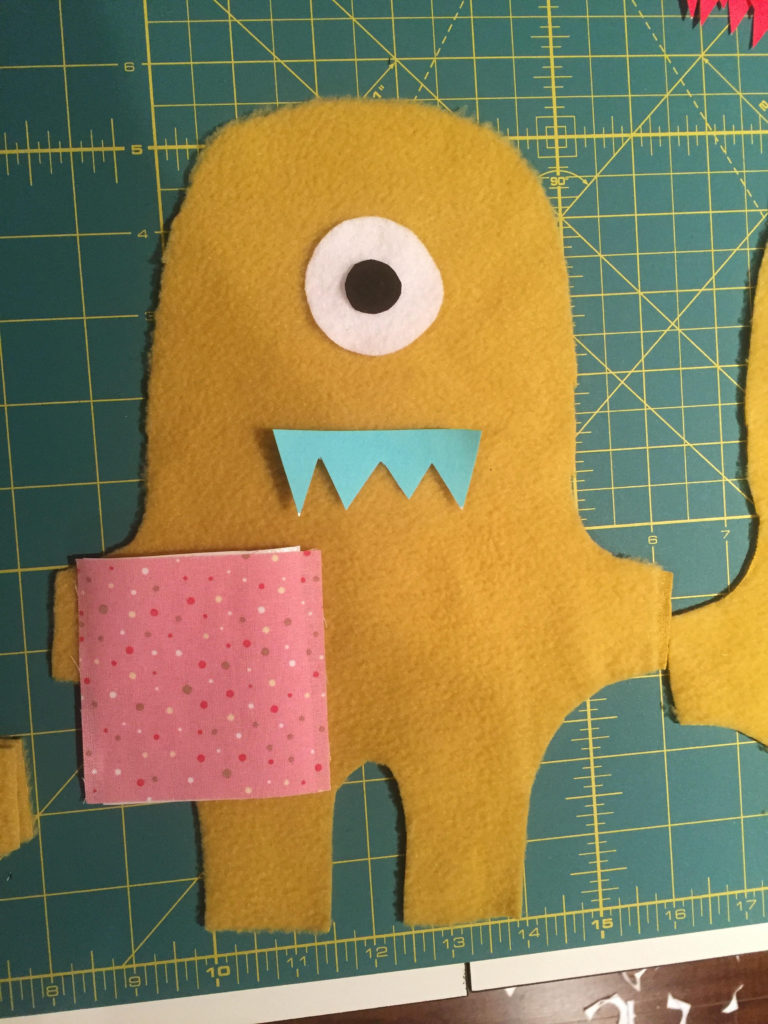
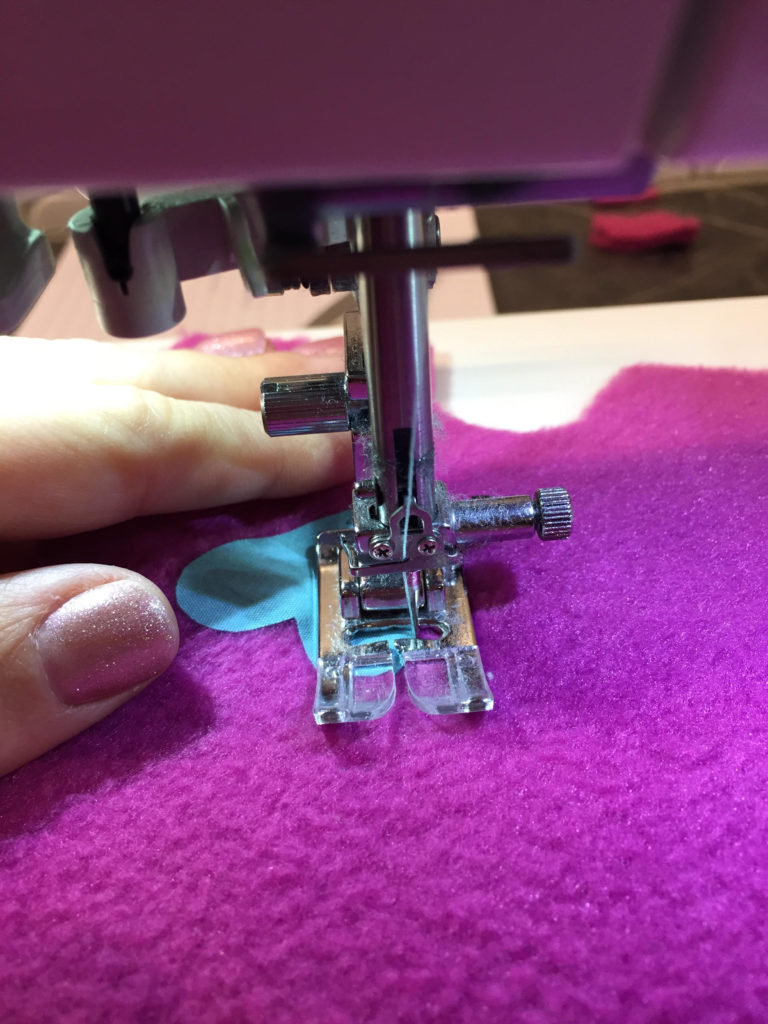
I appliqued the eyes, mouths and accessories in place. Then I sewed the bodies together per the instructions on the pattern pieces.
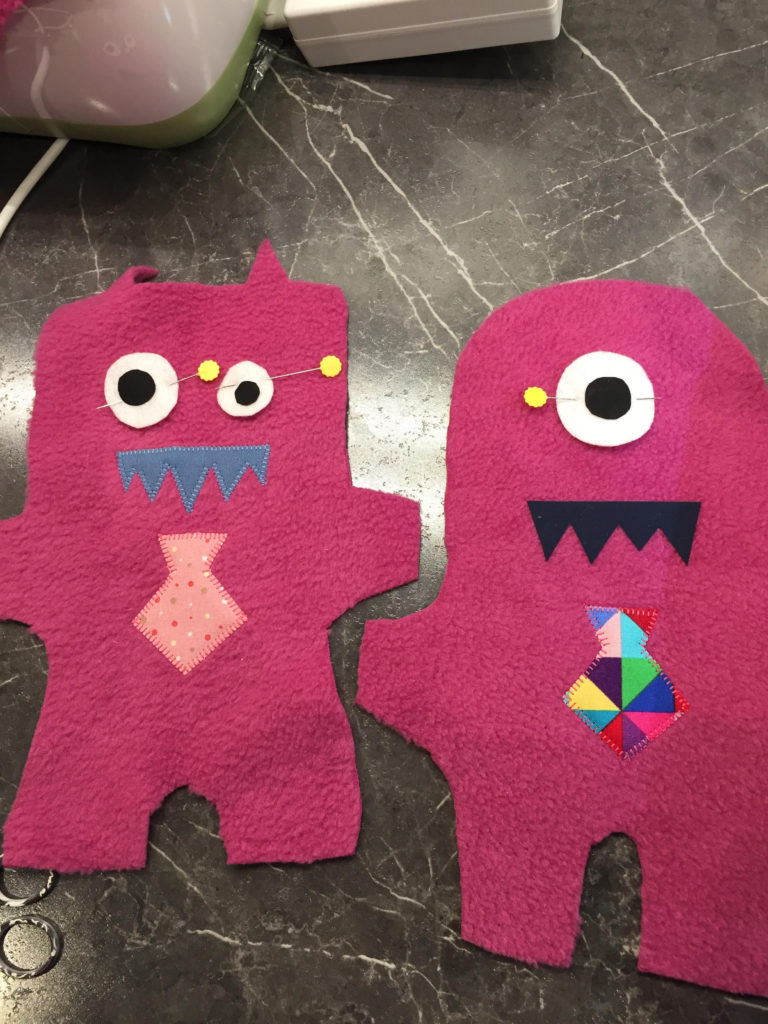
As much fun as it was putting the eyes, mouths and accessories on the front, I added hearts to the butts of some of the monsters. No idea why, just seemed cute at the time.
Next I turned them right side out, stuffed, and my amazing mama hand stitched them closed.
These don’t take a long time to make individually, probably about 20-30 minutes. Multiply by 30………I never want to see another monster pattern again.
Just kidding. They were so darn cute, and they were totally worth the effort.
![]()
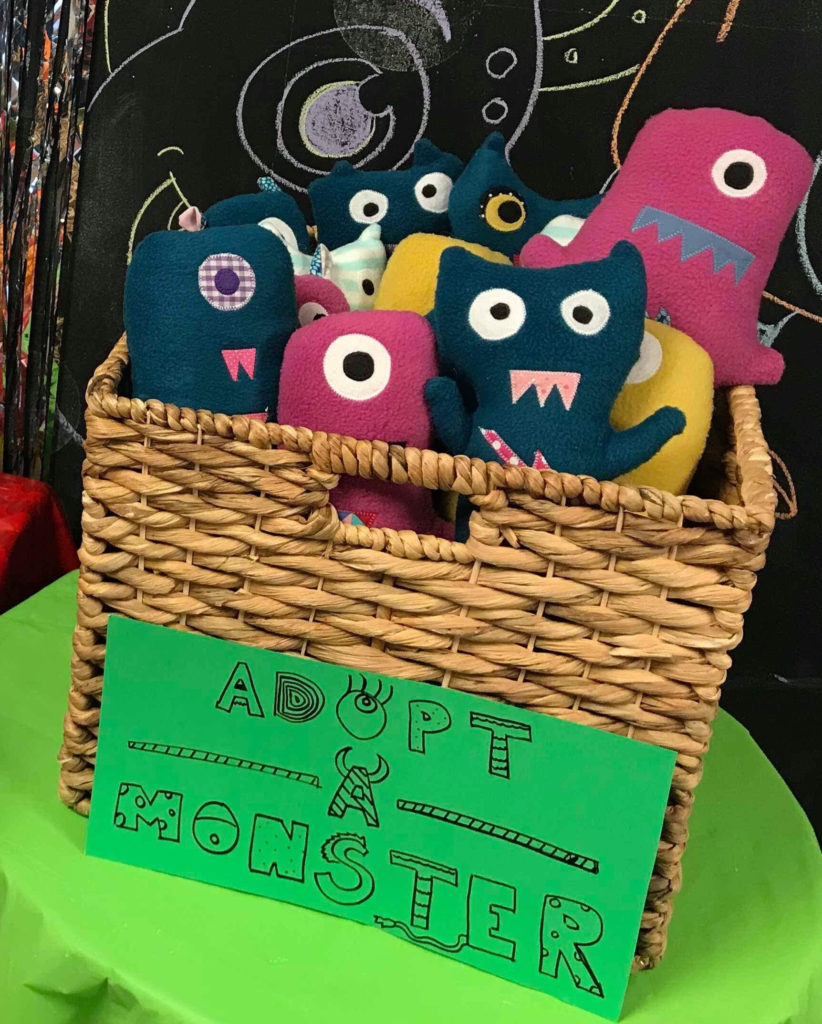
Once they were all made I placed them in a basket with an Adopt-A-Monster sign. The kiddies got to choose which monster they took home, and lots of moms messaged me afterwards to tell me how much their kid loved their toy.
I hope you’ve enjoyed this tutorial!
Heather
very nice publish, i actually love this web site, keep on it!