
Stroll though just about any craft fair these days and you’re sure to see a table (or three) of earrings made from sculpted polymer clay. I found a pair at the local farmers market a few months back and fell in love with them. What I didn’t love was the pricetag!
After a little time on Pinterest I was able to piece together how these are made. Specifically I was browsing Fab DIY’s tutorial and learned the technique there. Here is that page: http://www.fabdiy.com/easy-clay-rose-beads/
I didn’t want to make clay beads, though, as I had my heart set on studs.
Here are the materials you need for this tutorial:
- Polymer clay (I use Sculpey brand) in any color
- Acrylic paint (if you want to paint your clay)
- Sculpey gloss
- Paintbrush
- Earring post and back
- E-6000 craft glue
- Glass baking dish
- Oven set to 275 degrees
- Sculpting tools are optional
- Knife
- Clean, flat surface for rolling clay
I picked up a beautiful marble tray at Winners for $20 knowing that it would be perfect for working with clay. I purchased white Sculpey as well as a variety pack of colors, and some of their glittery colors at Michaels. I also bought the gloss and sculpting tools there.
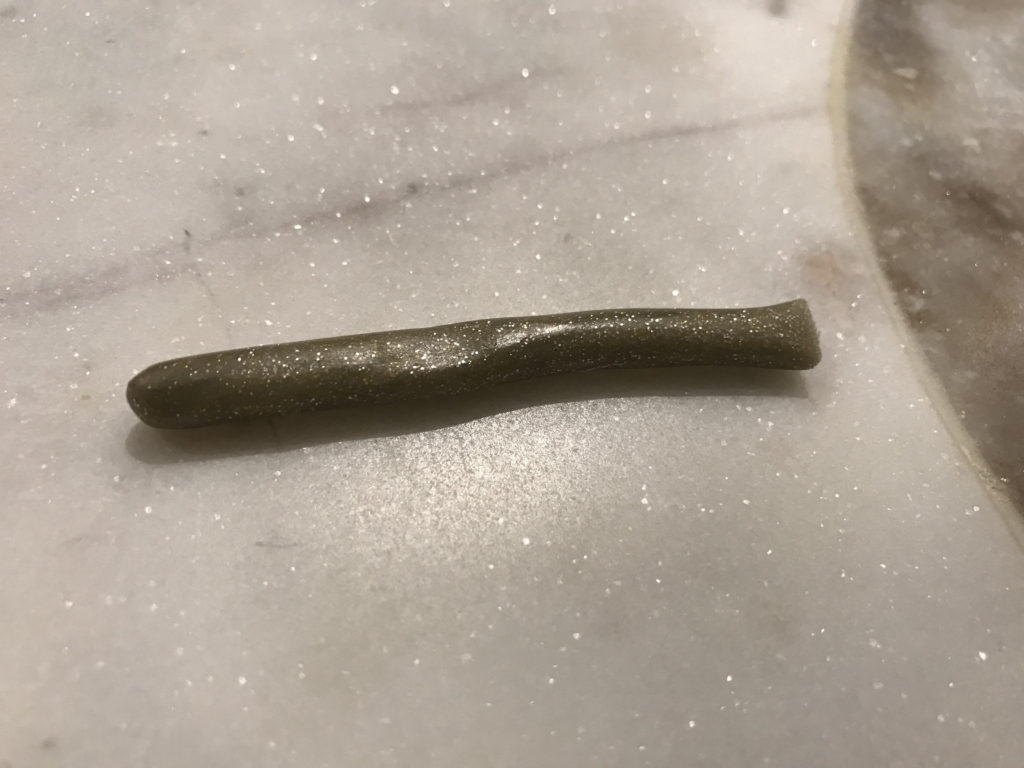
To start you will cut off a block of Sculpey and soften it gently with your hands. Roll it out into a log.
Take a sculpting tool or a knife and start cutting small sections from the log.
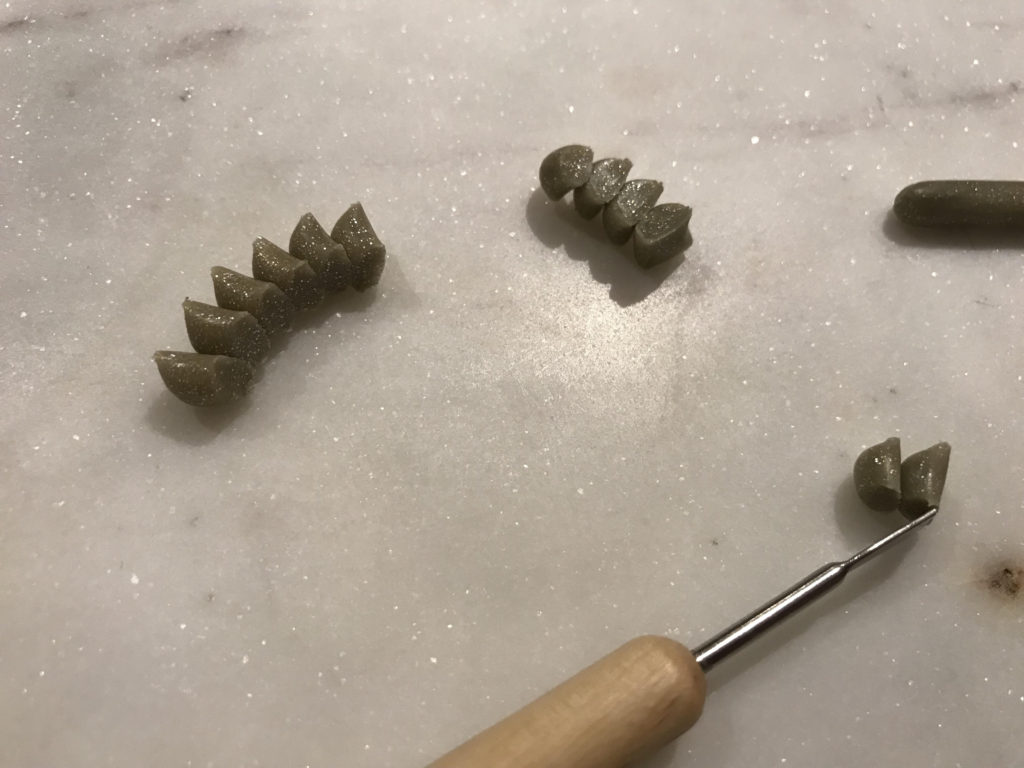
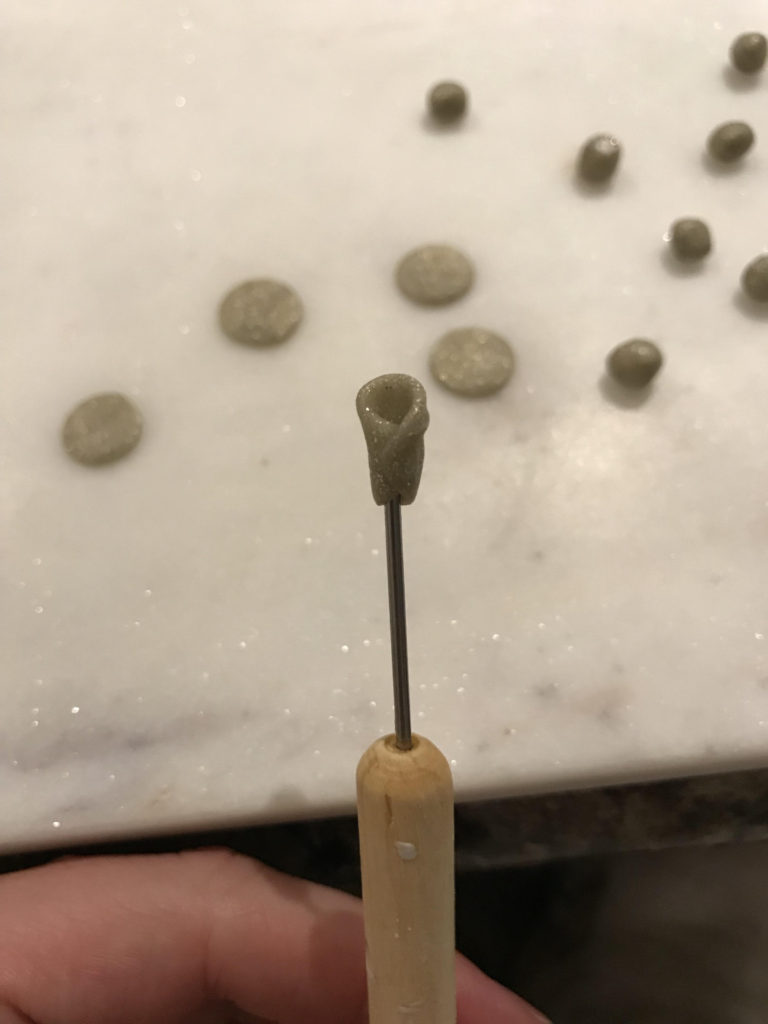
Next you want to take each section and roll it into a small ball.
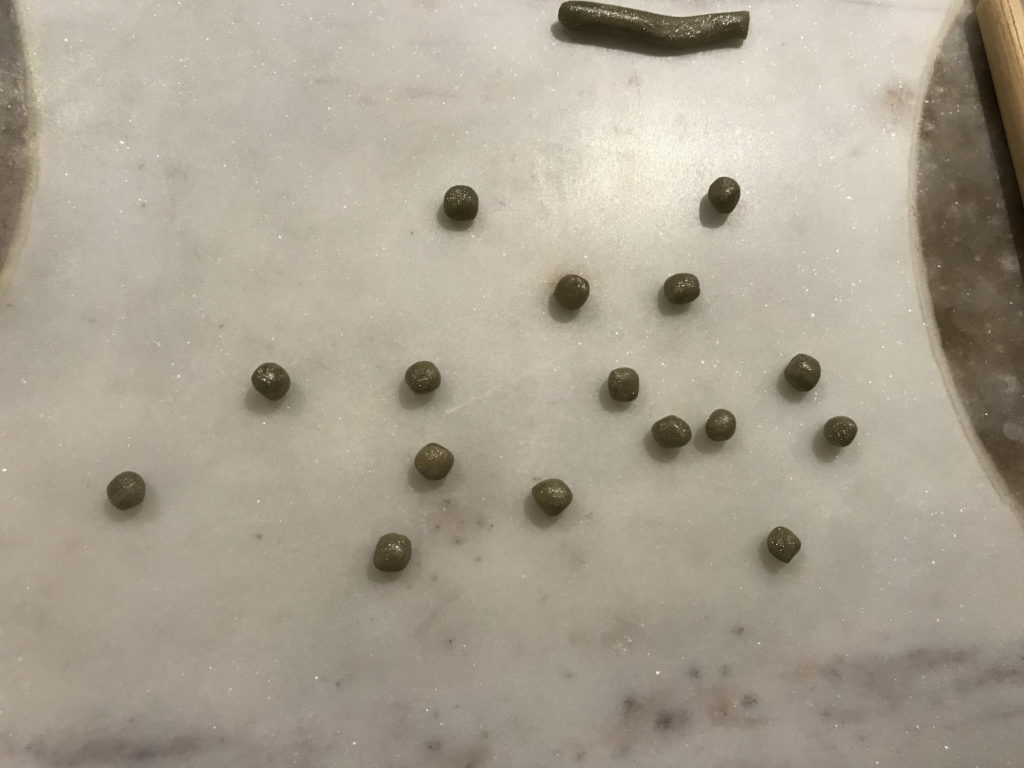
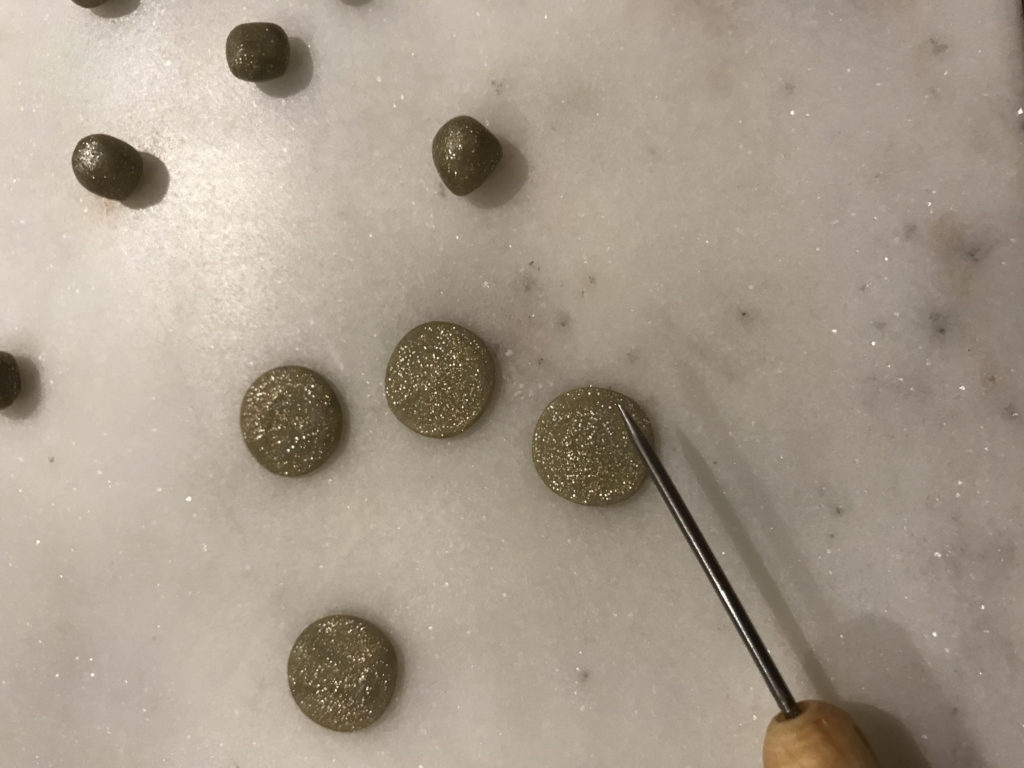
Next you will flatten each ball into a disc, keeping the edges of the disc thin and kind of flimsy, but not too flimsy as the clay will tear. You can either flatten it on your working surface or just between your fingers. You might find the clay sticks to the working surface so you will want to gently pry each one up off the board with your knife. If you are flattening between your fingers and it sticks to your skin, wash your hands with soap and water and it should help.
Next you can take a pointy sculpting tool (or you could use a toothpick) to begin wrapping your first disc, which will form the centre of your rose.
From here you will begin adding petals to the rose. You can either leave the rose on the tool or you can remove it, whichever is easier for you.
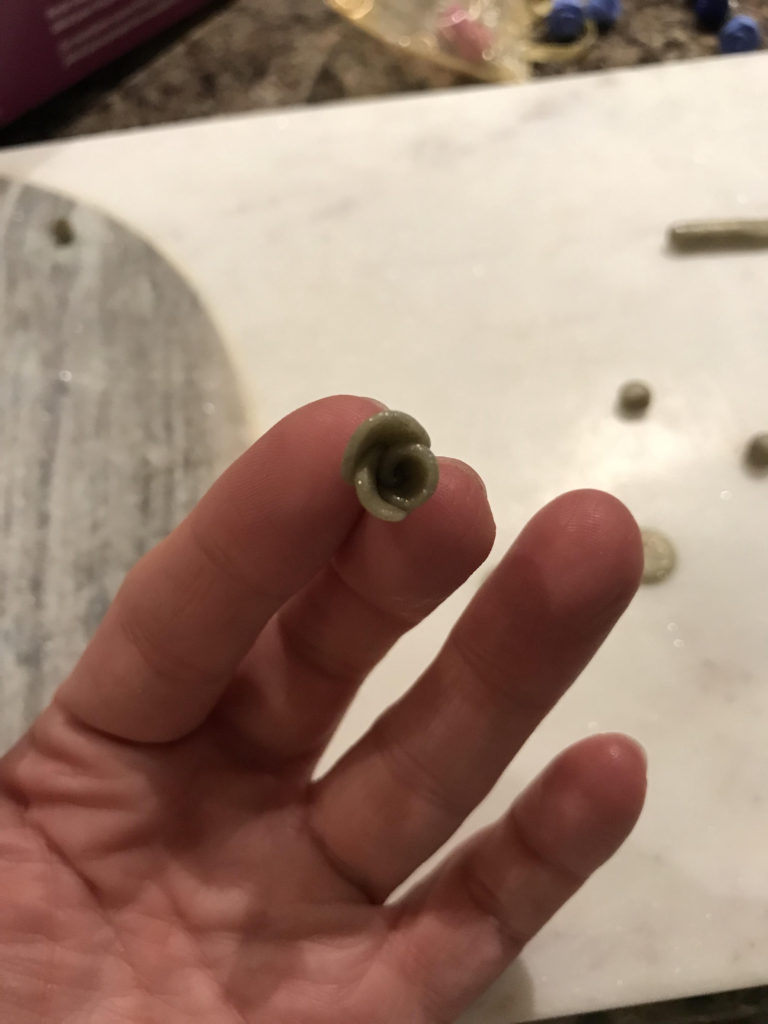
You will keep working in a circular pattern, adding petals to the rose. Typically I use about 9-10 petals per rose, but if I’m doing a mini rose (child-size) I may stick to 4-5 petals.
Once you’ve added all of the petals and are happy with the overall size, you will want to gently shape the rose so it has a round shape. Hold the rose between your fingers and gently shape it. The key is to NOT press on the petals directly as you will collapse them and ruin the design. You are gently kind of rolling the section of clay behind the petals to smooth it out.
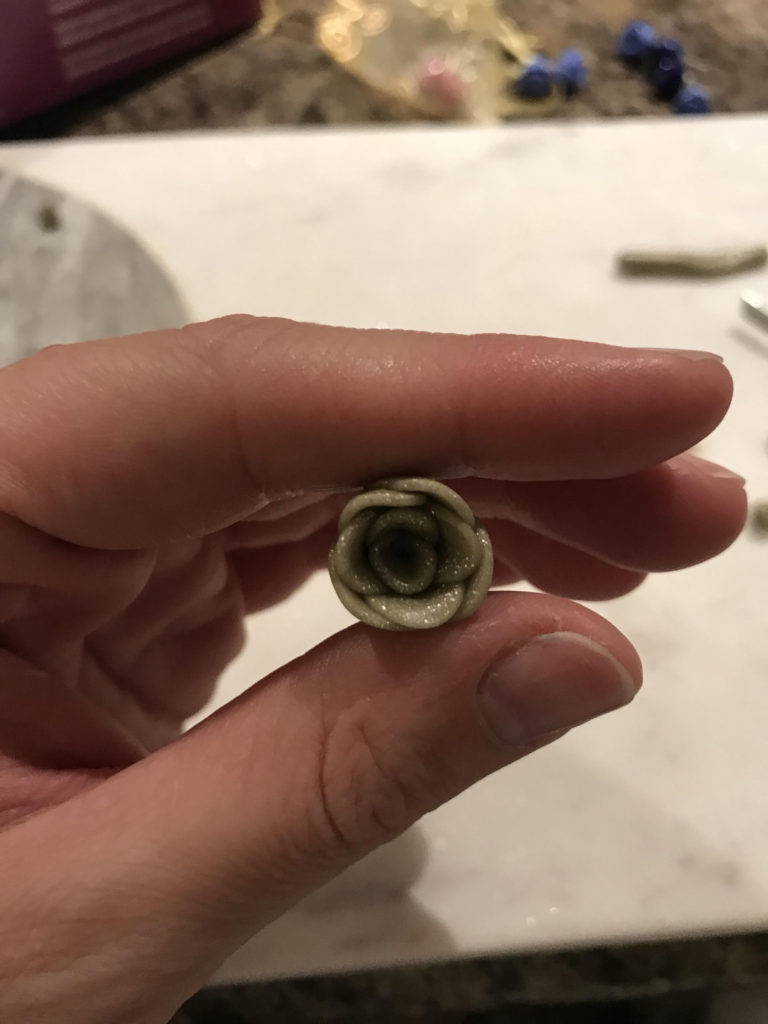
If you notice one rose looks a little larger than the other it’s not a big deal, but to even it out you can simply squeeze the petals a little. Alternately you can add a petal or two to the smaller rose.
The clay becomes very soft as you work with it as it’s warmed by your hands. So once the rose is formed I like to set it aside for 15 minutes or so to let it cool down and get its firmness back. It makes the next step much cleaner.
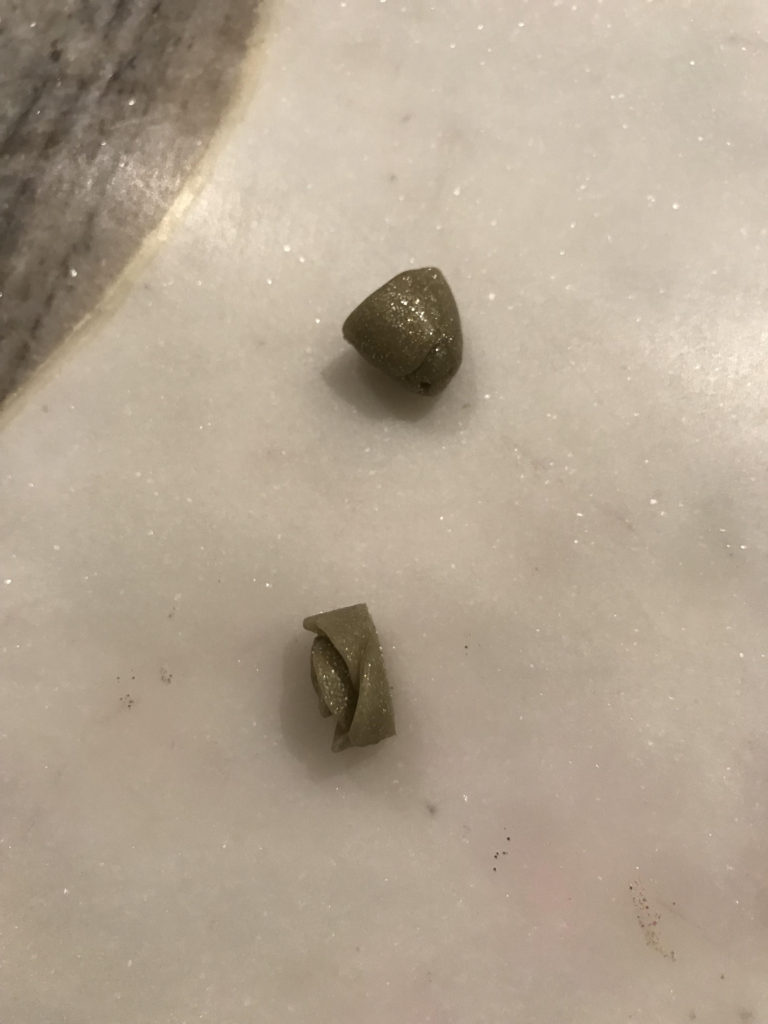
You will want to cut off the back of the rose now as you don’t want your earring to be really thick.
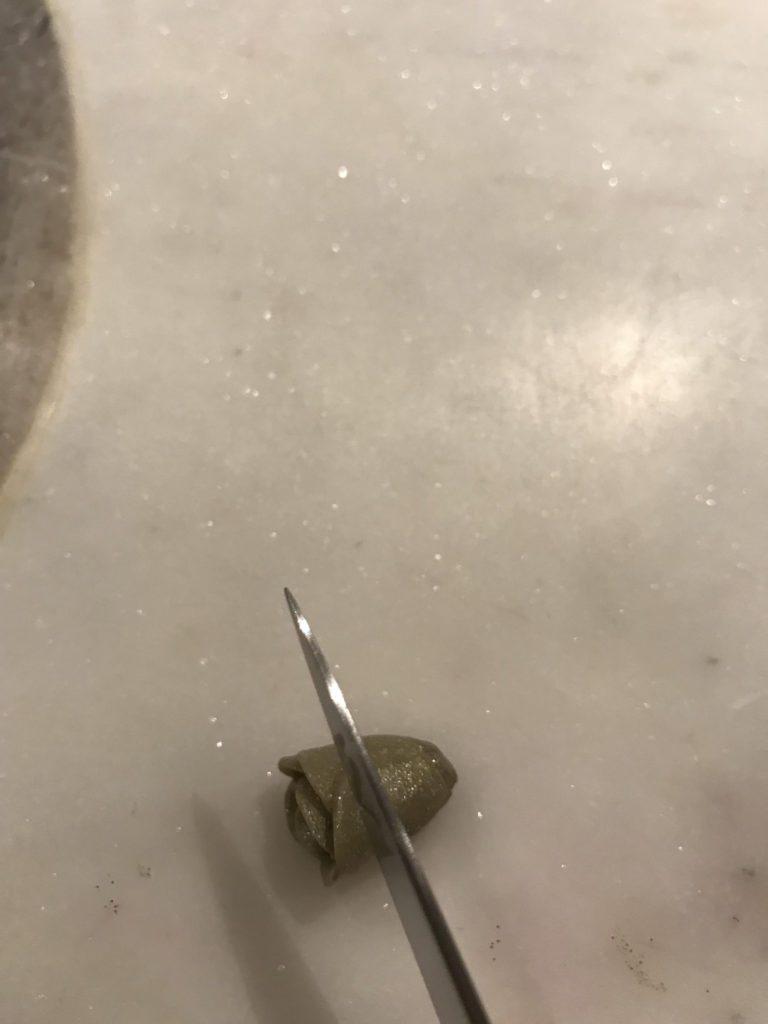
Cut as straight as you can. Try not to crush the rose as you do this. If you notice the rose seems to collapse a little, you can gently squeeze around the perimeter and hopefully restore the shape.
Once you trim your roses you will place them in a glass baking dish in preparation for baking. Take the remnants of clay and place back in the package for use later.
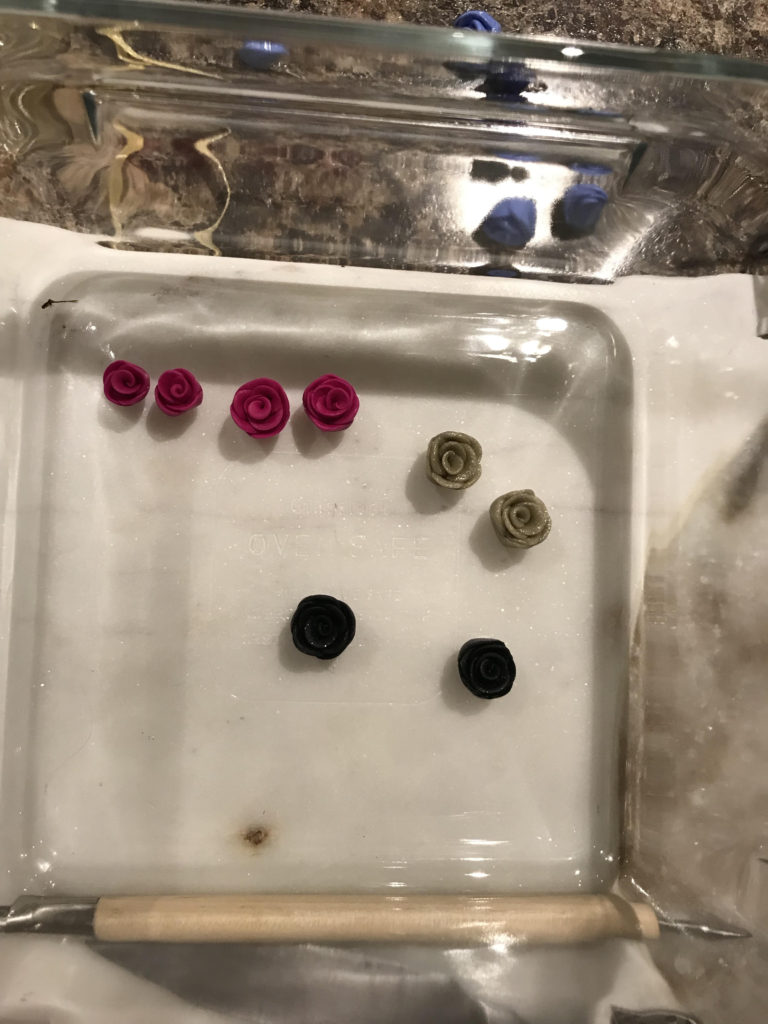
Pay special attention to the baking instructions for your specific clay. I noticed my natural Sculpey needs to bake for 15 mins at 275 per 6mm (thickness), but the colored Sculpey needs to bake twice as long.
Once your earrings are baked you can leave them in the dish and let them cool down. If you’ve used natural Sculpey you may want to paint your earrings with acrylic paint. If you’re using a light colored paint you may just need 1 coat, but for darker hues you will need 2-3 coats.
Once your earring is finished baking/drying, you will seal it with Sculpey glaze. You don’t need to glaze the flat side (the side you cut) as you will be attaching the earring post. So just glaze the petals and centre of the rose.
The glaze needs to dry for 24 hours, but in the meantime you can attach the post about 30 minutes after applying the glaze and let it all dry at once.
To attach the post you will make sure the flat surface is clear of any dust or debris, then use a small dab of E6000 glue. Lay the earring back in place and let dry on a flat surface.
24 hours later you have a beautiful pair of earrings ready to wear!

I hope you’ve enjoyed this tutorial. These make adorable gifts and a small pack of Sculpey makes a LOT of earrings.
Happy Monday!
Heather