With fall in the air here in St. John’s I’m dreaming of all things cozy! Fluffy, furry throw blankets…knit cowls…cozy ponchos. So much to do and so very little time!
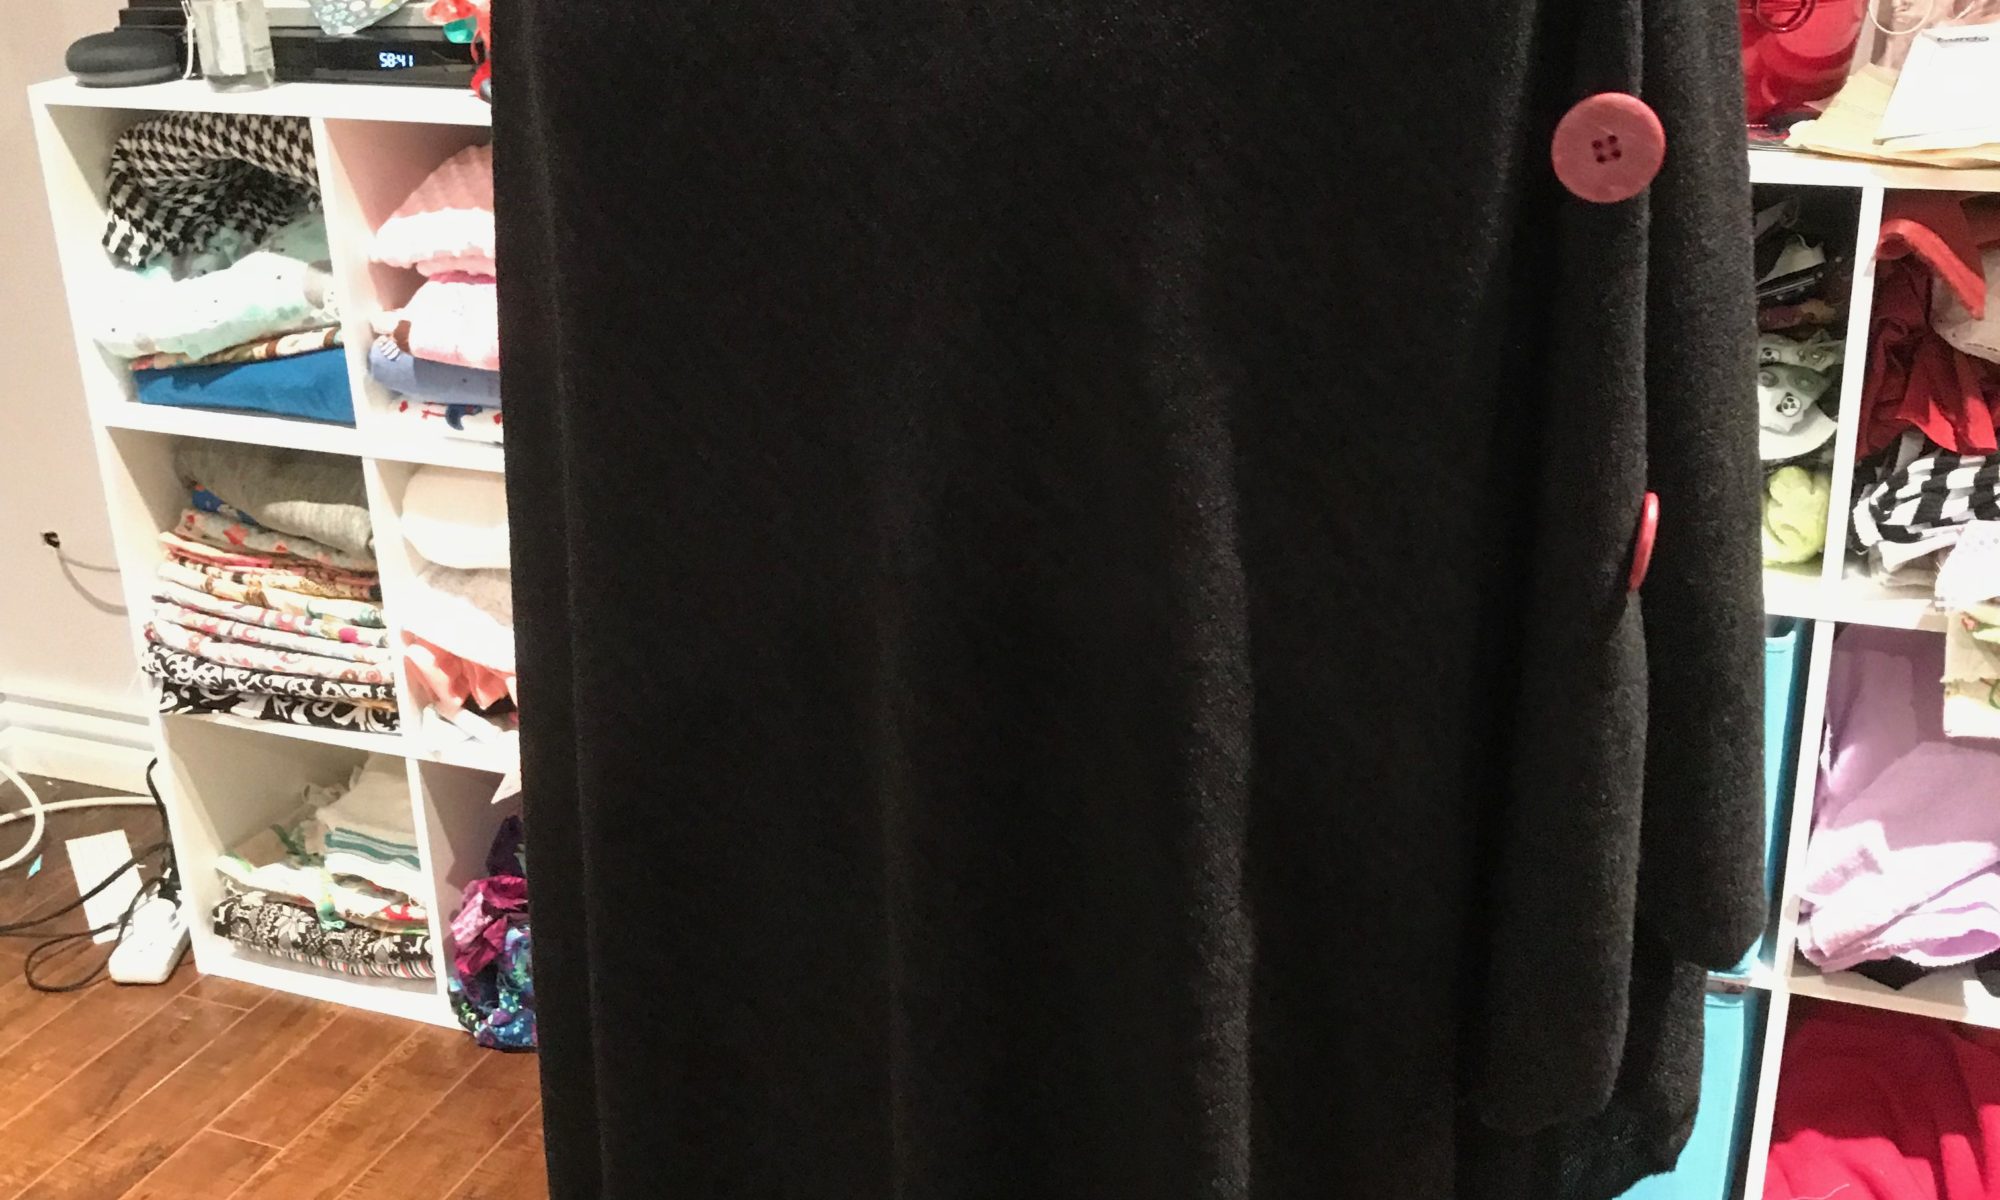
I picked up a stretchy, black knit fabric a few years back with the intention of making a cardigan, however it’s been sitting in my stash untouched ever since. A couple of weeks back I decided to turn it into a poncho for work (when the air conditioning gets the better of me).
I forgot to take pictures along the way so I’ve drawn out a diagram of the fabric for your viewing pleasure (sarcasm!)
Here’s what you’ll need for this tutorial:
- 1 meter of fabric
- medium or large buttons (optional)
I started by laying out the (folded) meter of fabric on the floor, with right sides together. When I say folded I mean the selvage edges are together (see diagram below). I evened up the cut edges to ensure I had clean lines to work with.
A meter of fabric will make a rectangular poncho, so it will be asymmetric. If you want a symmetric poncho, measure the width of the fabric and then cut the length of folded fabric to that same length. I like the asymmetric look.
If your fabric frays easily, you will want to consider serging around the whole piece of fabric now, or you can zigzag.
Starting from the folded side of the fabric, I measured down 9 inches from the corner and marked it with a pin. Then I measured 9 inches in the other direction along the cut edge and marked that with a pin. The area between the two pins is the neck opening.
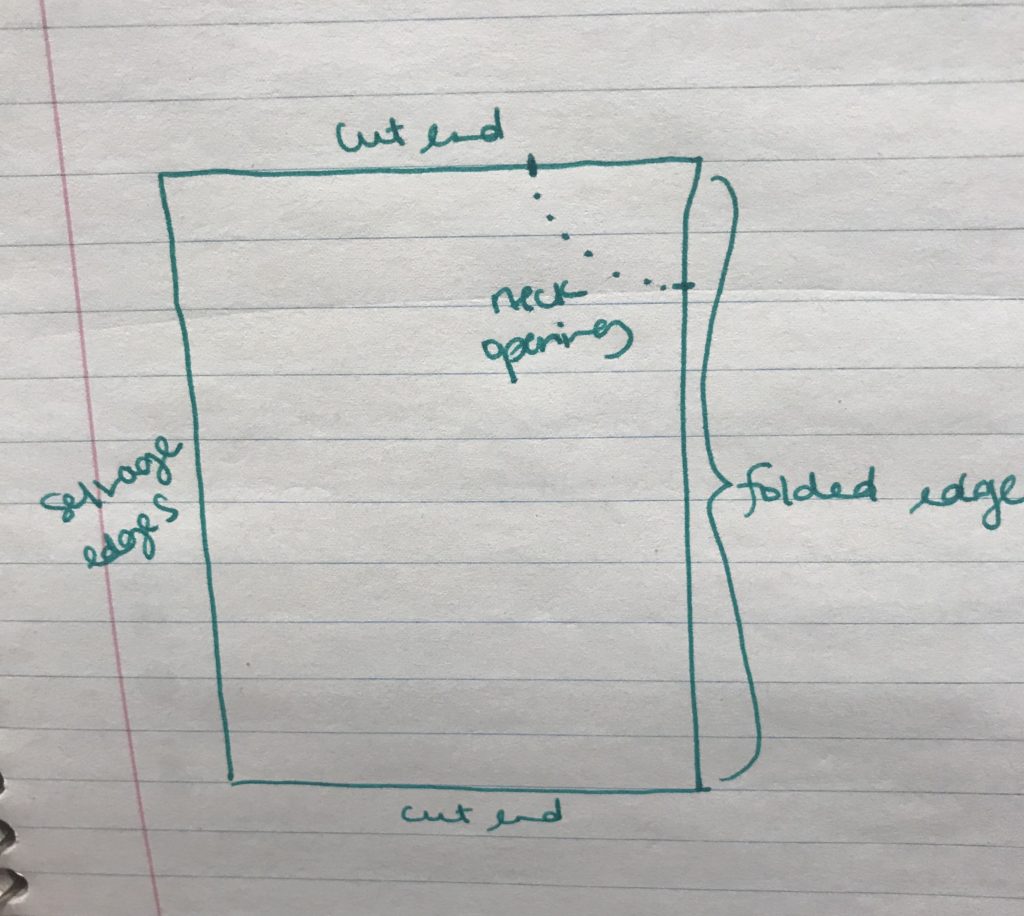
You will want to leave one side folded , which is one less seam to sew! Pin along the cut edge from the 9 inch mark to the end. Sew along that seam using a 1/2 inch seam allowance.
Turn the garment right side out.
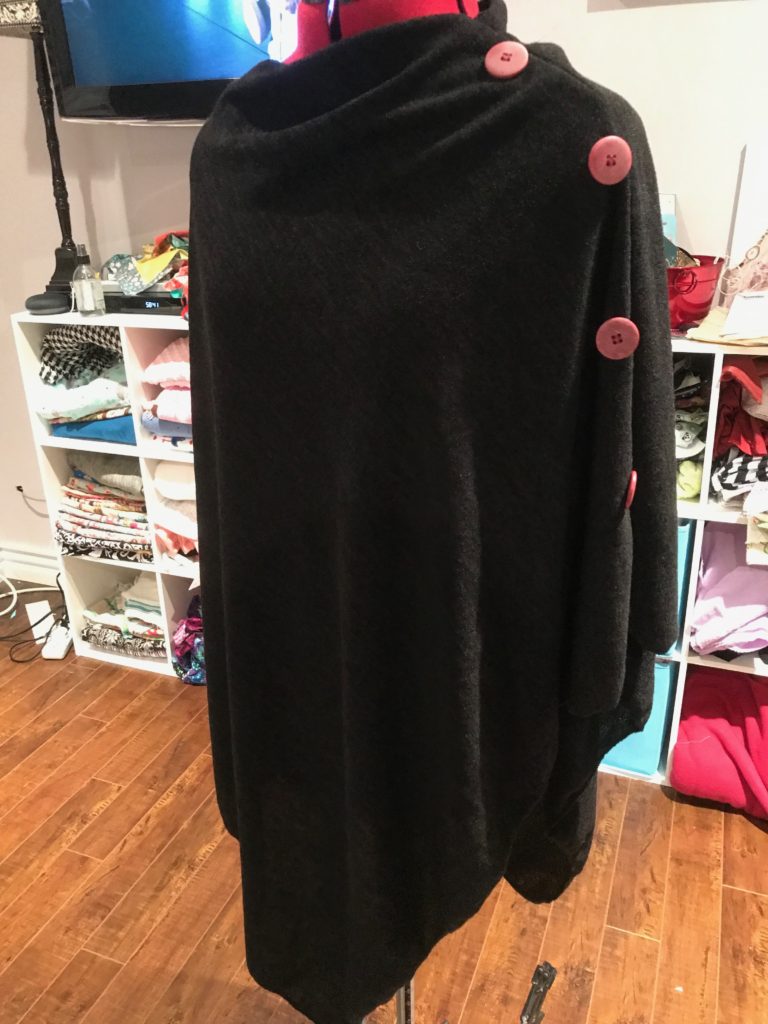
You can pick up your poncho now with just one seam sewn, and ready to wear! For the neck opening, you can either fold the triangles of fabric inside (as I do) or outside, whatever you think looks better.
Depending on your fabric you may choose to hem the bottom of the poncho as well, but this fabric didn’t need it.
I dressed up this basic black poncho with some buttons I had in my stash. I placed them evenly down the shoulder seam. Since they are only decoration, it’s about 10 minutes work to do this piece but it really does change the look of the poncho.
I’ve made this poncho in plain fabric, plaids, tweeds, etc. Every version has been cute. The key is to choose a fabric that isn’t too stiff or heavy as you want it to hang and have good movement.
Using a slightly heavier wool-blend fabric can provide a bit more warmth for outdoor wear, but this one is perfect for the office.
If you use a fabric that frays nicely (think: plaid) you can also intentionally fray along the bottom edges, which takes a little time but looks really cute as well.
Thanks for stopping by today! Happy Tuesday!
Heather