DIY Beachcomber Wall Art

One of the most peaceful hobbies I have is beachcombing. For many years, whenever I’ve been near a beach, I would be found digging for natures treasures, taking shells and other finds home for “future projects”, many of which never really materialized.

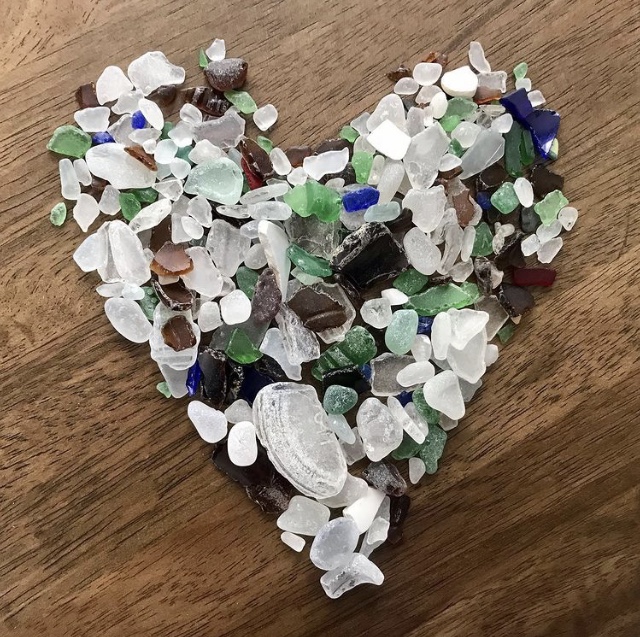
In 2020 I began combing beaches for seaglass, which is one of my favorite things in the world to do. Sitting on the beach, often barefoot, with just the sound of the gentle waves rolling in…..heaven!

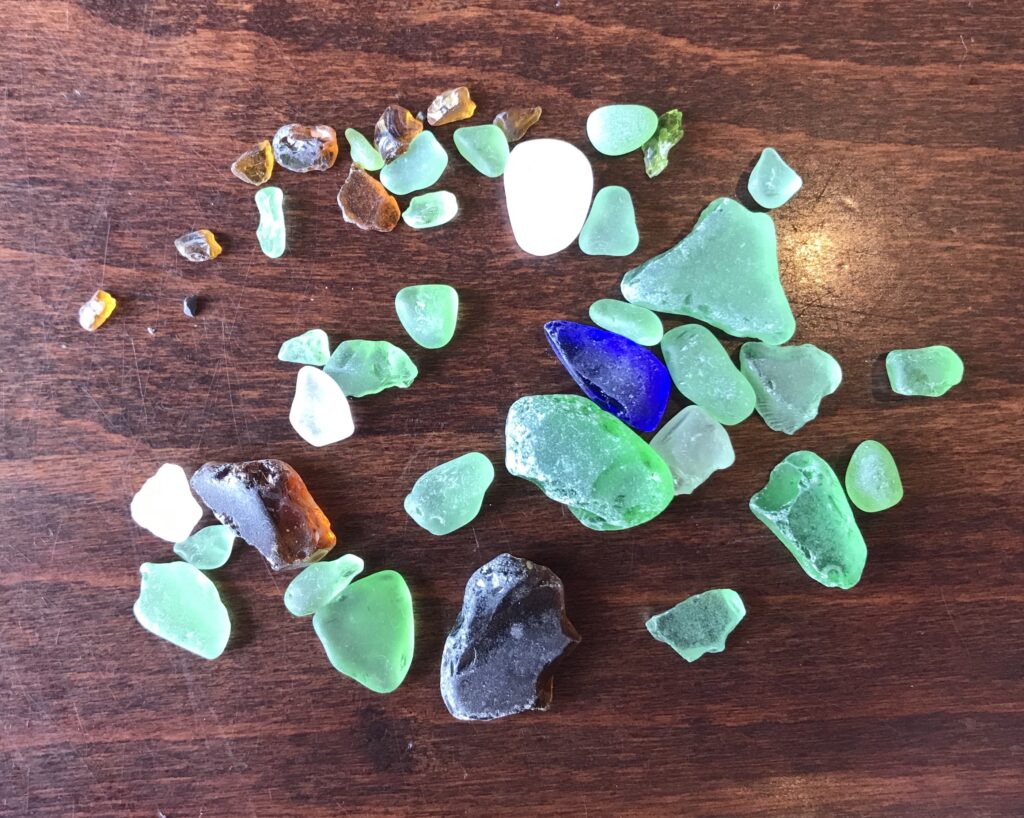
Recently my partner and I traveled to the Dominican Republic for a week at an all-inclusive resort. We enjoyed walking the coastline every morning, catching the early sun. Of course, we couldn’t resist gathering a few treasures to bring back with us.

Upon our return, I cleaned all of these empty shells and dried up coral with bleach solution, as I do with seaglass. I didn’t soak them long, as bleach can make delicate shells brittle.

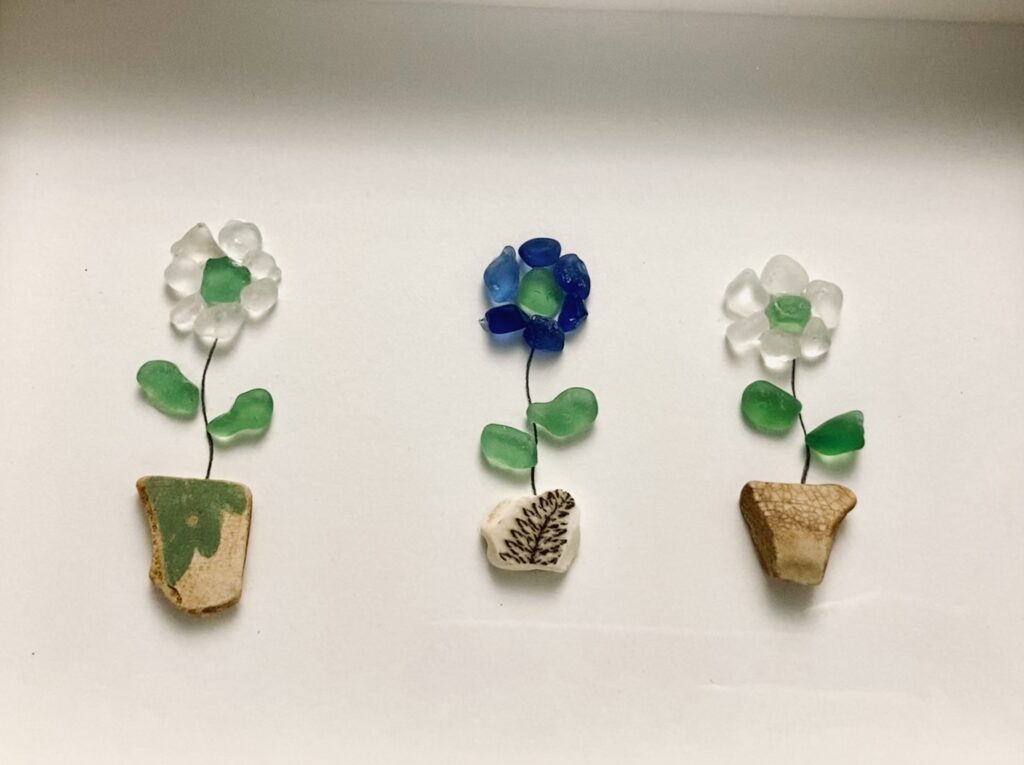
This project is fantastic if you have a passion for beachcombing yourself, or if you are looking to utilize special treasures your kids find (or bring back from trips).

For this tutorial you will need the following:

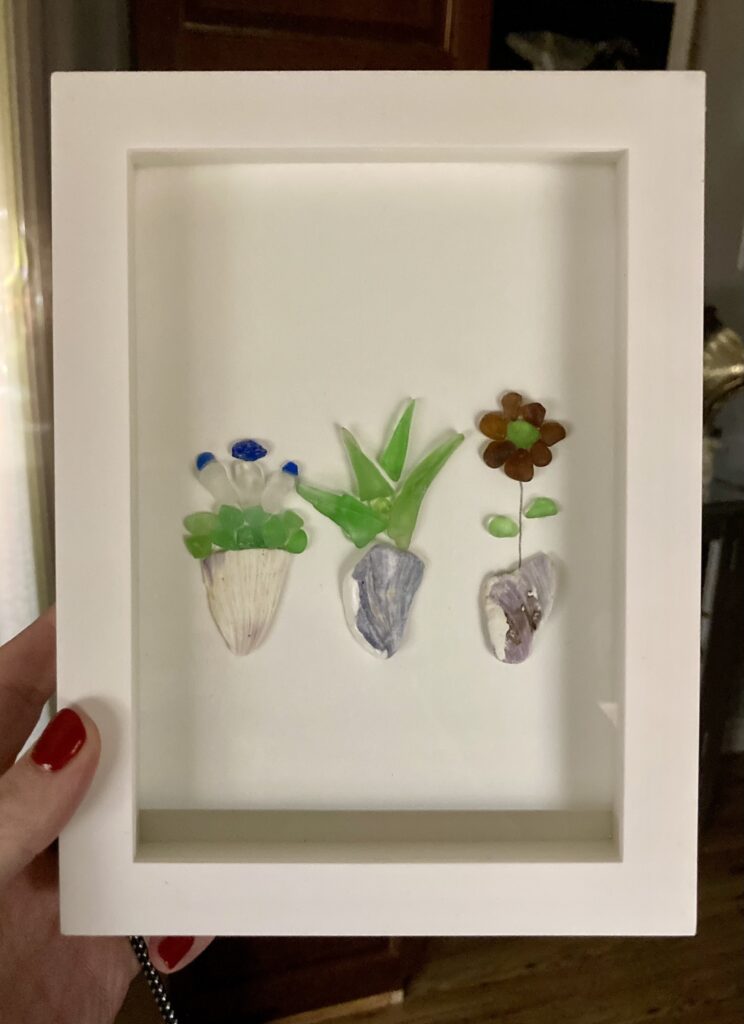
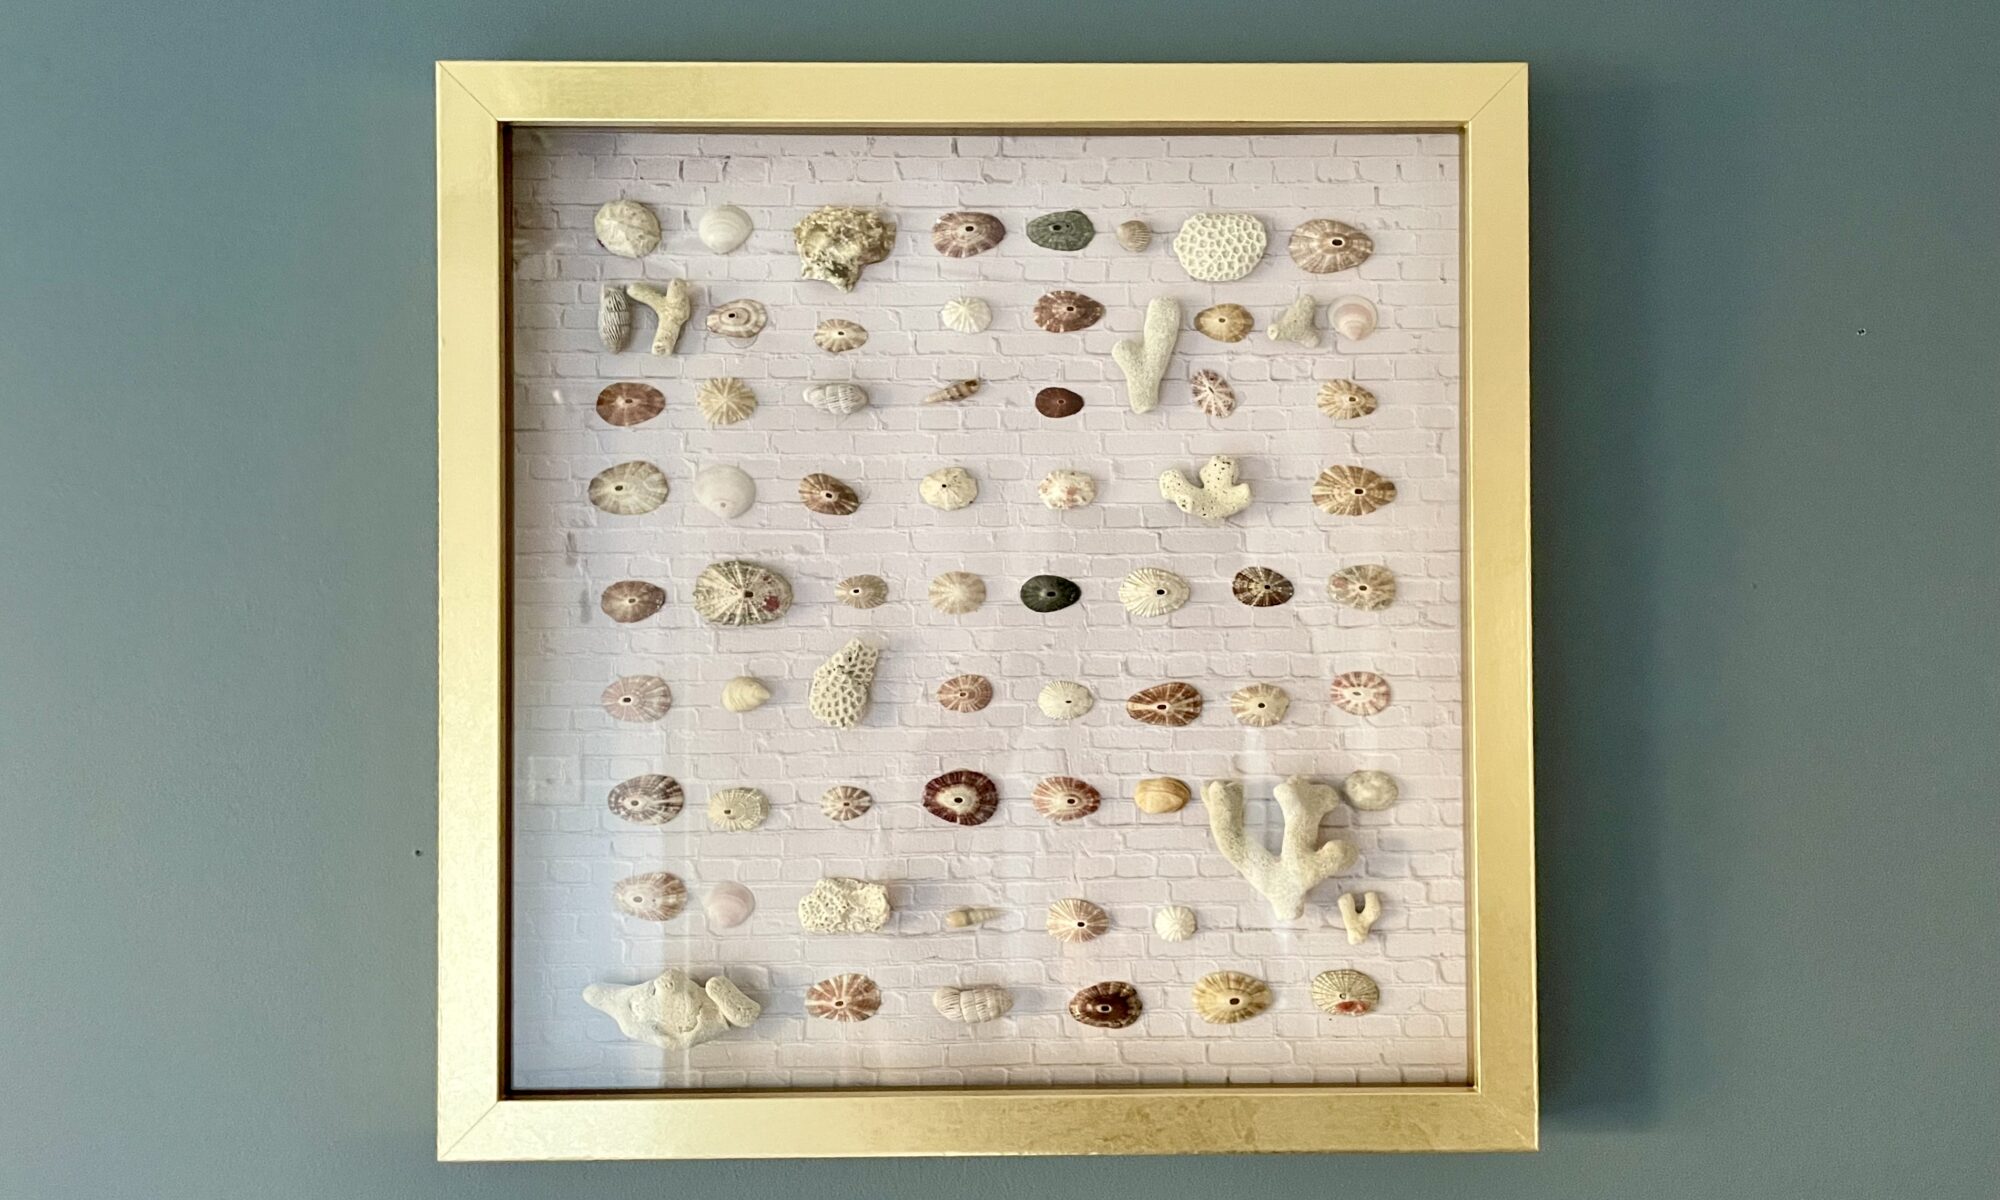
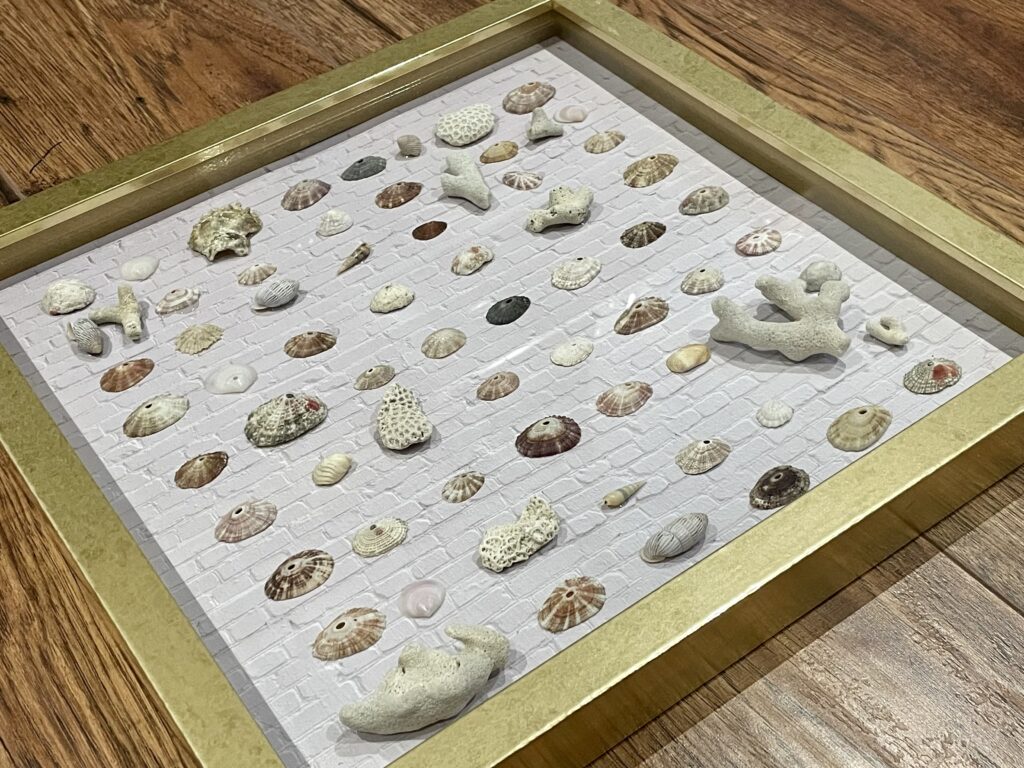
  • A shadowbox frame (I used a 12X12″ frame here)
  • E6000 glue
  • Clean, dry treasures
  • Cardstock (I used a 12X12 piece to fit the frame)

I love lightly-patterned cardstock, however you can use plain.

Depending on the size of your shadowbox, you may need to cut your cardstock to fit. I use a Fiskars paper cutter to get a nice, even cut. Make sure to cut your cardstock *before* you start gluing items onto the page.

First you will plan out the placement of your items. I recommend that you work 1-2 inches in from the border of your page. Gently place your treasures on the sheet, but don’t glue them down just yet. You may want to adjust them as you go. Try to balance colors (ie. dark and light) and larger pieces to bring an aspect of symmetry to your art.

When you’re happy with the placement of the treasures, pick each one up individually and place a little E6000 adhesive on the underside, and replace it on the paper. E6000 doesn’t dry immediately, so you have time to make small adjustments. Also be mindful that if you accidentally nudge the treasures, they will likely move.

Once you’ve glued all of your treasures in place, I recommend *not moving the cardstock* until the treasures have had a chance to dry. Dry time is a few hours, but I typically leave them for about 24 hours before framing.

To frame, take the glass pane out of the shadowbox and give it a good clean with glass cleaner, front and back. Frames normally aren’t totally clean when you get them from the store, so don’t skip this step.

Pop your art in your shadowbox and, voila!

Every time I look at this piece, I will remember that relaxing and wonderful trip to the Dominican Republic. This makes a great gift for your travel partner as well!

Thanks for stopping by to check out my post today!

Heather

DIY Seaglass Art

Well, this is a post I’ve been wanting to make for quite some time. In July I was playing around on a random beach with my son, finding shells and enjoying the salty air, when I came across a very small piece of green seaglass sitting among the sand. I had never found seaglass before, but I immediately wanted more! We visited the same beach the next day and didn’t find a single piece. I asked around about seaglass beaches in the area, and I was advised to “look for rolling waves”.

Within a few days, a friend and I were out scouring beaches in Bay Bulls, finding little nuggets of glass among the beautiful shorelines.

We did this a few days a week, mostly finding small pieces in green, white, brown and sometimes indigo.

Since that time, our weather has been cooperative and I am still seaglass hunting well into February! We have expanded our search zone a bit, and the payoff has been huge! I attribute that to the winter months not being seen as the ideal seaglass hunting weather, and I think getting out of town to more sparsely populated areas helps as well.

My mom kept asking, “What are you doing with all the seaglass?”, and the best I could say was, “I will make wall art out of it some day.” I dreamed up projects but they never really came to life. Truth is, finding seaglass, cleaning it and just admiring it was almost enough for me. Almost.

There are different types of glass that can be found on the beach, ranging from perfect, cloudy, rounded pieces of traditional seaglass, to more jagged, clear pieces of beach glass. At one point I was collecting beach glass, before really realizing it wasn’t exactly what I had in mind. I purchased a very simple rock tumbler and got some gritty sand from the beach. Dampened the sand, threw in some beach glass, and tumbled it for a couple of days. The glass came out nice and cloudy.

Some people make cloudy glass from scratch by breaking up bottles (using goggles, gloves, etc) and tossing it into a tumbler for a few days. I prefer the traditional way of finding glass, but if you find glass that’s not quite cloudy enough, no harm in tumbling it for a day or two until it’s usable, IMHO.

So, the materials you’ll need are listed below:

  • Seaglass
  • E6000
  • Cardstock
  • Shadowbox frame
  • Pencil

To start, cut your cardstock to fit the shadowbox. If you have a 5X7 frame, cut your cardstock 5X7. I use a paper cutter to get nice, straight edges.

I laid placemats on the table prior to gluing, mostly just in case glue soaked through the cardstock. I would recommend this for sure.

Lay out your seaglass on the cardstock in the pattern you choose. If you’re doing flowers (like I did, to start), lay out your glass, figure out where you want the flower stems, and just slightly move the glass out of the way to draw the stem before you begin gluing.

Once your pieces are laid in place, lift one at a time and place a dab of glue on the underside. Gently lay in place. Most adhesives will take a little time to fully set, but try not to move it around once it’s laid.

Continue gluing pieces until finished. Lay entirely flat to dry.

Sometimes you’re lucky enough to find little pieces of ceramic plates on the beach, as I did here. I used them for flowerpots. You can also use rocks or seashells.

Shadowboxes really help these pieces look complete. They also protect from dust and dirt, as you can imagine these cardstock pieces will not be entirely easy to clean.

This one was made with seashells my toddler picked on the beach. I cleaned them thoroughly with bleach and dried them, loosening debris with a soft toothbrush prior to gluing. Ensure the glass and shells are entirely dry to ensure they adhere properly.

The best advice I have when you’re looking to make seaglass art is to work with the pieces and shapes that you have. And definitely come up with a little stockpile before attempting to create. It’s addictive so you might as well buy 10 shadowbox frames now and save yourself the trips to Michaels. Most of the frames I’ve used are 5X7 but I do have a bunch of 8X10s as well.

You can incorporate things like twigs, pearls, beads and rope into these pieces quite easily. They are fun to make, and you can let your imagination run totally wild. Finding treasures along the shorelines with your children and letting them transform their finds into art is a fantastic way to foster creativity.

Happy creating! And thanks for stopping by today!

Heather

DIY Seashell Photo Frame

My husband makes fun of me (playfully, of course) for collecting seashells and rocks from pretty much anywhere we visit. I bring them home thinking, “I will do something crafty with them some day!” and sometimes I actually do….

Well recently we took our first family vacation to Florida and we were able to collect a bunch of beautiful shells from a day spent at the beach.

For Father’s Day I decided to put those shells to use.

Materials needed for this project:

  • Wooden frame
  • Glue gun
  • Glue sticks
  • Shells (cleaned)
  • Photo

I picked up a sweet little 4X6 frame from Michael’s. I cleaned the frame to make sure it was free of dust and debris, so the hot glue would stick properly.

Heated up my glue gun and got started right away. This project took 15 minutes in total.

I laid out shells on the frame to see where I felt each one should go. Then I kept adding shells until I was satisfied with the result. I found it helpful to lay out the larger shells first and then fill in empty spaces with small shells.

On our trip we kept taking note of how many shells had little round holes in them, so I knew I wanted to use a few of those for sure.

To glue, I simply filled the underside of each shell with hot glue, and placed on the frame. Work quickly, though, as hot glue does tend to dry/harden faster than regular glue.

The frame came with the writing on it, however (if you’re really adventurous) you could totally wood burn some text into it as well.

I stuck a cute picture (of him with the baby) from our trip into the frame, and it made a perfect Father’s Day gift.

This would be an excellent gift for a birthday or Christmas as well.

Thanks for checking out my post.

Heather