2020 has felt like an entire decade so far, and it’s only mid-April. I live in a beautiful province here in Canada called Newfoundland & Labrador, and our weather is no joke. In January we had a snowstorm that was affectionately known as Snowmageddon, where our city shut down for a week under State of Emergency. It was several weeks before our residential streets were wide enough for traffic to flow in both directions. I had never seen anything like it, and it caused a major life disruption. All businesses were ordered closed, you weren’t allowed to drive on the City streets, and life seemed to come to a screeching halt. Slowly things got back to normal, but now we’re faced with a Health State of Emergency as the province braces under the COVID-19 pandemic. All non-essential businesses are shut down indefinitely once again.
I haven’t been able to blog much lately because I am working from home full time, plus I have my nearly-3 year old son home all day long. It leaves me with a couple of hours every evening to finish work I didn’t get done during the day, maybe do a bit of sewing, clean the house or go to bed early. Either way, my blogging has been taking a hit. It will get better, but right now we are all in survival mode.
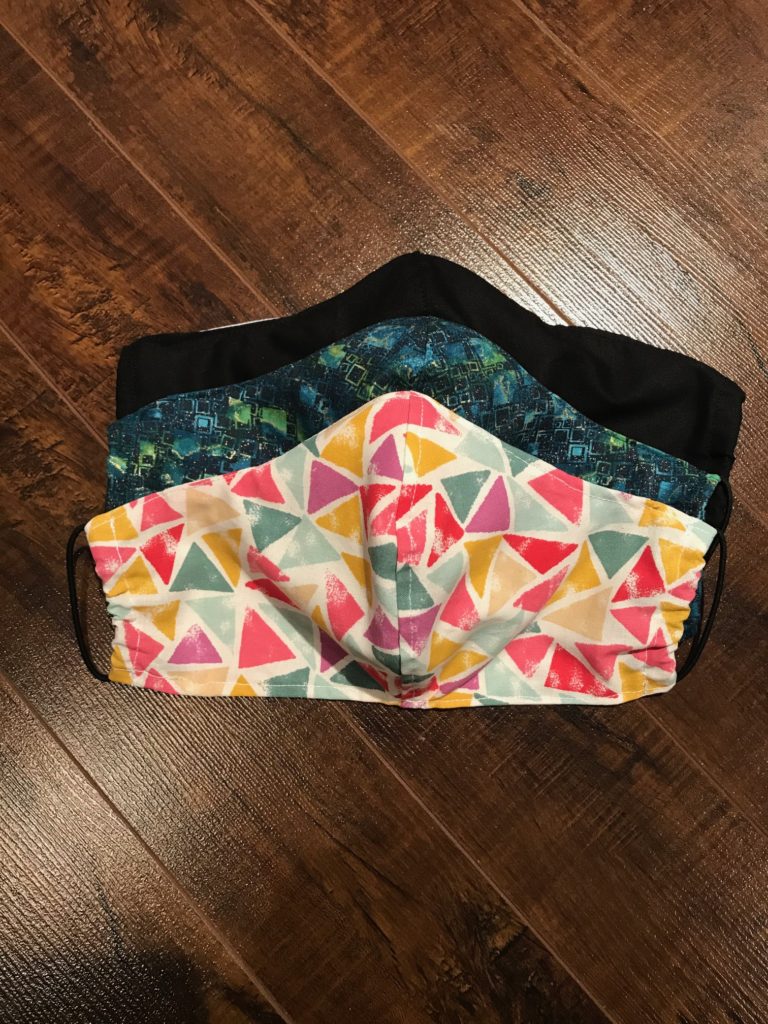
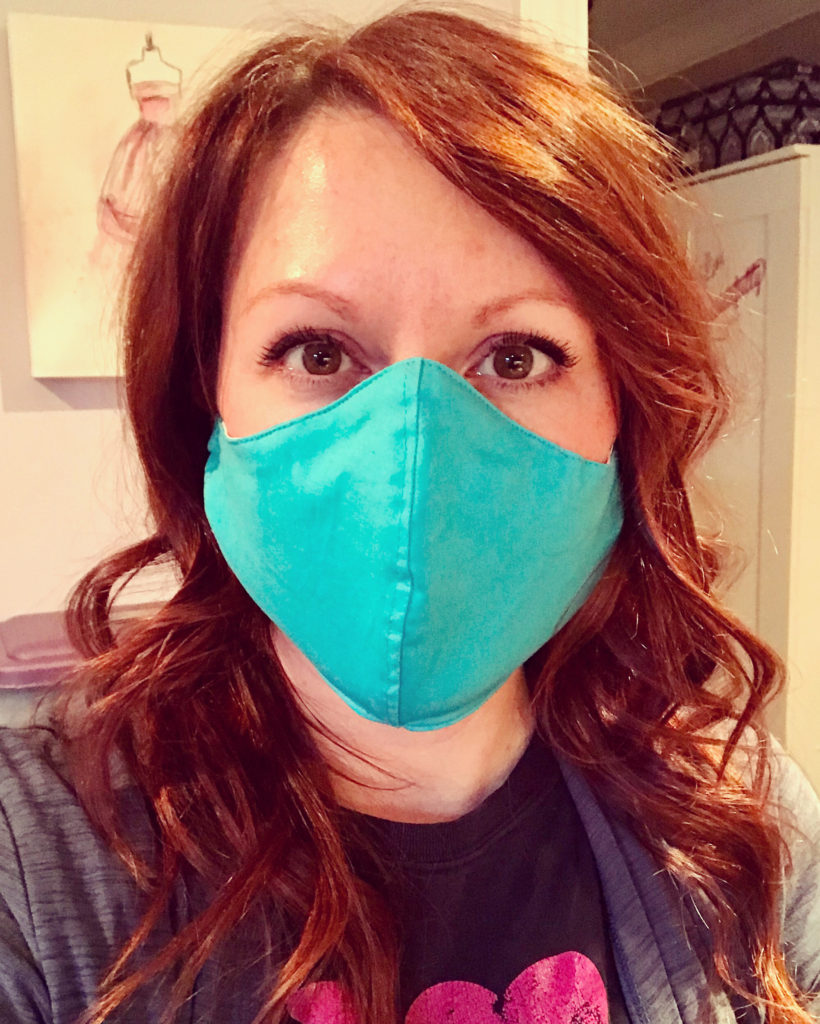
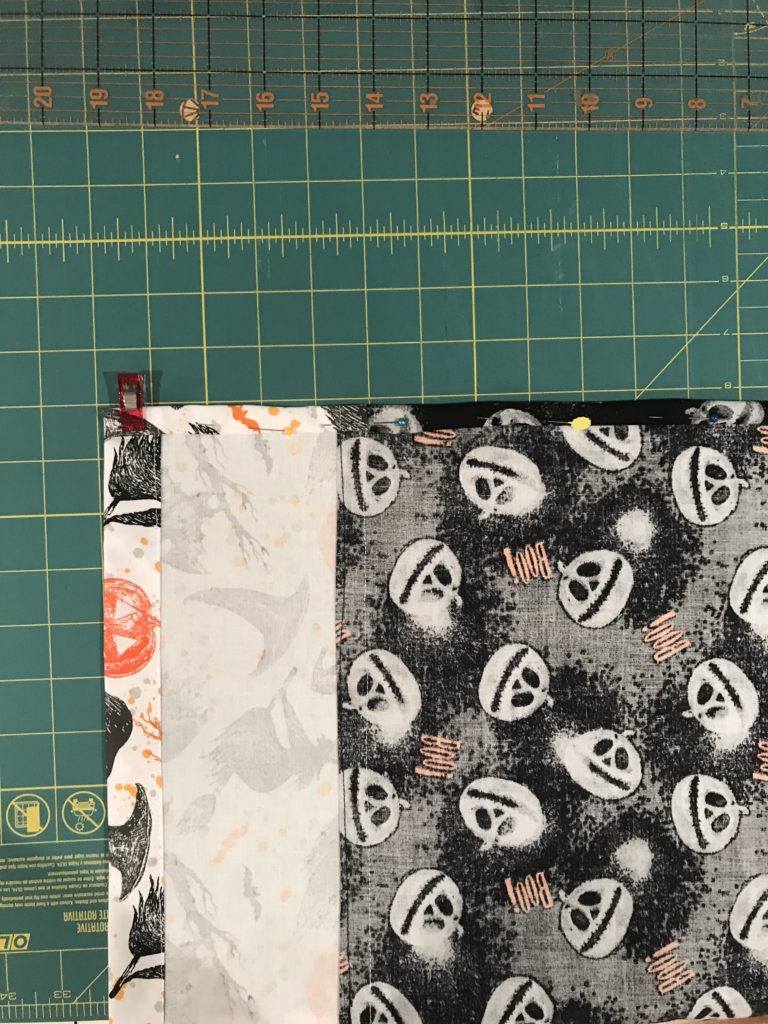
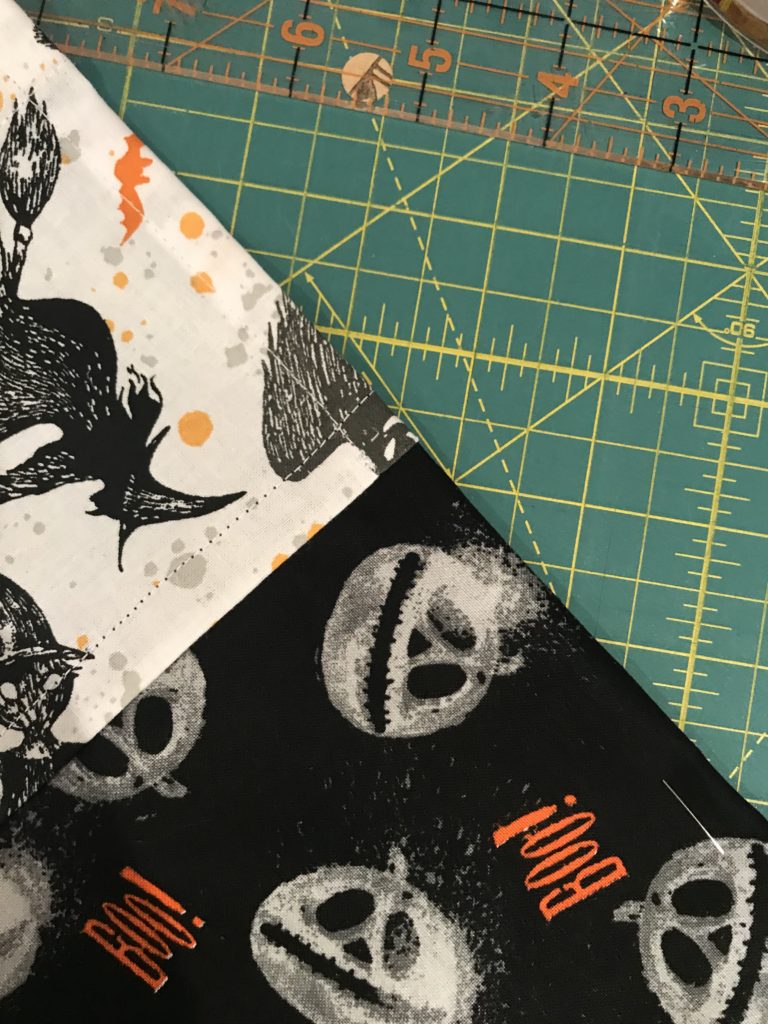
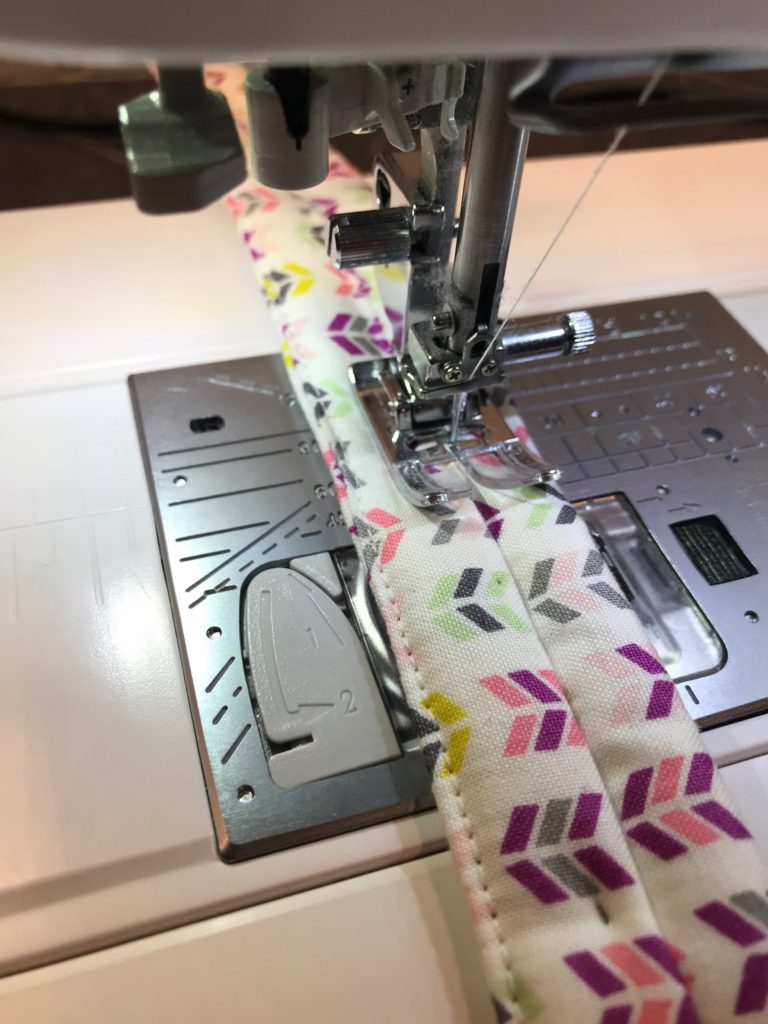
Last week our Chief Medical Officer of Health communicated to the province that we should all be wearing homemade face masks when we go out in public. There’s a global shortage of medical-grade personal protective equipment (PPE) so people had to start getting creative. Hence the double-layer cotton face mask was born.
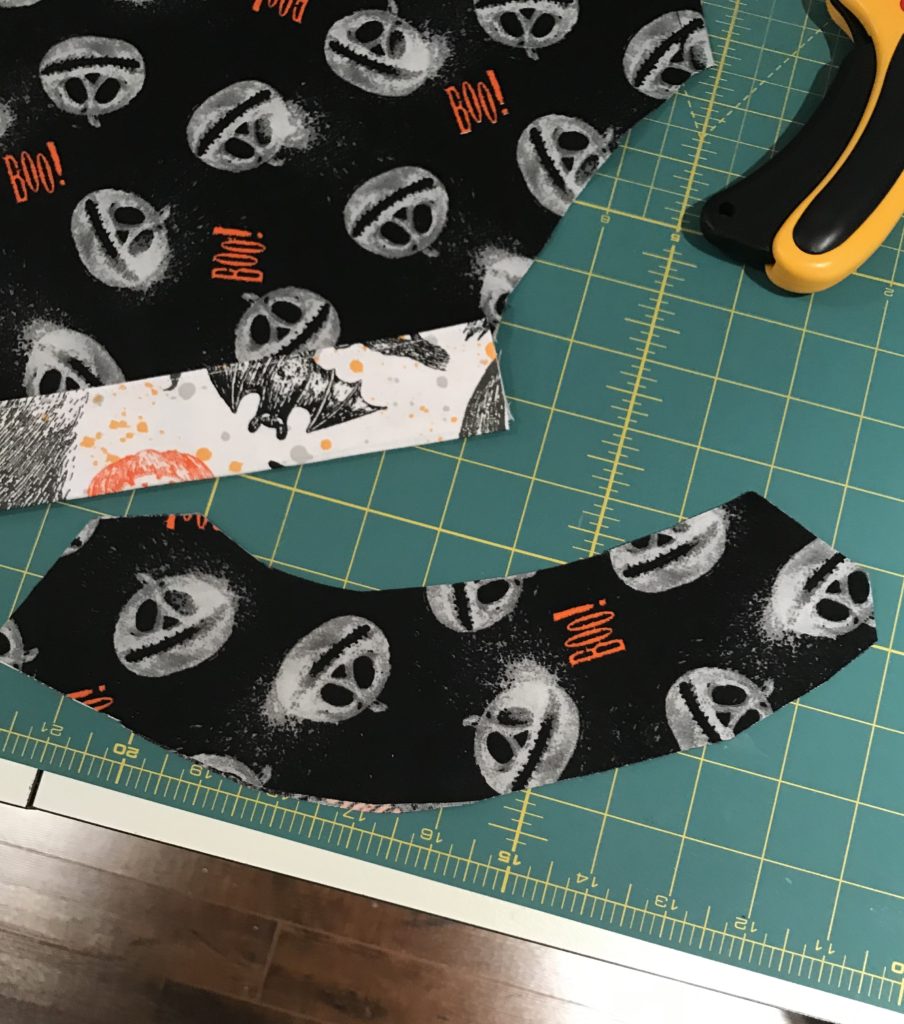
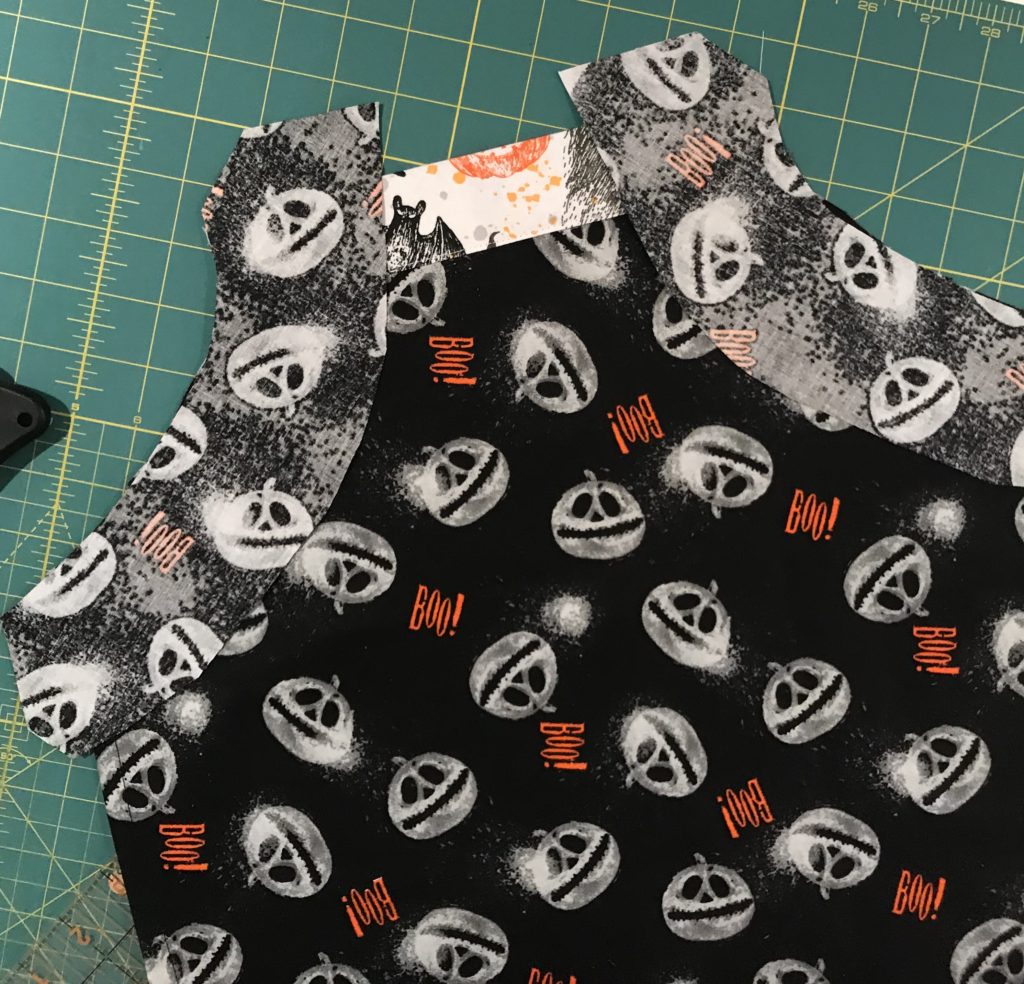
A friend asked me to whip up a couple for her spouse, which I absolutely jumped at. Then came many, many other requests. These are really fun to make and do require a little bit of skill, particularly sewing the curved seam.
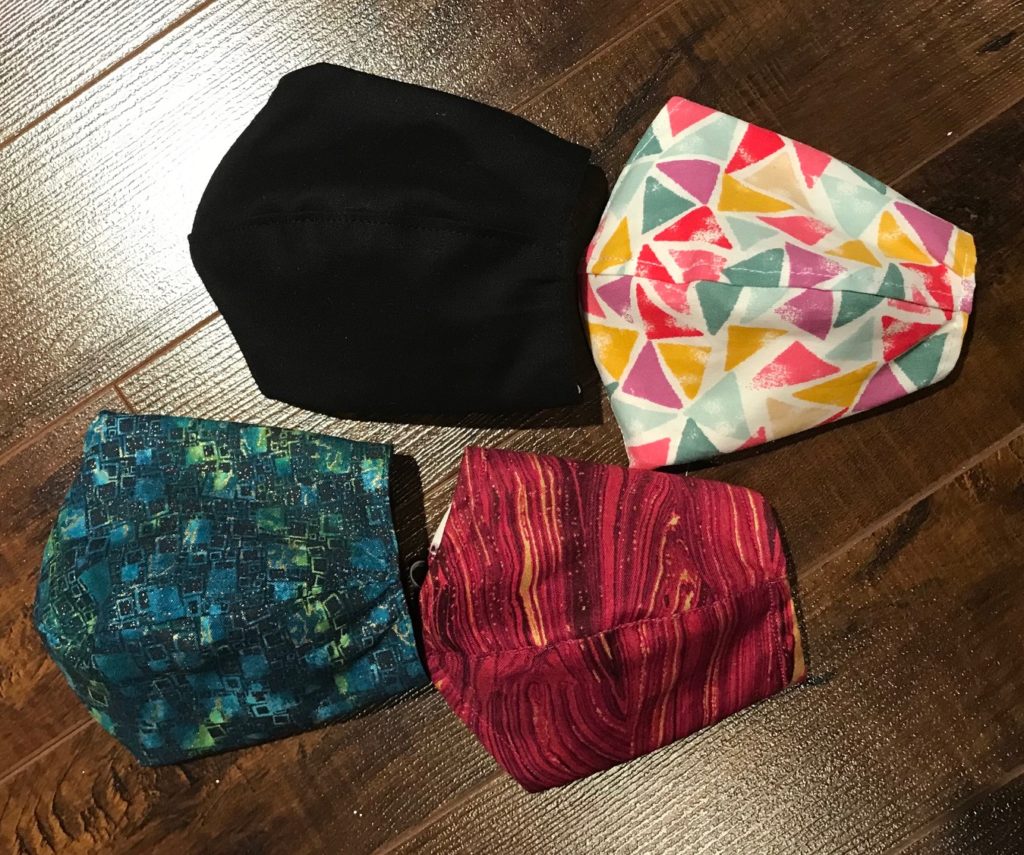
I sold upwards of 50 within a week, and now I’ve listed them in my Etsy shop. I’ve also created a coupon for those following my blog – MAKELIFECRAFTY10. Enter it when purchasing any of my face masks and you’ll get 10% off!
If you’re crafty and have some spare cotton and elastic around, there are a ton of free patterns online. There are different types – fans and cones are the two most common – and they each require different skill.
If you aren’t crafty or can’t seem to make these work for you, feel free to check out my shop. I ship within Canada for $3, or you can pickup for free in the local St. John’s area.
I hope each and every one of you are taking care of your physical and mental health during this wild ride. Praying we won’t need to wear these for long, but for now I’m whipping up masks with cute crabs, puffins, pussycats, polkadots, stripes or any other sweet print I have on hand.
This weekend I’ve been busy making aprons for toddlers. You might recall a previous post An Apron Pattern to Love and this apron follows a lot of the same instructions, however there are some differences for sure.
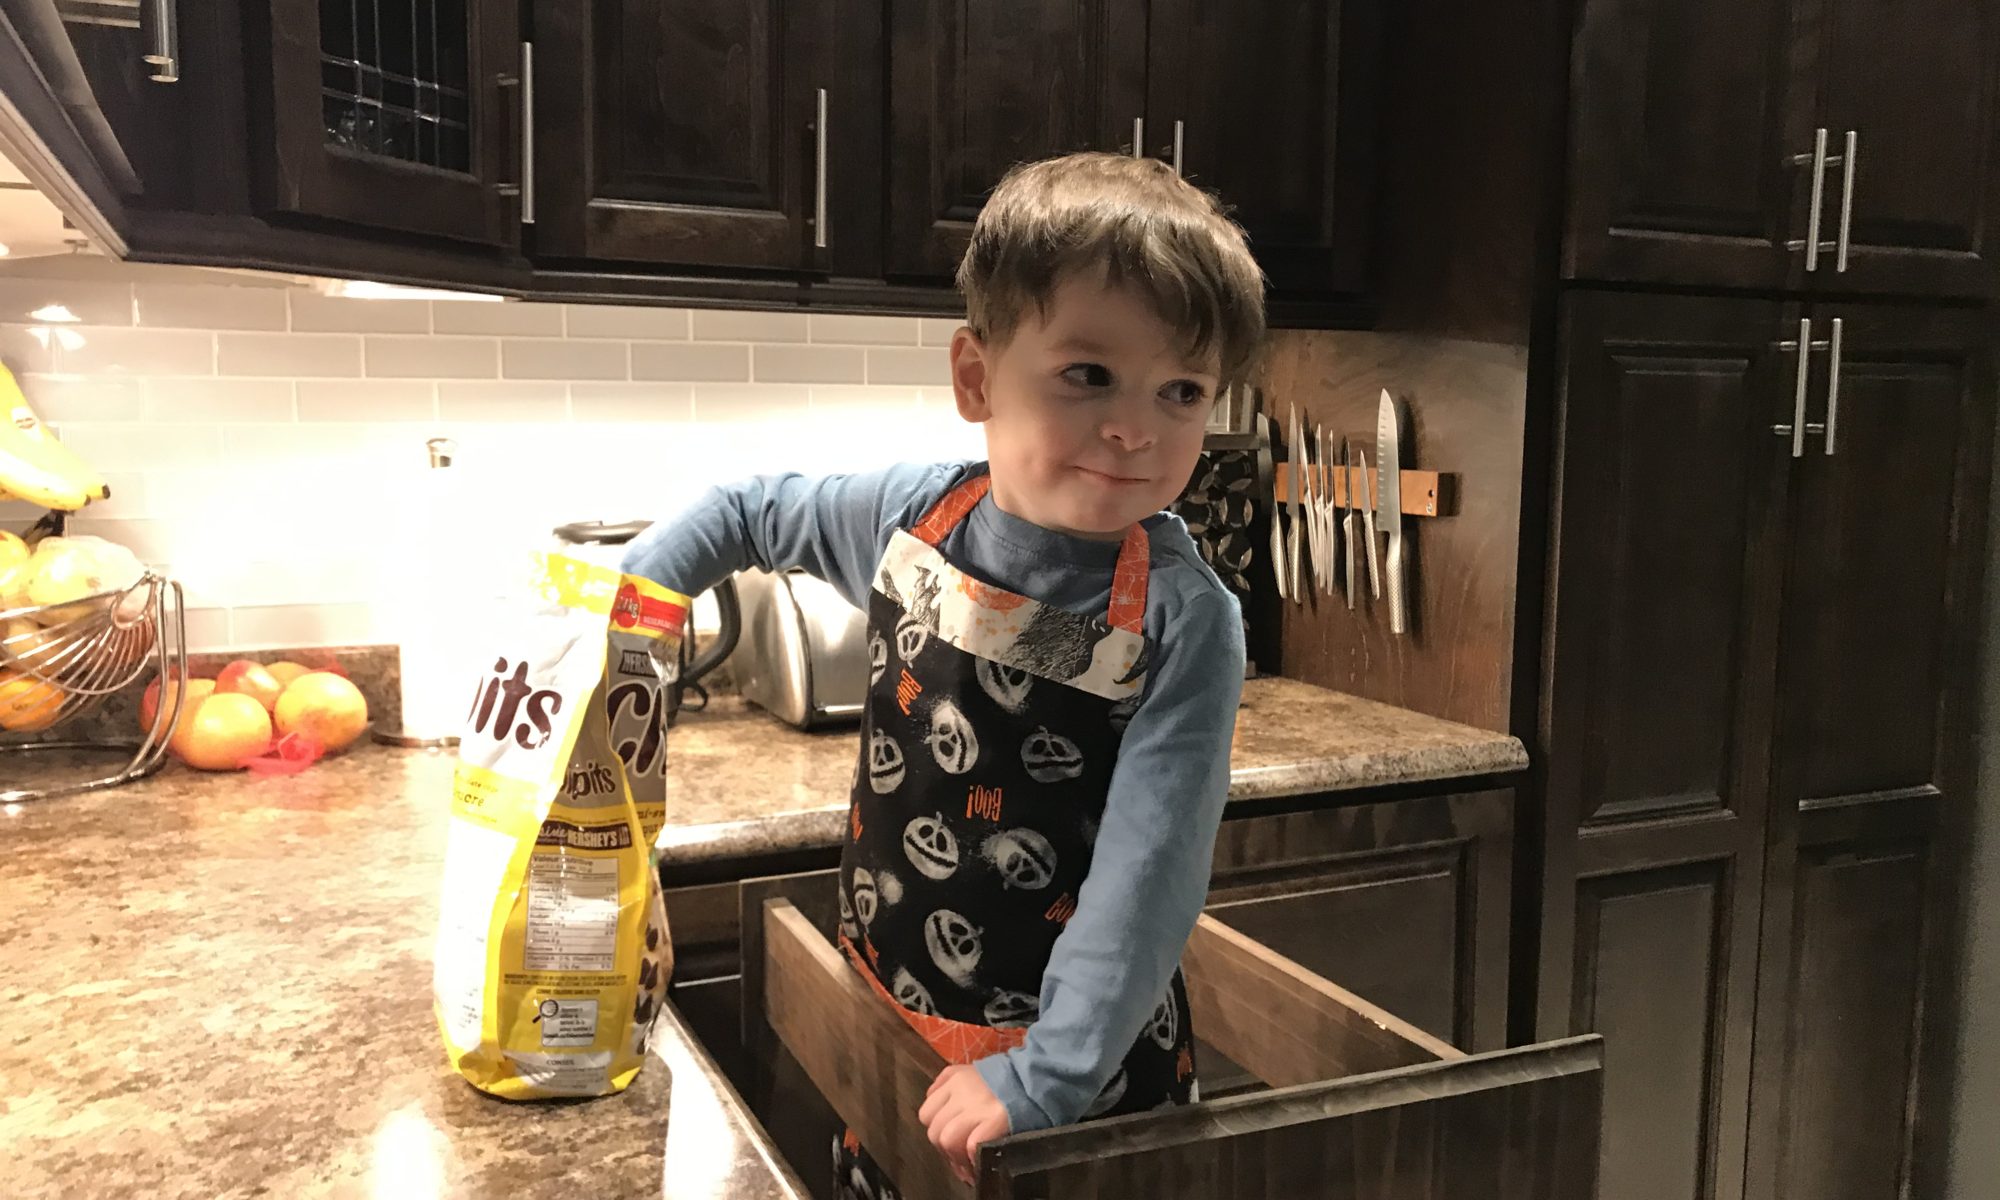
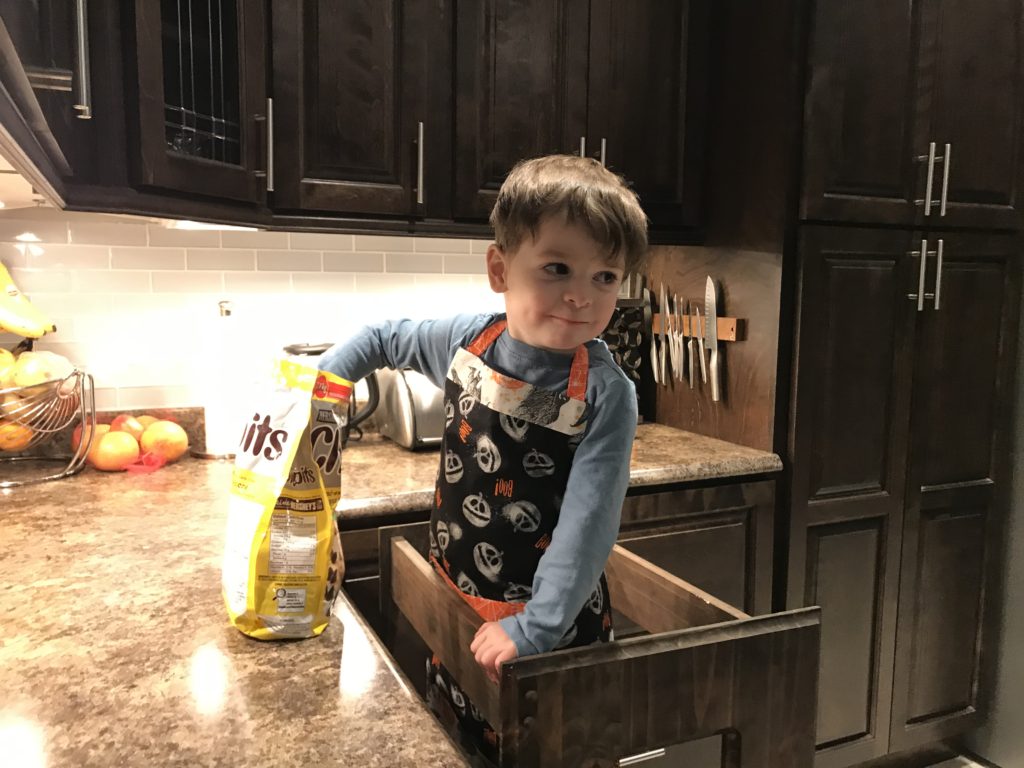
My son is nearly 3 years old and absolutely loves to bake and help prepare meals. He’s got a little learning tower in the kitchen so he can reach the countertop, and I often find him reaching for my aprons to wear. I made this one in a 3T-4T size.
My family is Halloween-obsessed. No joke. We spend weeks preparing costumes every year, and we go a bit nuts with decorating the outside of our house. The little one has caught the Halloween bug and just loves anything spooky!
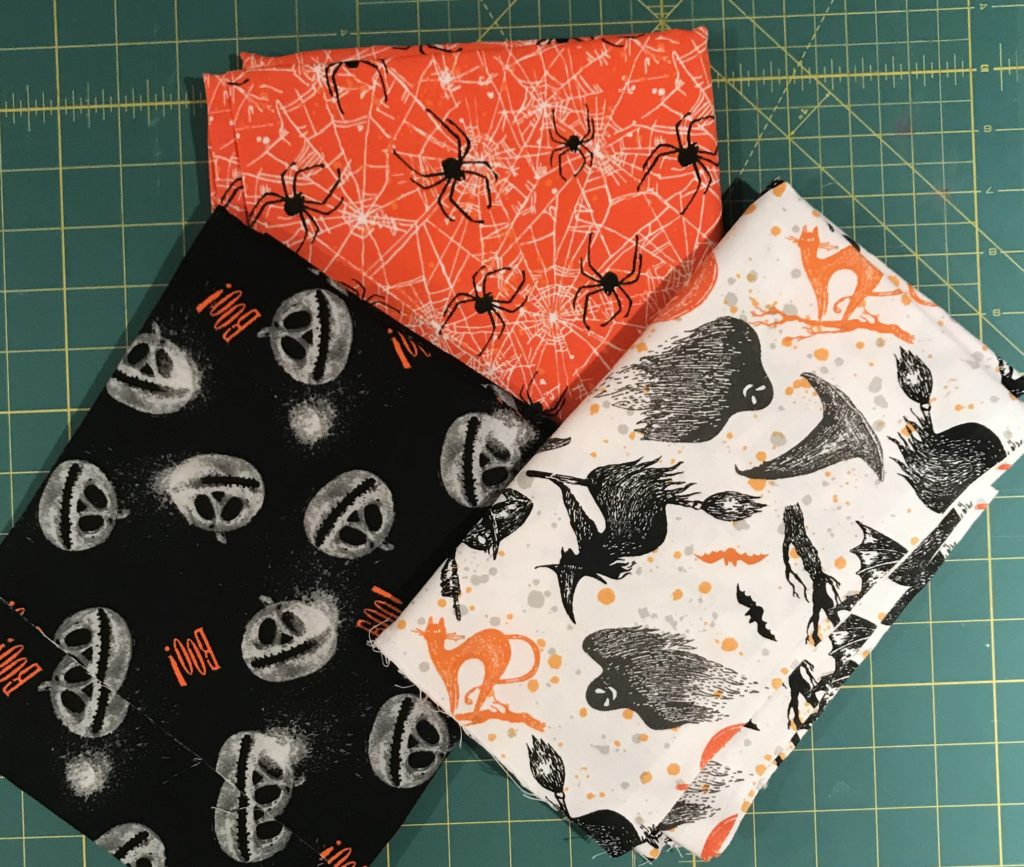
One way I make sewing a bit more economical is by buying seasonal fabric (Christmas, Halloween, Easter, etc) on clearance at the end of each season, to use the following year. I have a stash of Halloween fabric from years gone by, so there couldn’t have been a more perfect time to use my spookiest prints than for my sons first apron.
Materials needed for this tutorial:
3/4 meter of fabric (I used cotton, and I used 3 coordinating fabrics in smaller quantities)
Safety pin
Ruler
Cutting wheel
Cutting mat
Pins
In keeping with quilting rules, I did not pre-wash the cotton for this tutorial. If you’ve ever pre-washed cotton you will know that it frays and gets terribly tangly around the edges after going through the dryer.
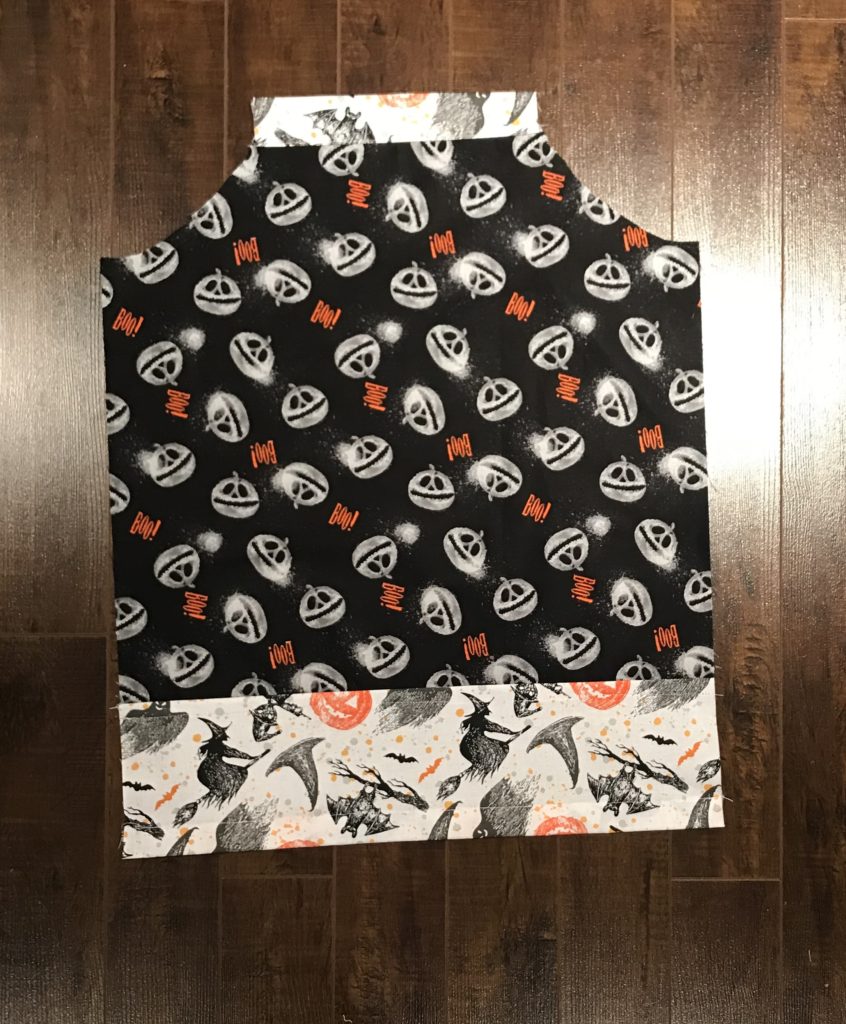
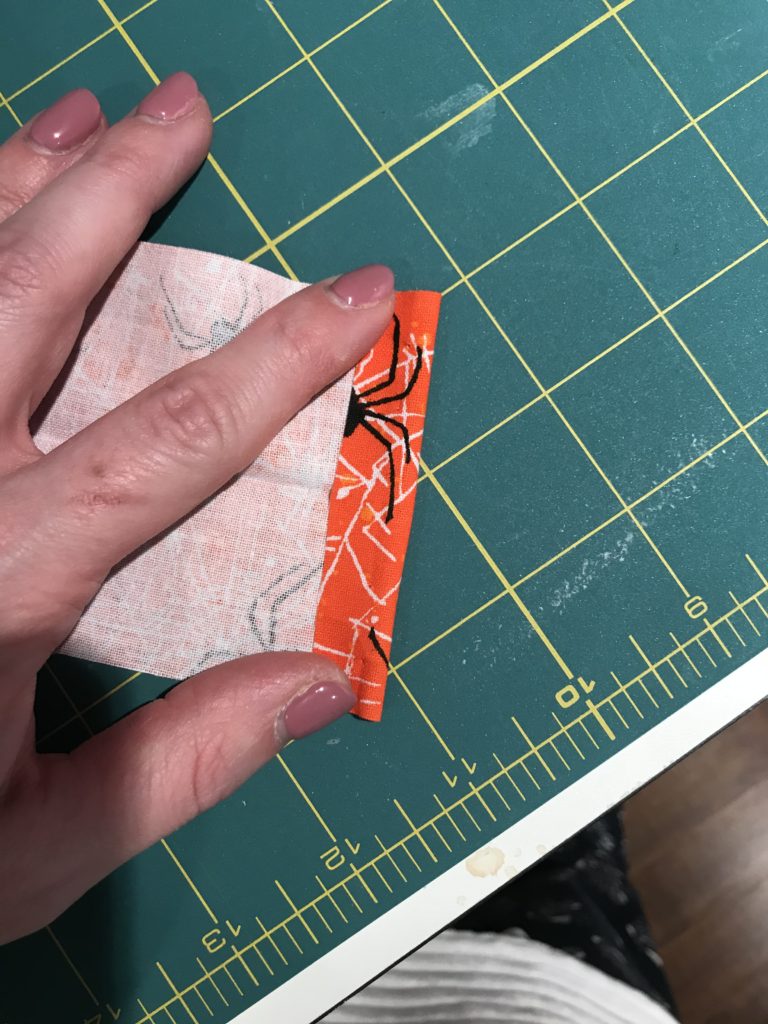
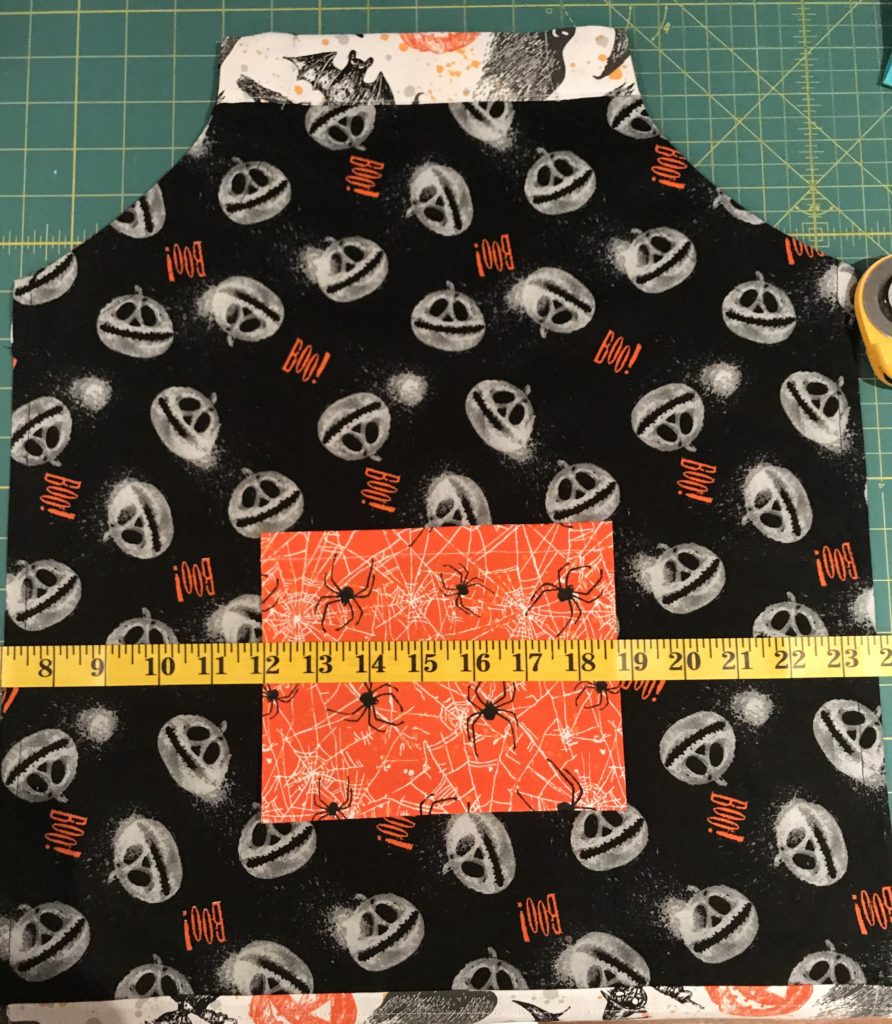
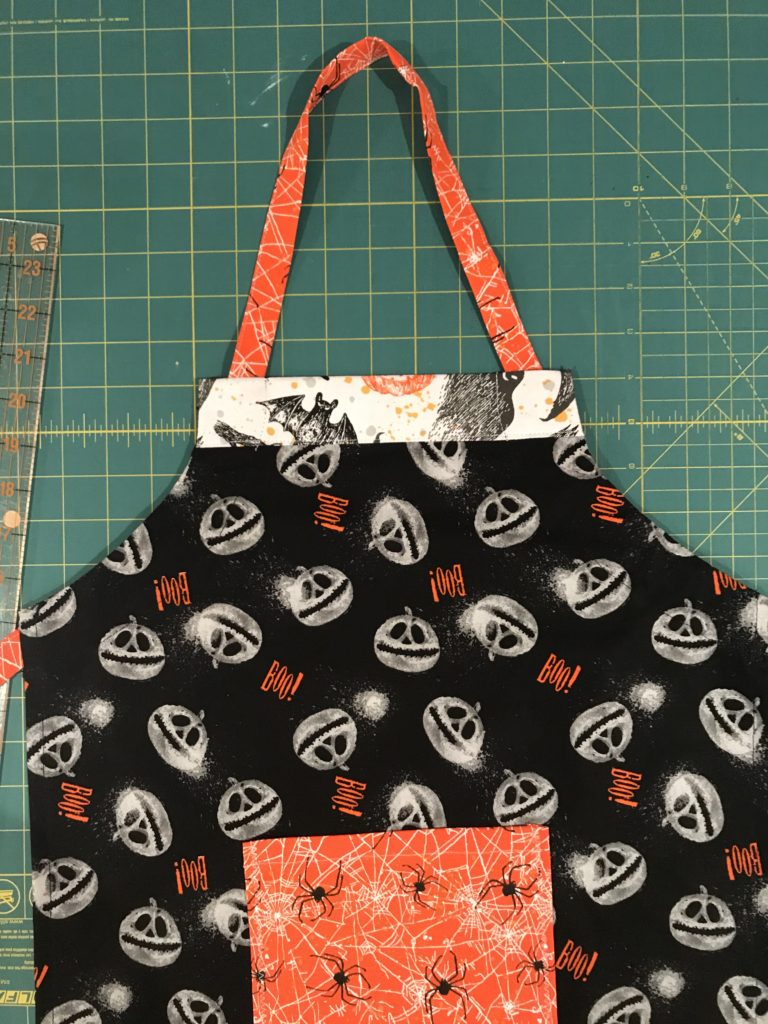
I started by ironing my fabric to get the creases out. I was using 3 coordinating Halloween fabrics so I selected one for the body, one for the trim (around bottom and top of apron), one for the pocket and tie.
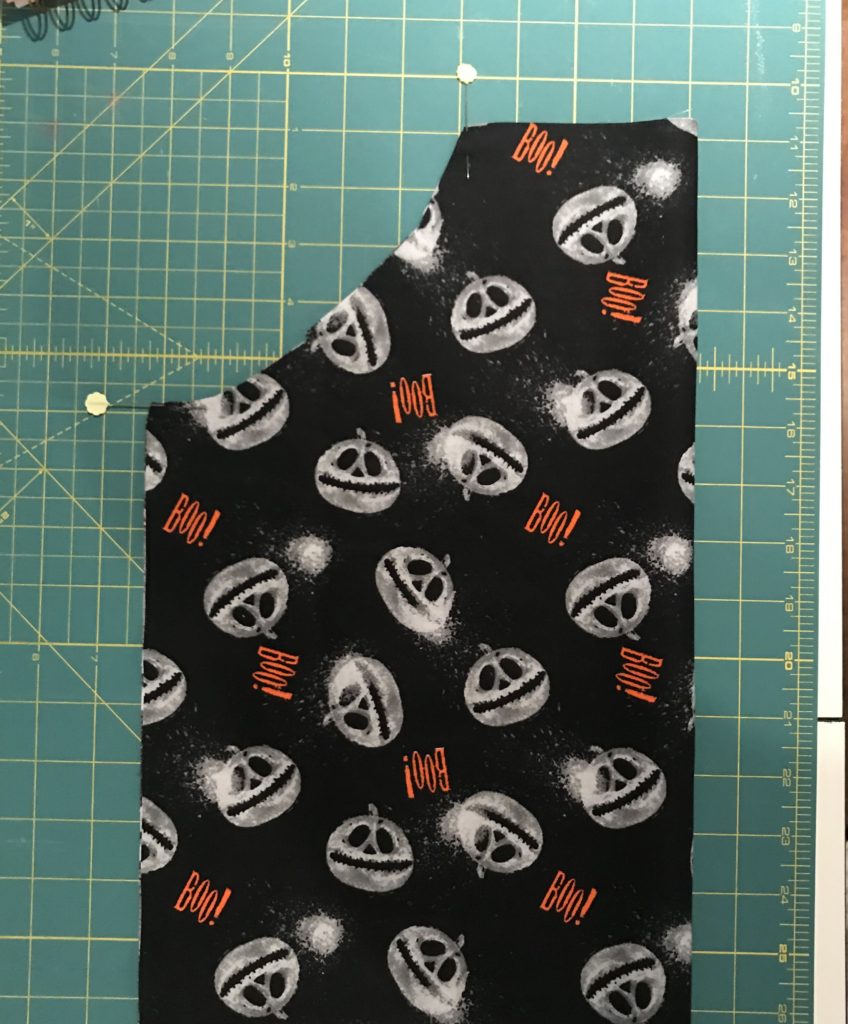
Using my cutting mat I laid out the fabric for the body of the apron. Being aware of the direction of the print on the fabric, I cut a rectangle that was 19 inches wide and 28 inches long. In hindsight I probably could have gone with 25 inches long because the apron did end up being a bit long on my son, but as he grows it will still work for him.
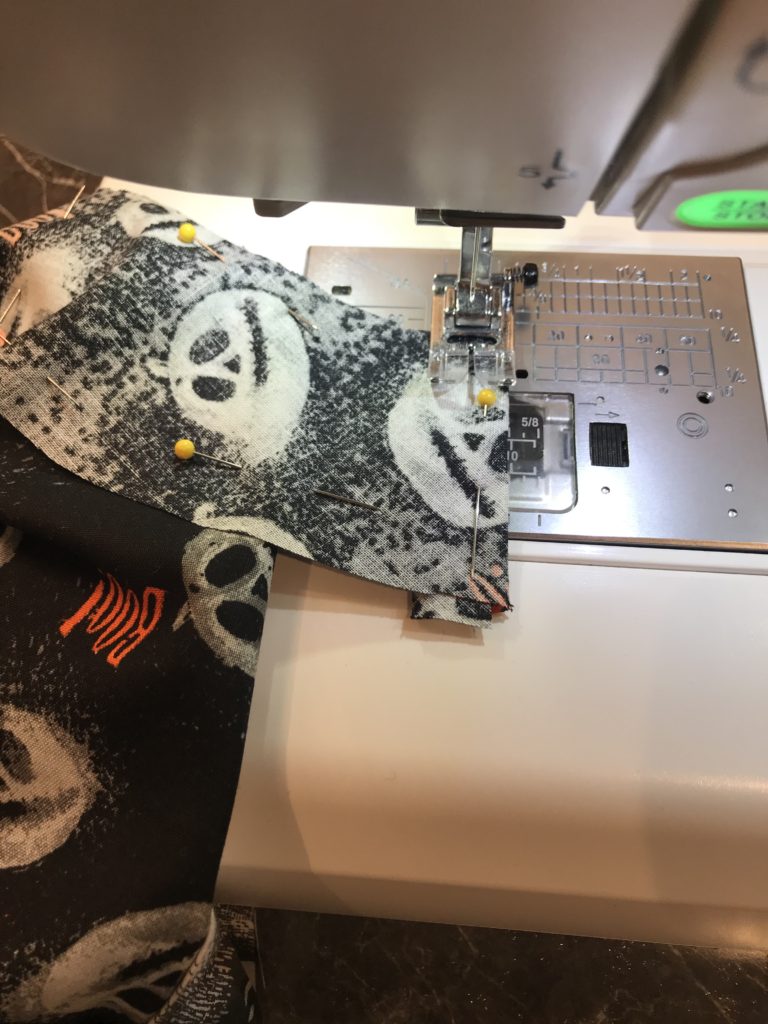
Once I had the 19WX28L rectangle cut I folded it in half lengthwise (the folded piece would now be 9.5WX28L). Working from the cut edge I measured down from the top 5 inches, placing a pin. Working now from the folded edge at the top of the apron body, I measured across 4 inches and placed a pin. The area between those two pins is the armhole.
Next you need to cut between those two pins. I’ve included a photo here so you can see the shape I use. If you make it too rounded it won’t fit nicely under the arms.
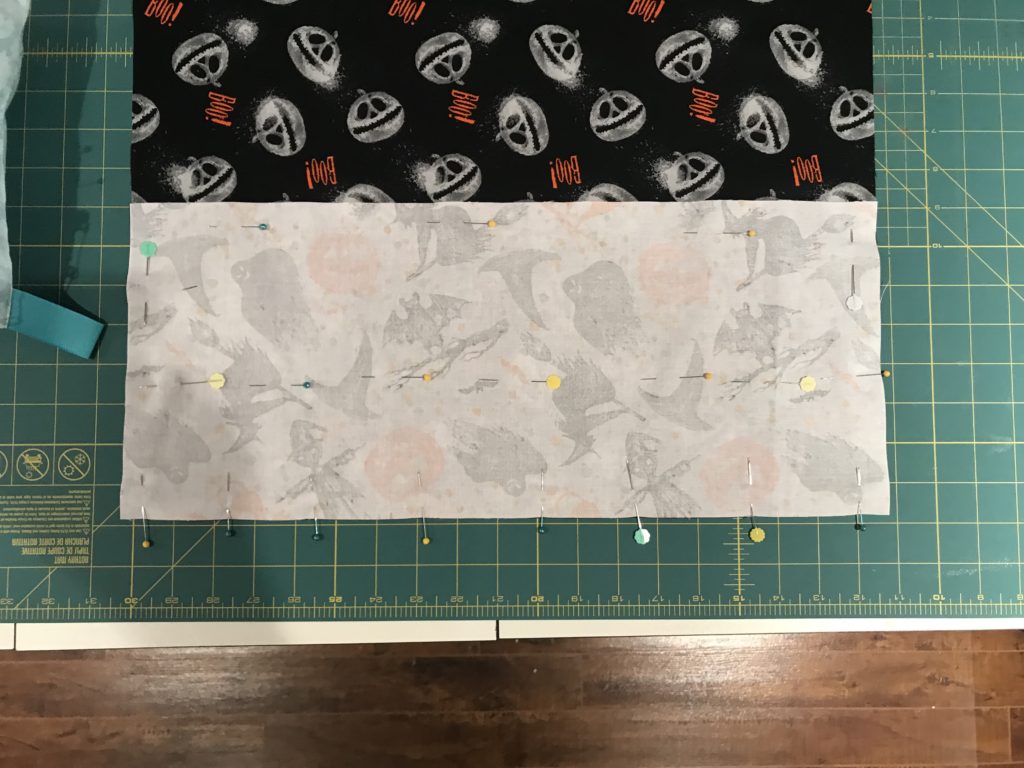
Once you’ve cut the armhole, you will start the trim piece for the chest and bottom of the apron. For the bottom (again, mind the direction of the print on your fabric!) I cut a piece that was 8 inches long and 19 inches wide. For the top I did 9 inches wide and 6 inches long.
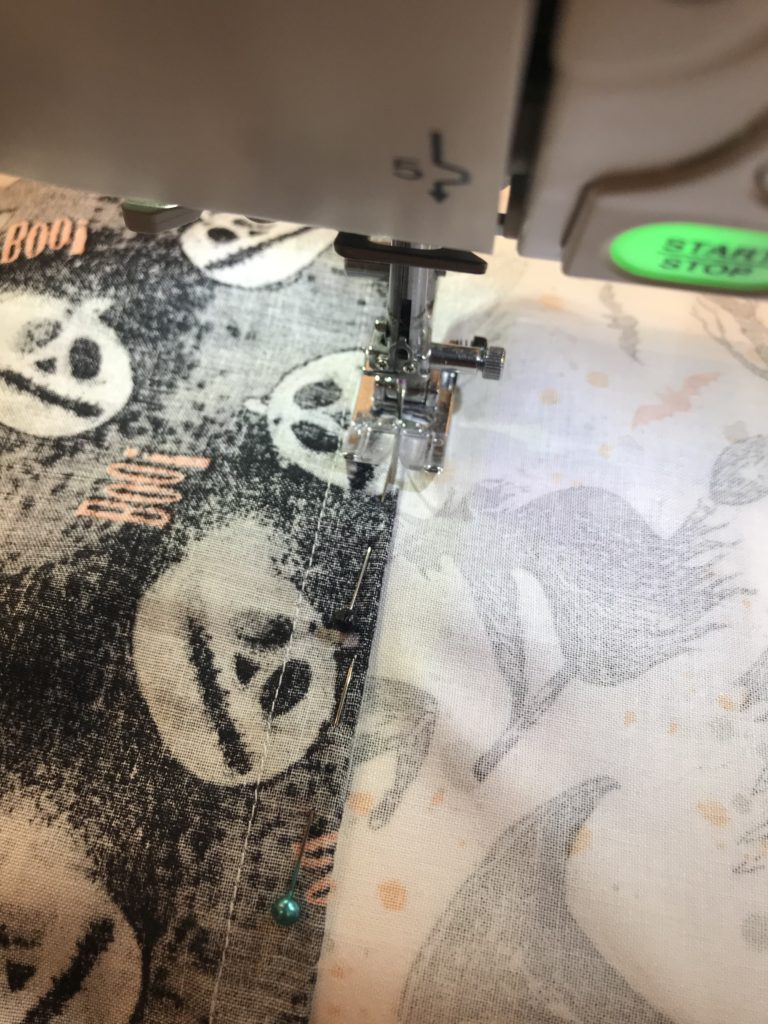
To attach the bottom piece I ensure both pieces of fabric are pressed and wrinkle-free. Then I flattened out the body of the apron and placed the rectangle for the bottom trim over top, with right sides together. I lined them up and pinned along the edge.
When I sew along this edge I use a 1 inch seam allowance, which is a lot but you’ll be making a bit of a pocket with this shortly so you will be thankful you’ve given yourself lots of fabric to work with.
Stitch along the edge. Once you’ve stitched, your 1 inch seam allowance is now 2 pieces of fabric, but we want to trim the lower piece.
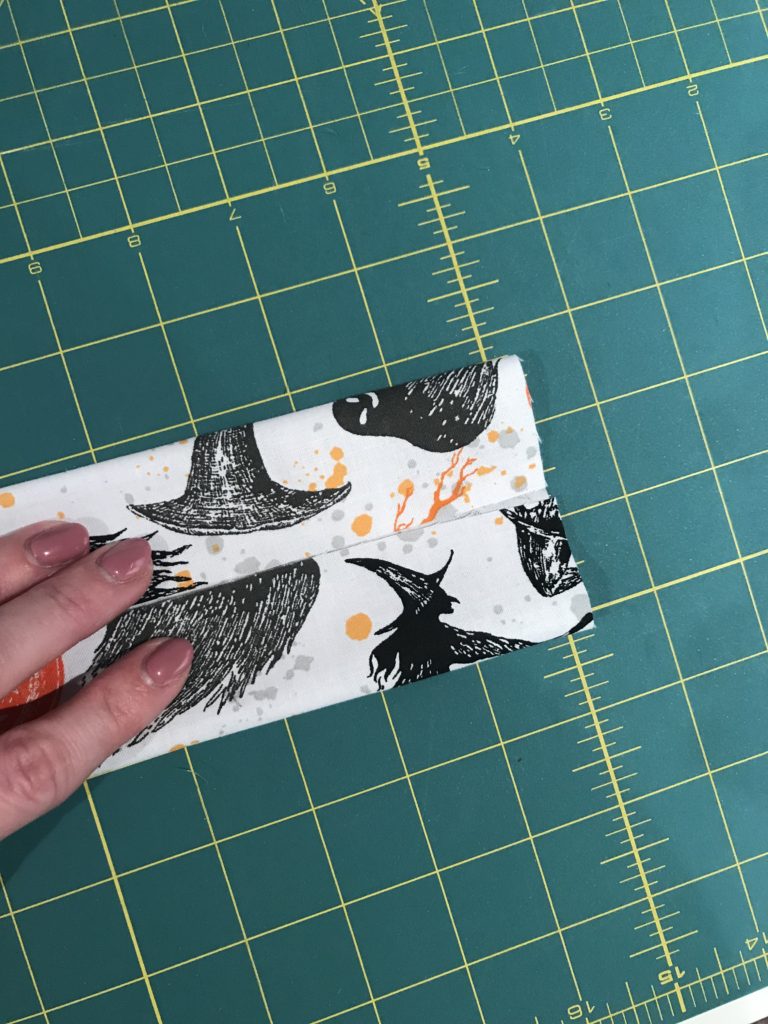
Next you want to press the main body piece of fabric (the seam allowance) downward, to cover the piece we just trimmed. Give it a good press, using steam.
The seam allowance will now be tucked up under itself, encasing the cut edge of the lower fabric.
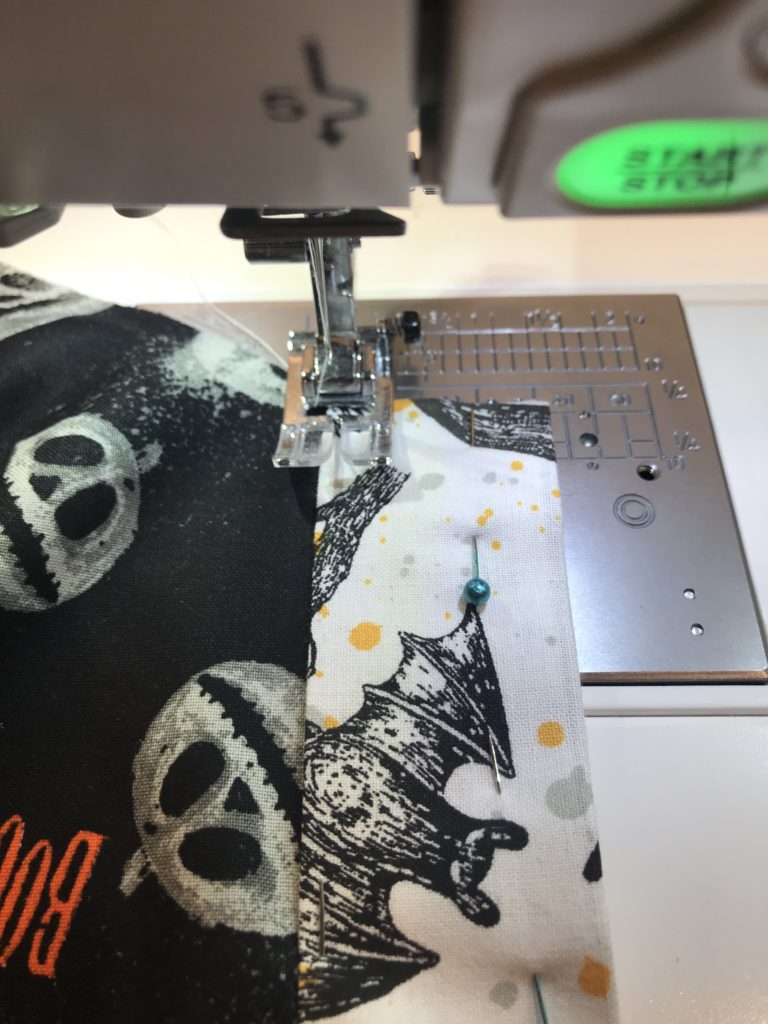
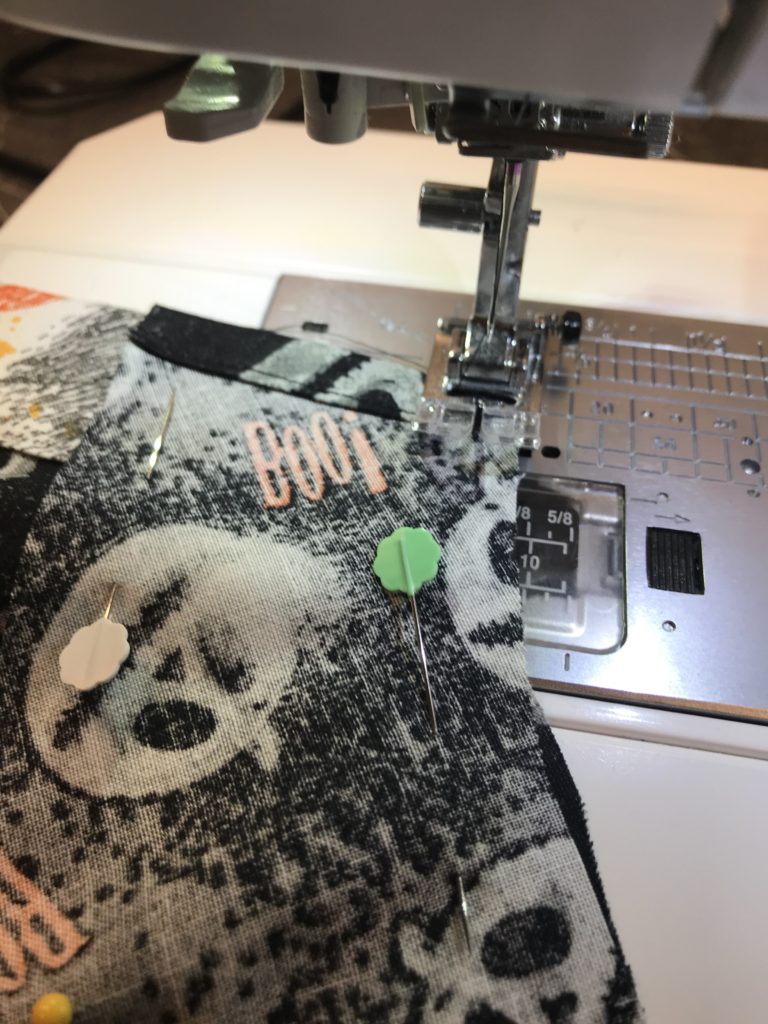
So you can see I tucked the main fabric under, pinning as I go, ensuring the other fabric is entirely covered. I then stitched along the folded edge. Note: For this stitching you will want to ensure you are using the matching thread and bobbin. The stitches will be visible from the front. Sometimes, for simplicity, I use whatever thread is already in my machine for non-obvious stitching, but from this point forward you will want to ensure you have spools and bobbins to coordinate.
Next I fold up the bottom edge of the apron to form the hem. I turn the hem up twice, 1 inch each time. I like the look of a thicker hem. So you are losing 2 full inches from the length of the apron by doing this, but it does give a nicer look.
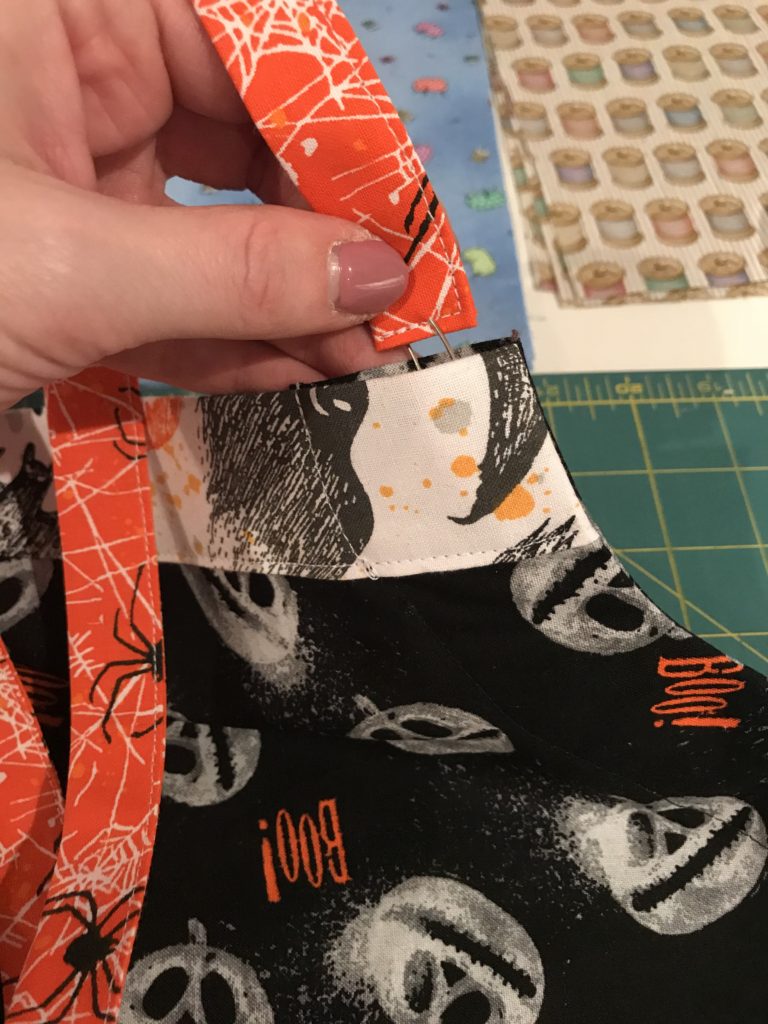
Next step is to attach the top piece of trim. So we’ve cut a piece that’s 9 inches wide by 6 inches long. Fold it down lengthwise (so the rectangle is now 3 inches by 9 inches) and give a good press. You’ll then take each of the cut edges and fold them inward.
Give it another good press, then fit it neatly over the top of the apron bib. Stitch.
Once that’s in place, give a good press with the iron. Your apron is now really starting to take shape!
Next step is to sew the sides of the apron. You will want to use a narrower tuck here than we did for the hem. I use 1 inch for the sides, pressing, then tucking it in half to ensure no raw edges are visible.
When you are stitching the sides it’s important to remember that you have a different color for the trim than the body. This means you will want to switch out your spool and bobbin part-way up the sides. I usually start with the trim first (as the thread is still in there from doing the hem and the bib). So you’re just stitching to where the fabric changes to the main body on each side.
Now the body of the apron is sewn except for the armholes. This is the part I despise every time, but it’s a must. Some people use lining for their fabric for the armholes, but I rarely do that extra step. This apron is for a toddler who grows like a weed – it won’t be around long enough to worry about lining it.
Here is the general shape you need for the armhole casings:
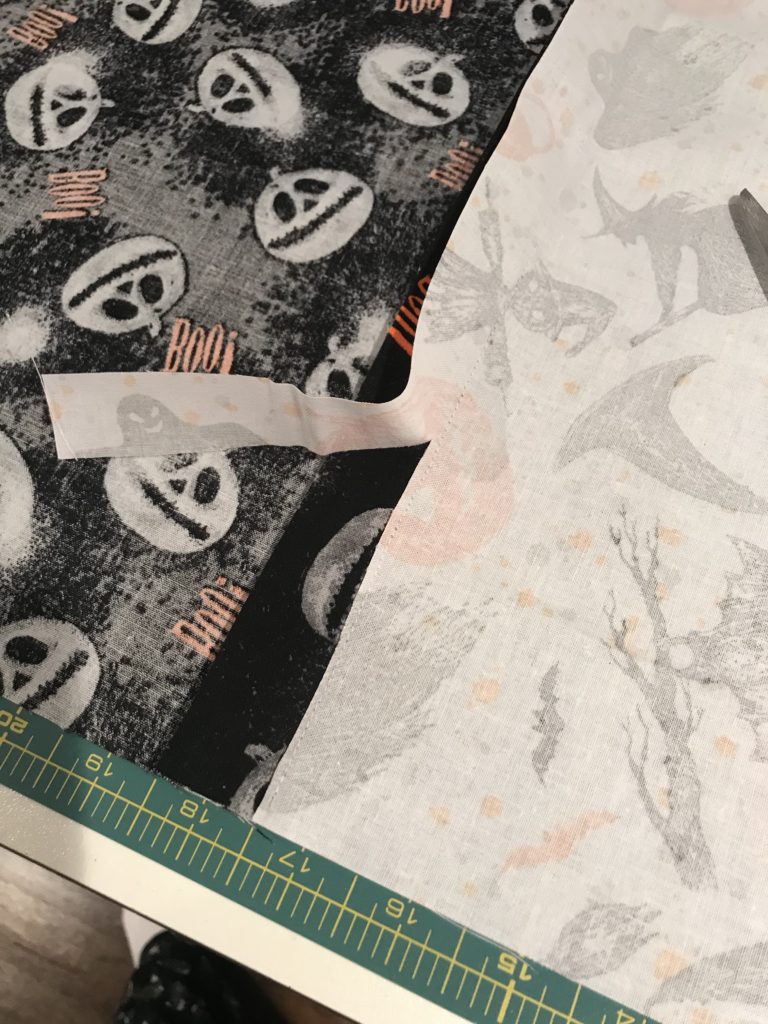
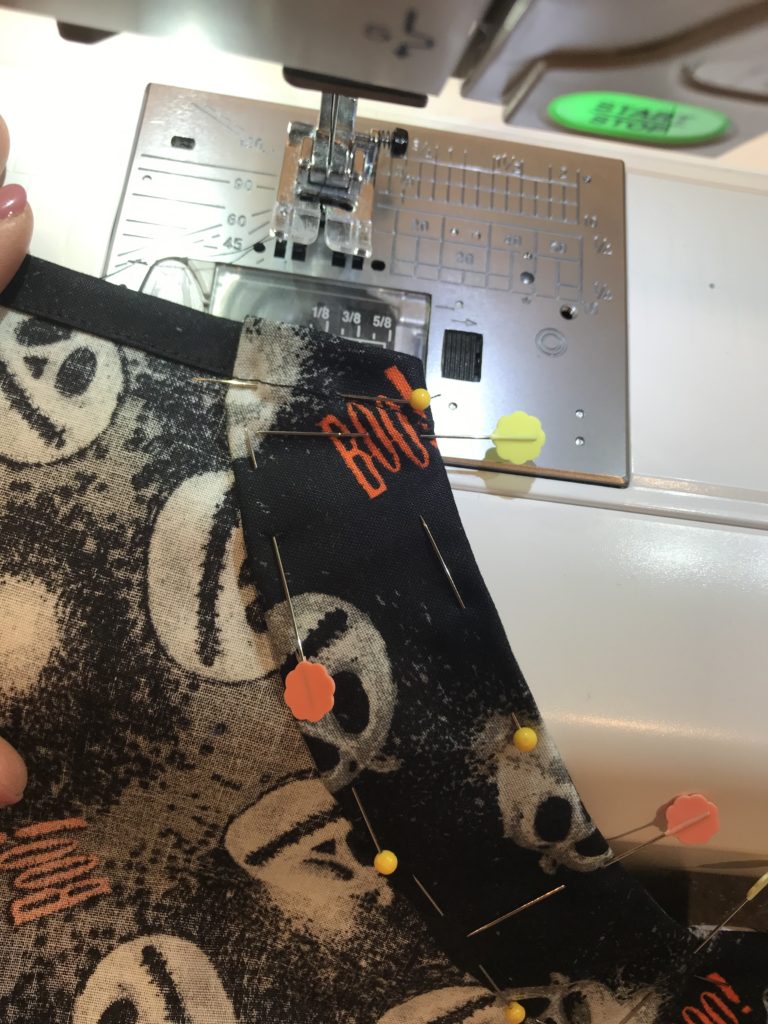
To make my own armhole casings (lining is optional here) I just take a rectangle of fabric and lay it flat against the front of the fabric (right sides together). One edge will follow the shape of the armhole you created, and then you basically measure out 2 – 2.5 inches and cut. You need to leave the ends about an inch longer so you can sew them under.
So for this next part, I’ll do my best to put it into words: You have to take that extra length and turn the ends in, and sew them shut. This facing will eventually have the apron strap fed through it, so you want to ensure the edge is not going to fray.
This next photo is where I am closing up the end of the facing (with the body folded away from the machine so I don’t accidentally stitch them together:
Then once the ends are all stitched, I attach to the armhole. I use about a 1/4 inch seam allowance here.
Once it’s attached to the body of the apron, you will turn it right side out, and press the seam firmly with an iron. Next you turn in the edge of the facing about 1/4 inch and pin along as you go. You will be leaving the ends open, again to thread the apron strap through.
Not unlike when we did the bottom trim, the top trim has two different patterned fabrics so you need to switch out thread and bobbin part-way through. If you look at the front of your apron you will notice your upper trim is about 1.5 inches. As you’re sewing the facing to the body of the apron, you are stitching over that trim. So I recommend switching out threads to give the best look.
The hard part is officially done now! You’re ready to add a pocket and sew the apron strap.
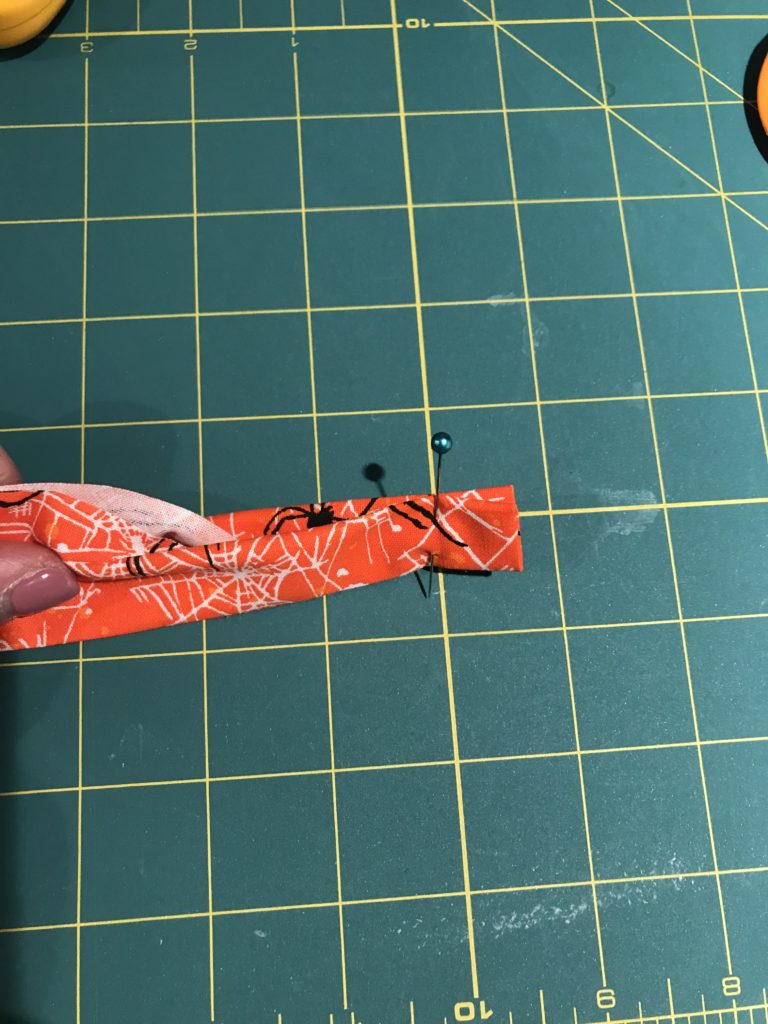
For the apron strap I cut two straps, about 36 inches each in length and 3 inches wide. Join them, right sides together. Press the seam open.
Press the ends of the strap over so no raw edge is visible.
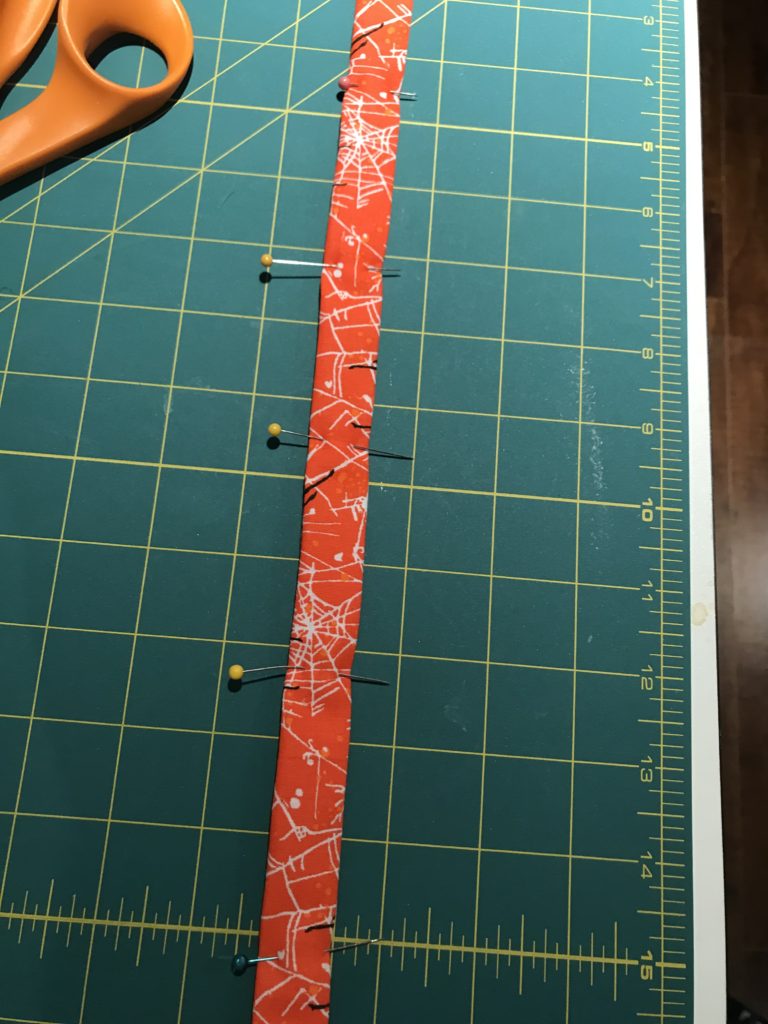
Next you need to fold the strap in half (so now your dimension will be 1.5 inches X 72 inches). Press. Then tuck each of the cut edges under a second time.
Set aside the strap and we’ll move onto the pocket. You can be really creative with pockets. You can do a big pocket, a small one, many small ones, a pocket on the bib, whatever you like. Add lace or ribbon to the top of the pocket to really dress it up.
I cut a square 8 inches by 7 inches wide. For the top of the pocket I fold down about 1/2 an inch, press, and fold down again. Stitch across the fold. If you want to add lace or ribbon, pin it on before stitching – two birds, one stone. Just be sure to use the right color thread, whichever option you choose. I like the look of the wide seam there. Then I press about 1/4 inch around the rest of the pocket.
Lay the pocket on the apron wherever you like. Measure across or from the bottom of the apron to ensure it’s straight.
Once it’s pinned in place, stitch around the three remaining sides, ensuring you backstitch properly at the top of the pocket where there’s likely to be more strain on the seam as the pocket gets used.
Give the apron a good press, using steam, and you’re ready to put the apron strap through the facings.
Back in my early years when I began sewing my mom taught me how to do this – attach a safety pin, close it up, and feed it on through. This is a great trick if you pull a string out of a hoodie or a drawstring out of pants.
As you do this, ensure your strap stays flat and doesn’t twist.
And you’re done! This is such a fun little project and once you’ve done it a couple of times, you can get these out in about an hour. They are a great stash-buster and they make great gifts.
You can personalize aprons by appliqueing a name or initial on it. I’ve also seen people applique things like mixing spoons or cupcakes on them. One day I’ll find time to try that out.
Other ways to personalize would be including decorative stitching, embroidery, decorative ribbons or lace, buttons, etc. The possibilities really are endless.
My little Halloween-loving toddler, on his learning tower modeling his new apron!
Thanks for stopping by and checking out my post today!
Oh, and when you go to wash this apron it’s best to knot the strap together because it’s adjustable, so it can come out in the vigorous washing machine. If it comes out you can always use the safety pin trick above to thread it back through.
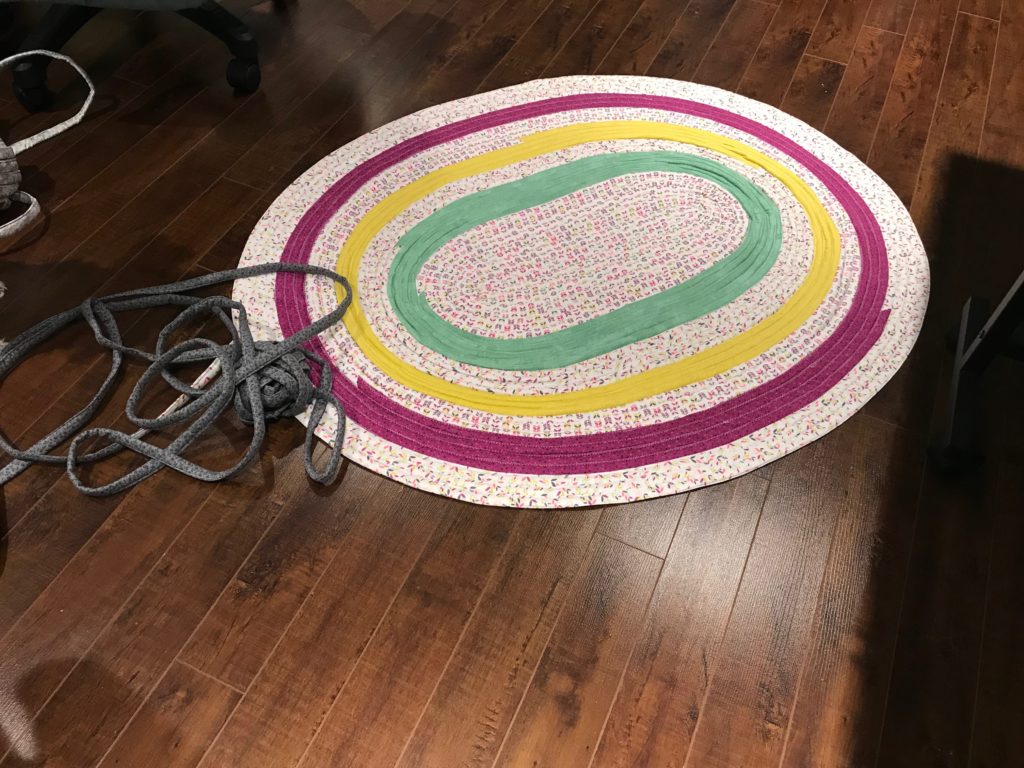
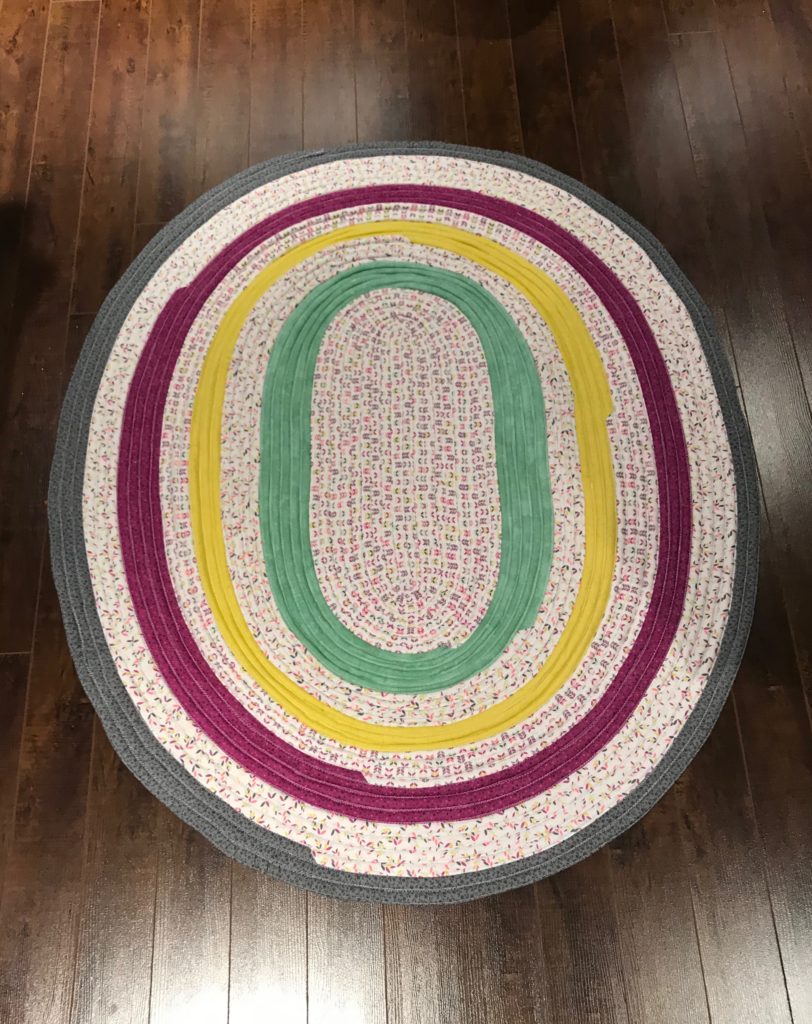
A number of months ago a crafty friend of mine asked if I wanted to make jelly roll rugs together! Intrigued by it’s unusual name I looked it up. Well, they are so cute I just knew I needed one for my sewing room.
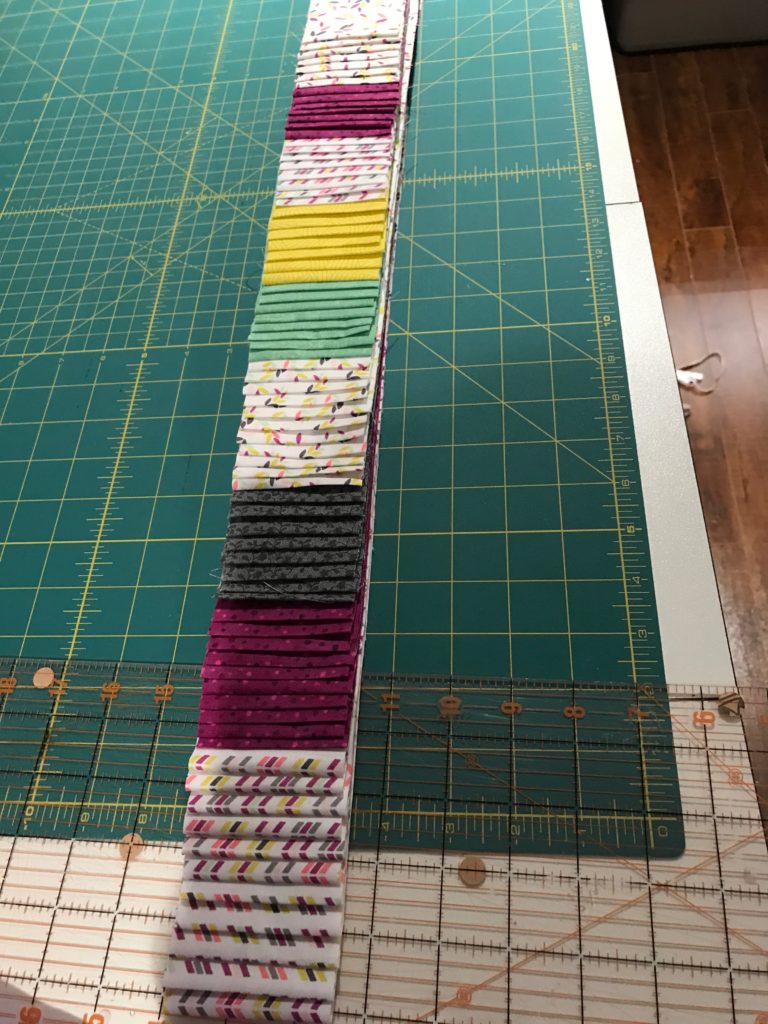
Gillian picked up a pattern online for $10 at the Fat Quarter Shop https://www.fatquartershop.com/jelly-roll-rug-downloadable-pdf-sewing-pattern-rj-designs and we started looking around for jelly rolls. Gillian got pre-cut jelly rolls and I (somewhat foolishly) picked out fabric and decided to cut and coordinate on my own.
I didn’t bother looking up how much of each color to use, I just started cutting strips and then arranged them in a color pattern I had in my head. I was using a combination of (kind of) solid colors and whites, so I wanted to alternate, and I knew I wanted the dark grey fabric on the outside perimeter of the rug.
The pre-cut version is definitely more cost effective, but I had specific colors in mind. She also used pre-cut batting but I used scrap batting that I had left over from quilts. I am trying my hardest to reduce my fabric stash, so while it’s not as convenient to have to cut and join all that batting it is nice to use up what I already had.
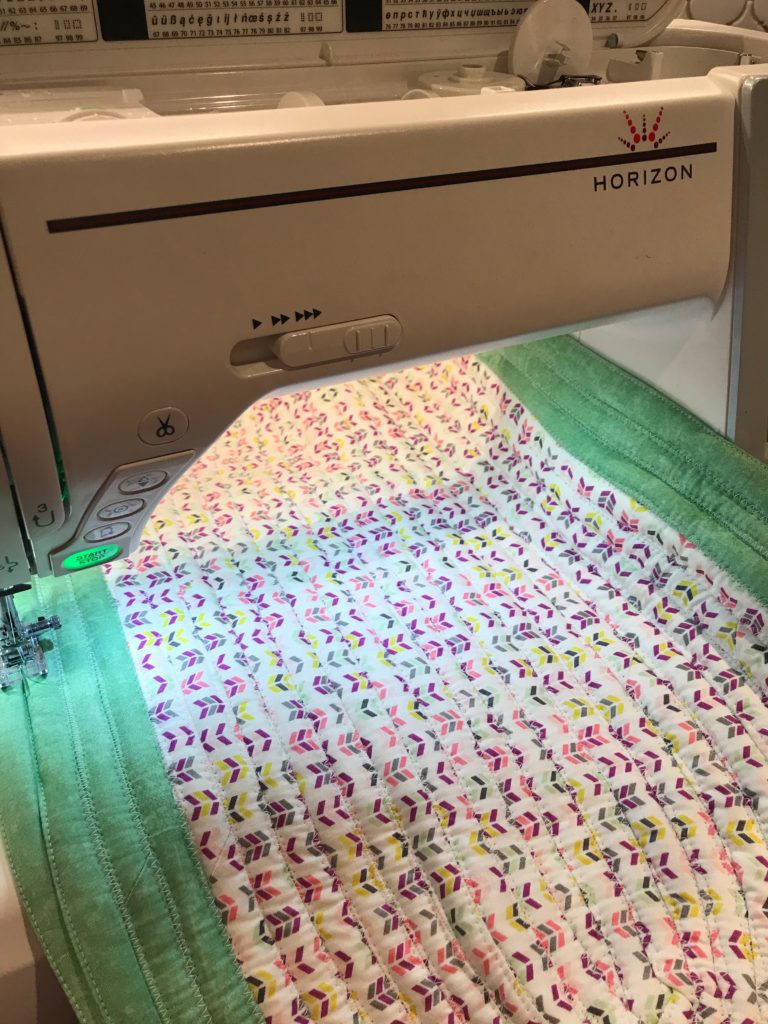
We did this project over the course of 5 evenings, and we were both surprised at just how long it took. The first night we joined the fabric from the jelly rolls. The second and third nights we made the “cording” (sewing the batting inside the fabric). The fourth night we started coiling, and the final night we finished them off. We spent a few hours each night at this, so it took quite a bit longer than expected.
The pattern is easy to follow and it’s repetitive so it’s a great project to do with somebody (ie. the chit chat won’t distract you and cause you to lose your place).
I wanted a larger rug for my room so I didn’t stick to 2 jelly rolls, but Gillian did.
In the end, the rugs turned out great. One of the challenges I had was that the size of the rug was so big it became heavy and a little cumbersome to constantly push through my machine neck.
Also, I didn’t take note initially in the pattern when it said to sew with the rug to the left, which meant my rug “grew” into the neck of my machine. I thought I could make it work until the rug got a bit too big. The picture below is where the neck of the machine started to get a little crowded. I ended up snipping the threads and turning the rug it over so I could get the fabric back to the left of the machine, and then I kept going. Would have been easier had I done it right from the start.
One of the biggest lessons we learned while working on this project was to stop frequently and press the rug with a hot iron, which seemed to help keep things somewhat flat. We used Flatter spray in a delightful Fig scent in hopes that the rug wouldn’t go “wavy” around the edges.
When we were done we did notice both of our rugs were wavy around the edge, but with lots and lots of Flatter spray, a hot iron and some steam we were able to make it work.
This is definitely a project I will repeat again at some point as it turned out really cute for sure. I’d love to find some more jelly roll projects to test out as well. This was my first time using or hearing of jelly rolls, somehow.
Happy Thursday! I’ve been absent for a couple of months while the busy holiday season was upon our household. I assure you, though, that doesn’t mean I wasn’t sewing.
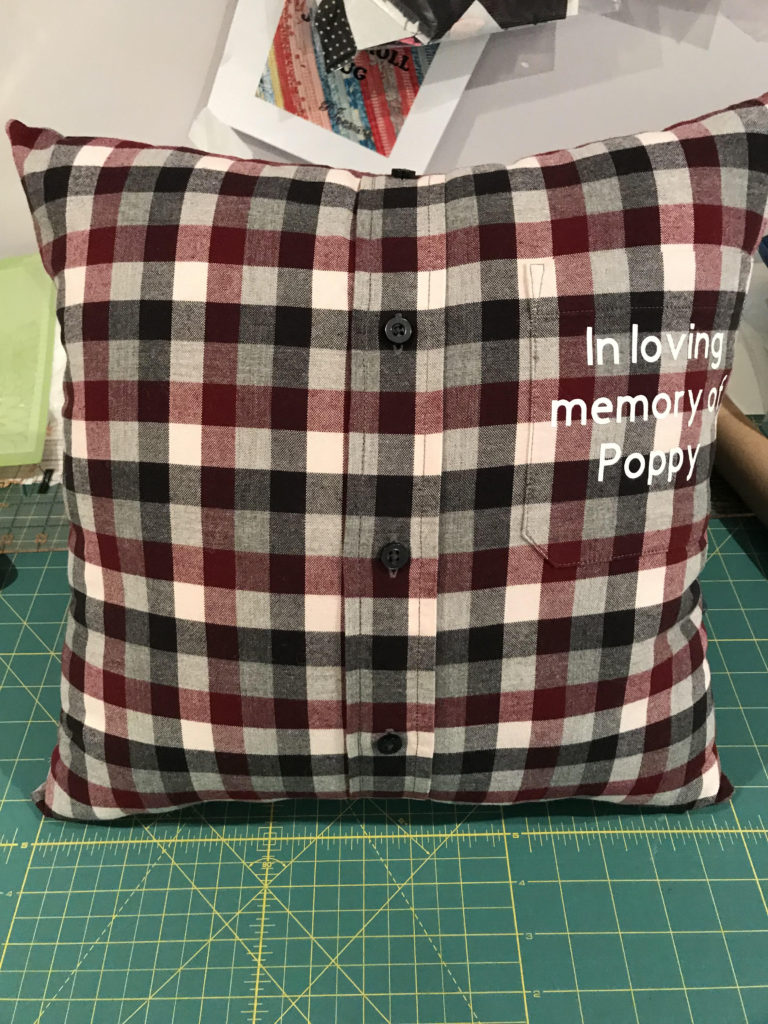
Today’s post is about a simple memory pillow I made back in December. Armed with a shirt, teddy bear stuffing (Loops and Threads is my brand of choice) and my Cricut, I whipped this up in about 45 minutes.
My sewing machine (Janome Horizon 8200) has text stitching capability but I don’t feel it’s one of the machines best features. The text is a little thin with not much variation, therefore I almost never use it.
Instead of hand embroidering, I decided to use my Cricut Explore to cut vinyl (iron-on) for the text on this pillow. The Cricut Explore is really easy to use and the this part only takes about 10 minutes. I measured the pocket (where I would place the vinyl) and that’s how I came up with the sizing. I used Cricut Design Space and a standard font, entered the text, cut the vinyl. Easy peasy.
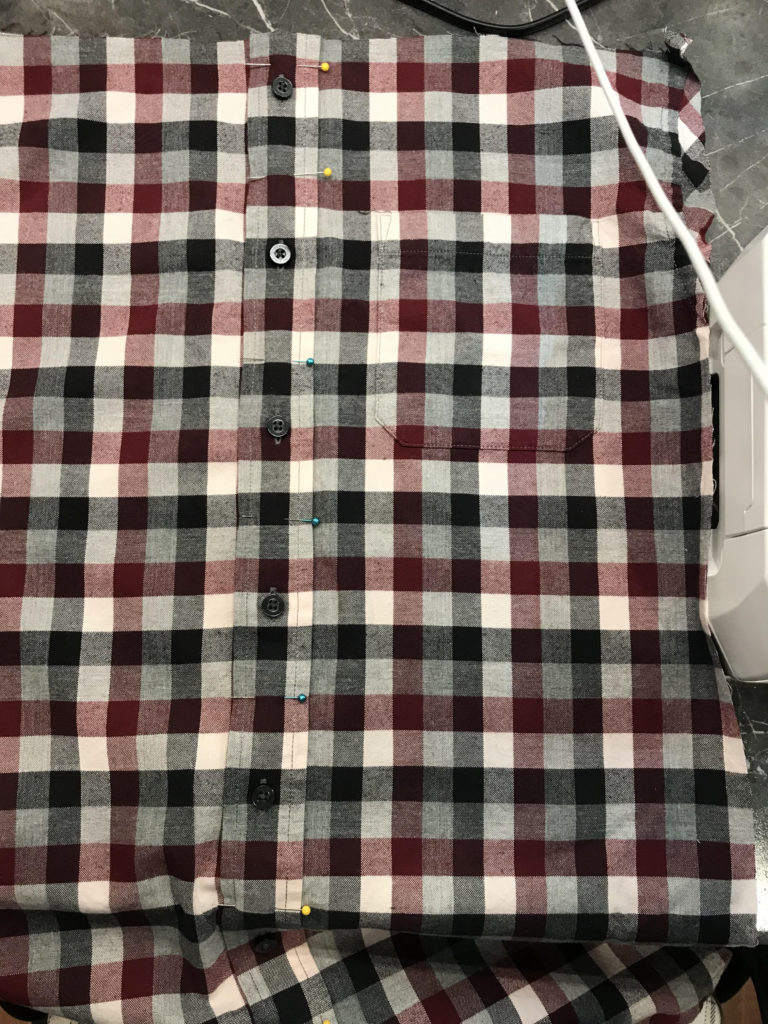
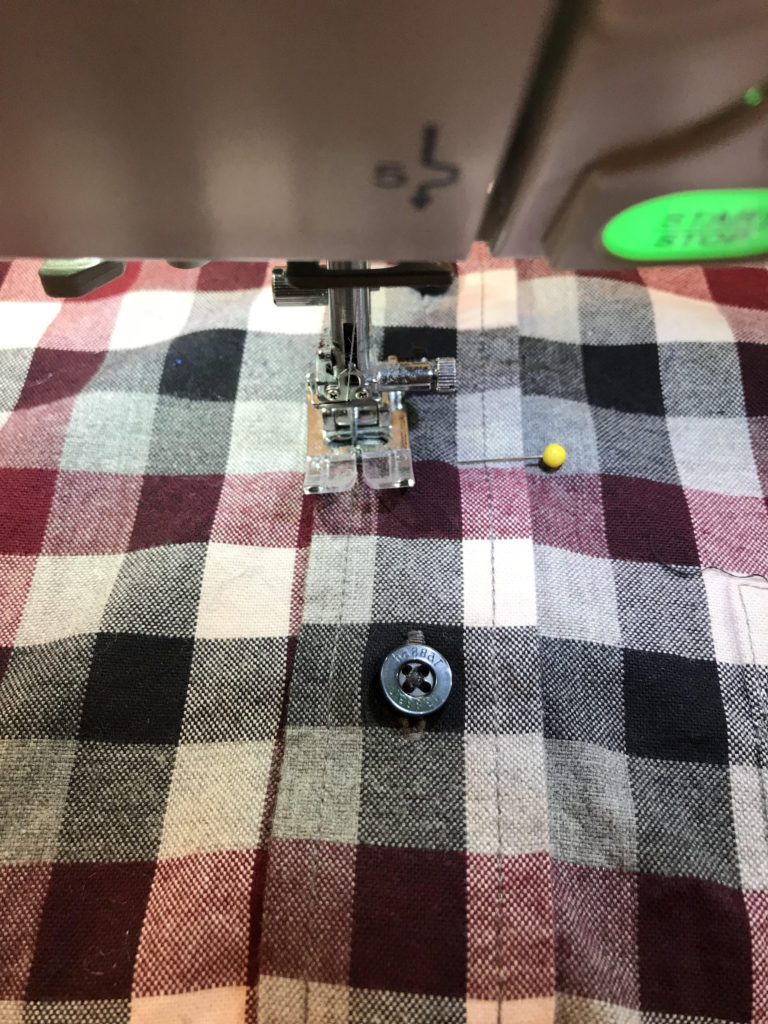
I started by pinning the front of the shirt together to keep it stable. Without pinning, you can get pulling in the fabric which can cause uneven cuts. Probably most important here where the fabric is an obvious plaid.
Next I took the shirt and cut off the sleeves and collar. I did so sparingly, though, because the shirt was not overly big and I wanted a finished pillow about 16″ X 16″. Once the sleeves and collar were gone, I took the buttoned halves apart and pressed each piece until all wrinkles were gone.
I stitched carefully down the front of the shirt, securing the two pieces together at the button column. This is important so the pillow doesn’t open up once stuffed!
Next I was ready to adhere the vinyl lettering to the pocket of the shirt. I had not anticipated how difficult this would be. I have used Cricut vinyl many times on shirts, but this shirt was a thicker fabric. I heated up the fabric with the hot iron, placed the vinyl down, ironed over the clear plastic backing, lifted gently but the vinyl didn’t adhere. I repeated this process several times before almost deciding it wasn’t going to work. Eventually I left the iron in place longer, then once the iron was removed I took the shirt over to a firm surface and pressed the clear backing into the fabric, being careful not to burn myself. Because the vinyl was quite hot, this worked better than simply ironing over the clear backing.
Once the lettering had cooled I cut the front and back of the shirt the same size, which was roughly 17.5″ X 17.5″. I put the right sides of the fabric together (wrong sides facing out), pinned together and left about a 6 inch opening along the bottom (middle) of the pillow.
I stitched around the edges, then turned the “pillowcase” right side out through the 6 inch opening. Now it’s time to fill the pillow! I always start by putting small amounts of stuffing in each of the 4 corners of the pillow. I used teddy bear stuffing for this as it’s quite soft and squishy, which is perfect for hugging when you’re missing your favorite person and only have their shirt to hug.
Once I had the pillow filled evenly, I overstuffed the pillow around the 6 inch opening. I then tucked in the edges of the opening and hand stitched it together.
Now the pillow is stuffed, stitched and ready to gift!
This is a quick project but a meaningful one. A lovely gift for a person who’s missing a loved one.
If you don’t have a Cricut and aren’t in the mood to embroider, you could also skip the text and just make the pillow. Another option is to put a note or a card in the pocket.
I hope you enjoyed today’s tutorial. Thanks for stopping by!
For as long as I can remember, crafting has been one of my greatest passions in life. I love creating, customizing, and dreaming up new projects and bringing them to life.
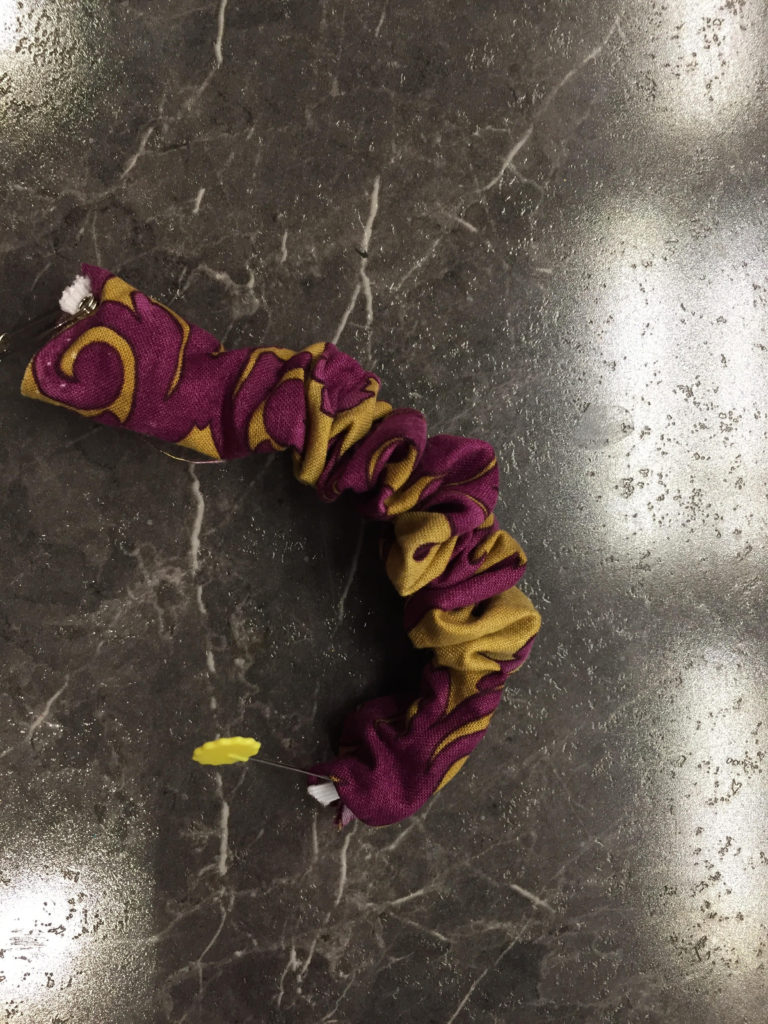
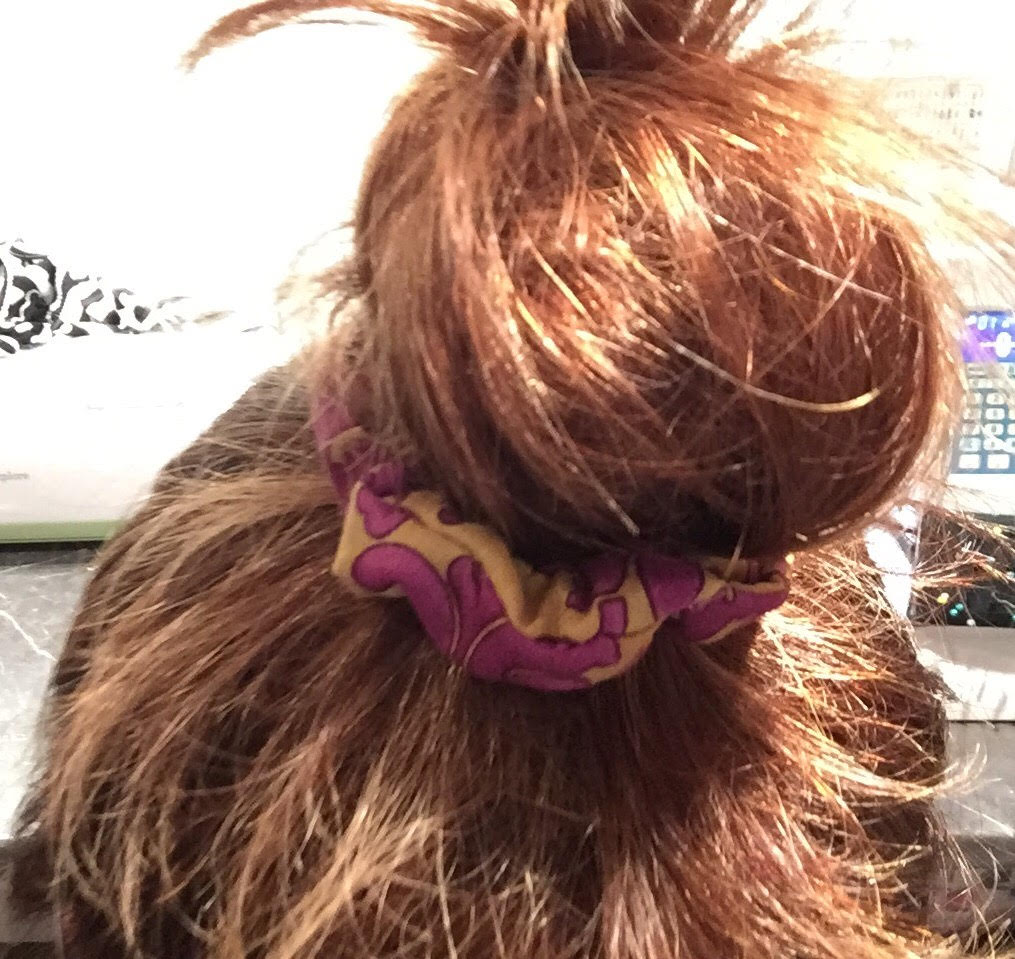
When I was just 4 years old my amazing mama taught me how to sew. She would do the cutting, of course, and she would sit with me while I used her Singer sewing machine, but with her passion (and patience!!!) she taught me to make small things like pillows and blankets for my Barbies. The first project I ever did, though, was a hair scrunchie. I made a million of them and I wore them proudly.
Lately I’ve been seeing scrunchies popping up all over the place, including Lululemon. I guess they really are making a comeback! I am still hooked on the Invisibobbles but scrunchies really are a cute accessory.
Last night I found some cute fabric in my stash and decided to put it to good use. This tutorial includes measurements for a small scrunchie and a regular scrunchie. Small might be best for people with thin hair (or for children). This project shouldn’t take more than 15 minutes once you master turning this thing right-side out.
Materials needed:
Scraps of fabric (cotton, lightweight denim, etc)
1/4 inch wide elastic
Safety pin
To start you can cut a piece of fabric 3 inches wide by 9 inches long (for a small scrunchie), or 3 inches wide by 16 inches long (for a regular scrunchie).
Fold your fabric lengthwise with right sides (printed sides) together. Stitch the long edge with a 1/4 inch seam allowance.
Turn the tube of fabric right-side out. I’d tried a few techniques for turning fabric and I’d never found a really easy way until I saw this YouTube tutorial:
Next take your elastic and put a safety pin through one end, and close it up. In the other end you can put a stick pin or another safety pin. This needed should be big enough that it kind of acts as a holder at the end of the tube – it sits lengthwise across the bottom of the tube so the elastic doesn’t pull through.
Once both ends of elastic are visible you want to stitch them together, with about a 1 inch overlap. If you’re machine stitching I would use a zigzag stitch.
Next you want to close up the ends of the tube. So you will feed one end into the other, and then on the raw edge of fabric you want to tuck it under so no raw edge is visible. It should only be about a 1/4 inch tuck.
You can sew the end of the tube by hand or with your machine. I use my machine for this part. Sew directly across the opening. You’re done!
If you want a fuller scrunchie you can add 1 inch to the width of the fabric (instead of 3 inches, go with 4) and it will do the trick.
I hope you’ve enjoyed this tutorial! While writing this I have the sudden urge to throw on some neon clothes and watch Full House. Weren’t the 80s just the best?!
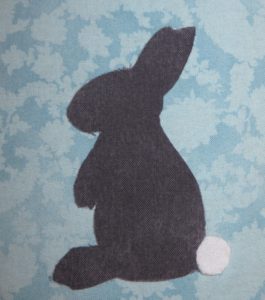
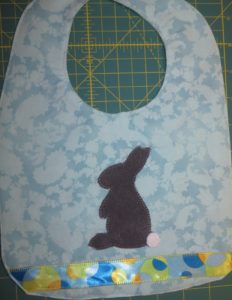
This weekend is Easter and it’s my son’s first one! I can’t say he’s excited about the Easter Bunny, but mostly because he hardly knows what a bunny is.
Recently I learned to applique and I am completely in love with it. I literally want to applique everything I see! Pillows, tote bags, placemats, blankets, you name it.
Following Nana Company’s pattern, cut out the bib. I am using a scraps of fabric from my stash, so a simple cotton on the front and a flannel on the back.
To applique this bib you will need the following:
A small piece of contrasting fabric
Optional: A piece of white felt for a fuzzy bunny tail
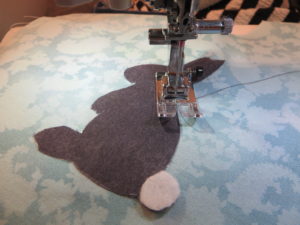
A printed bunny silhouette (my husband drew the bunny by hand for this tutorial. Thanks, Matt!)
Heat’N Bond Lite
A threaded sewing machine (or a needle and thread if you’re into hand applique, which I am not)
A hot iron with the steam setting turned OFF (per Heat’N Bond Lite instructions)
Look at your bib and decide how big you want the bunny. Mine was roughly 3 inches high. Print the bunny silhouette to the appropriate scale. Cut a rectangular piece of fabric just slightly bigger than the measurements of your bunny, and cut a matching piece of Heat’N Bond Lite.
Do the same with the white felt for the bunny tail, if you are doing this step.
The best way I can describe applique is that you are essentially making a fabric sticker. So the wrong side of the fabric (not the patterned side) will face the webbed side of the Heat’N Bond Lite. When the fabric and Heat’N Bond are sandwiched together, the paper backing will be visible on one side and the (right side) printed fabric on the other.
Using your hot iron (again, no steam!) you will iron on the paper side of the Heat’N Bond, with the fabric underneath. Don’t press for too long, just a few seconds should do the trick. When in doubt, read the instructions on the Heat’N Bond Lite.
Let the paper cool for a few seconds before attempting to pick it up. Once it’s cool, you’re ready to cut out the silhouette.
You will trace the bunny onto the paper backing of the Heat’N Bond Lite. For this project it may not matter much, but if you were doing this with, for example, letters or numbers you would need to flip your template over before tracing so as to create a mirror image. Otherwise if you just trace directly onto the paper, you will have a backwards letter or number. You only make this mistake once or twice.
Cut out on your trace marks. You should now have a bunny silhouette with printed fabric on one side, paper backing on the other. Remove the paper backing and lay the silhouette on the front of your bib. Once you’re happy with the placement, iron over the top for a few seconds. This will secure the bunny to the bib. You’re now ready to applique.
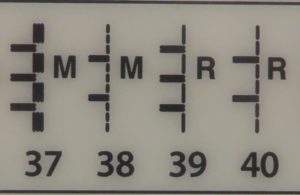
On your sewing machine you should have several different stitches to choose from. I’m using the Janome Horizon Memory Craft 8200 (hello, dream machine!) and I use stitch number 39 for applique. I sometimes use contrasting thread for applique, but today I’m using matching thread.
I turn the sewing speed down when I applique to avoid going off course.
Once you have appliqued all the way around the silhouette (and around the tail, if you choose), snip the threads and get ready to sew the bib front to the bib back. I added a strip of ribbon across the bib before sewing the front to back.
You can follow Nana Company’s instructions for sewing the bib and attaching a snap closure. An alternative would be velcro, which I find easier and often more durable.
Once you’ve finished sewing the bib I would give it a quick press with the iron (this time with steam on to ensure the wrinkles are gone), and it’s ready to wear!
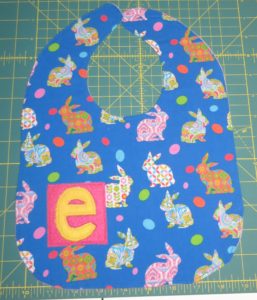
I also made an Easter bib for a friend of mine today. I’ve posted it below, just for another easy custom bib idea. I used felt for the pink square and the “e”. Appliqued around both.
Thanks for checking out my post today! I hope you enjoyed it. Hoppy Easter!!