Tutu X2

Last year I had the pleasure of making a tutu for one of my favorite little babies who was turning 1 year old ( https://makelifecrafty.com/diy-tutu/ ). 2019 brought another opportunity as her sweet little sister celebrated her first birthday, so I jumped at the chance to take on another tutu project!

These photos were taken by Melanie Courage Photography and are being used with her permission.

In making the first tutu (above) I focused more on texture and the color pink – little Emily’s favorite! In making the second tutu I went more for color variation and put some purple in there – little Riley’s favorite!

For Riley’s tutu I went with a little less fullness so all of the colors would show a bit more individually. Instead of purchasing tulle on a bolt at Fabricville for this one, I went with tulle on a roll (conveniently cut into 6″ wide strips) that I found at Michael’s. This certainly reduced the time it took to create the tutu. It was perhaps a little bit stiffer to work with than tulle on a bolt, but I think you will agree that they are both adorable.

Thanks for checking out my post today!

Heather

DIY Memory Quilt

Recently I had the tremendous pleasure of making a memory quilt for a baby who will be arriving in just a couple of short months. The quilt is made in memory of the grandmother of the soon-to-arrive baby, using her scarves, tshirts and pyjamas.

I had pondered the design of this quilt for quite some time. I came up with an elephant puffing water out of its trunk, with the water droplets made from pieces of her clothes, and a patchwork border.

I set out to get fabric for the elephant and the main body of the quilt. I headed down to The Fabric Merchant and met with Shelley to discuss my project. We planned out the colors, the border, the design, etc. It’s so good to bounce ideas off a really experienced quilter. An hour later I emerged with the supplies I needed.

I planned out the size of the quilt and drew up a rough draft of how it would look. I decided to do 3X3 (unfinished) squares of fabric to form the border. One challenge with this quilt is the variety of fabrics I had to work with – cotton for the body of the quilt, flannel on the back, but then there was everything from polyester to jersey to silk for the border and water droplets. I stabilized most of the fabric before sewing, just to save myself a headache.

I printed a silhouette of an elephant and cut it out of cotton, with applique paper for the backing. Then I drew out the water droplets and cut those out of the memory fabric, with applique paper on back as well.

I went with color coordinated thread for the applique in this case. Instead of my typical applique stitch I chose a tight zigzag stitch, as this blanket will probably be washed frequently and I want the design to hold up over time.

I stitched the elephant in place and then started adding the water droplets. Of course attaching them to the quilt with the iron was tough because, again, each fabric was a different weight and composition, and I was constantly changing settings on my iron to avoid scorching the pieces.

The applique took about 1 hour in total, so it went by pretty quickly.

Once the applique was done I added a black border to the blanket before stitching the colored border in place.

I finished the quilt with a black binding.

After I took this photo I quilted this down a bit with some white hearts on the white space to give this a bit more durability.

This project was so fun to design and create, and I would absolutely love to take on more keepsake projects down the road.

I hope you enjoyed this post today! Thanks for stopping by.

Heather

Baby Blankets

My most frequent sewing project is, without a doubt, baby blankets. All different shapes, colors, themes, sizes. It’s my favorite gift to give at a baby shower, and you can pretty much rest assured the receiver won’t get a duplicate.

Whether you’re doing tummy time, reading books on the couch or heading outside for a picnic, baby blankets are sure to get used.

Recently I’ve had the pleasure of making a bunch of blankets, so tonight I will walk you through my process. There are plenty of standard sizes for blankets, but you can absolutely use your imagination when planning out your blanket.

The first blanket was made for a new baby in my very extended family, I will say. A beautiful little girl named Isabelle. I actually used fabric from my stash (still working away at it…….) and I was really happy with it.

Previously I had used these exact fabrics to make Big Sis and Little Sis blankets for a good friend of mine. I made a mini version of that quilt for Isabelle.

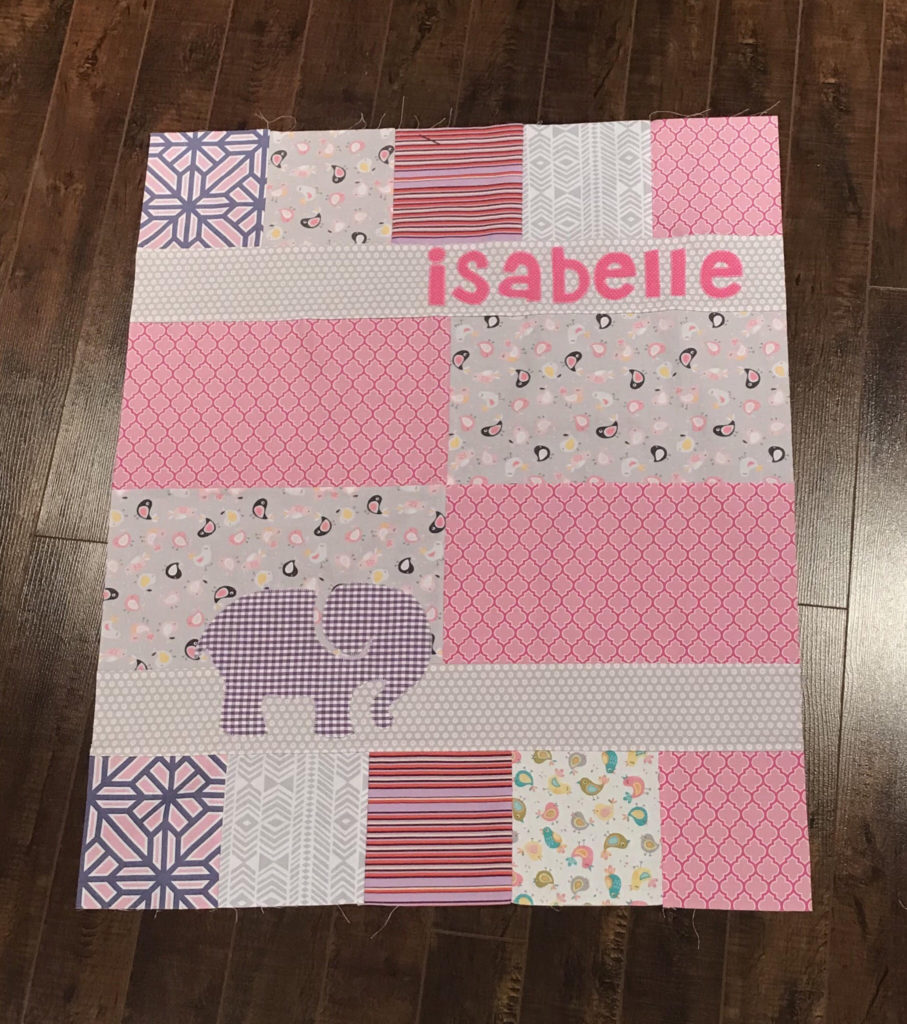
I started by drawing out a pattern. I cut 10 6X6″ blocks for the top and bottom of the quilt. I cut 2 30X4″ pieces for the long rectangular sections. Then I cut 4 15X8 pieces for the center. I knew that once I joined the pieces I could trim the uneven edges caused by the seam allowances. Sometimes I am more precise, but this time I didn’t feel the need to be.

I used a 1/4″ seam allowance and joined the blocks across each row. Once each row was formed, I joined them horizontally to form the blanket.

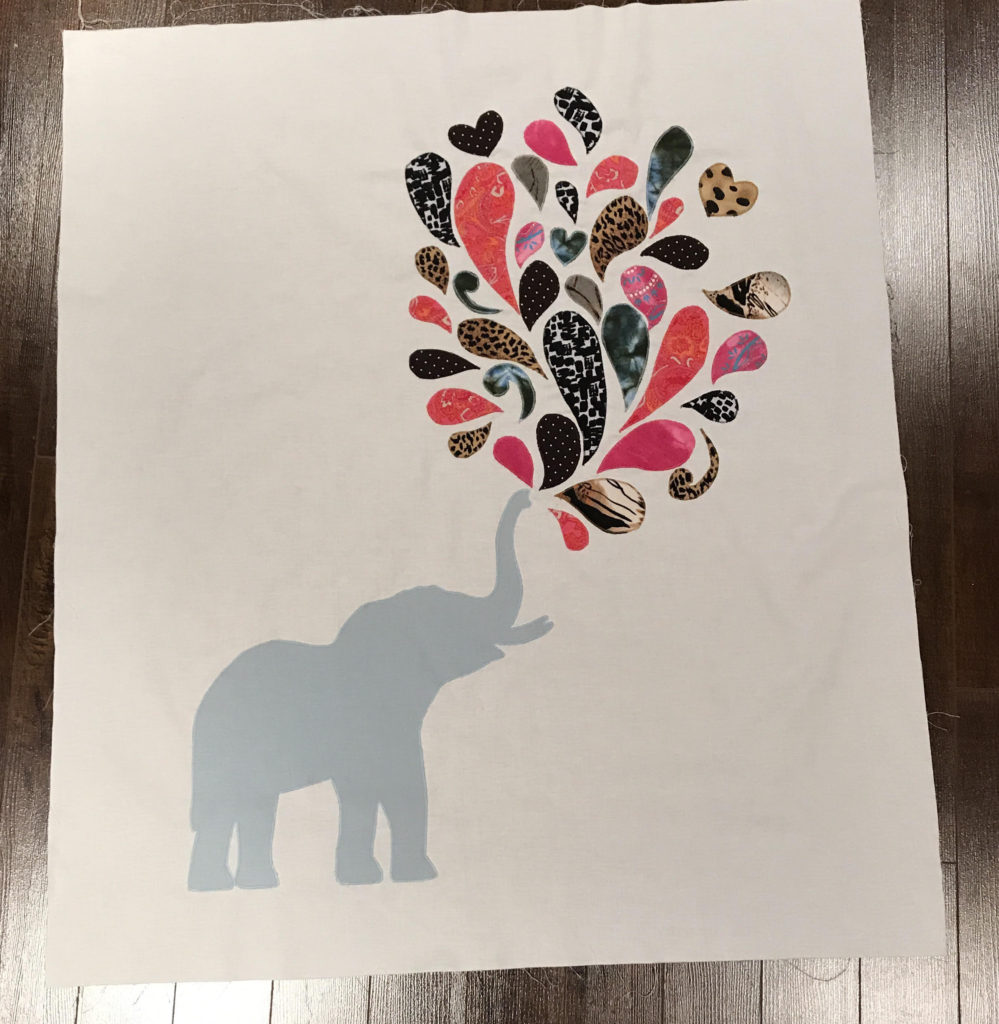
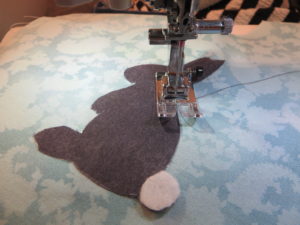
It came together quite quickly as there weren’t that many pieces. This is a photo of the quilt top once I appliqued the elephant and her name.

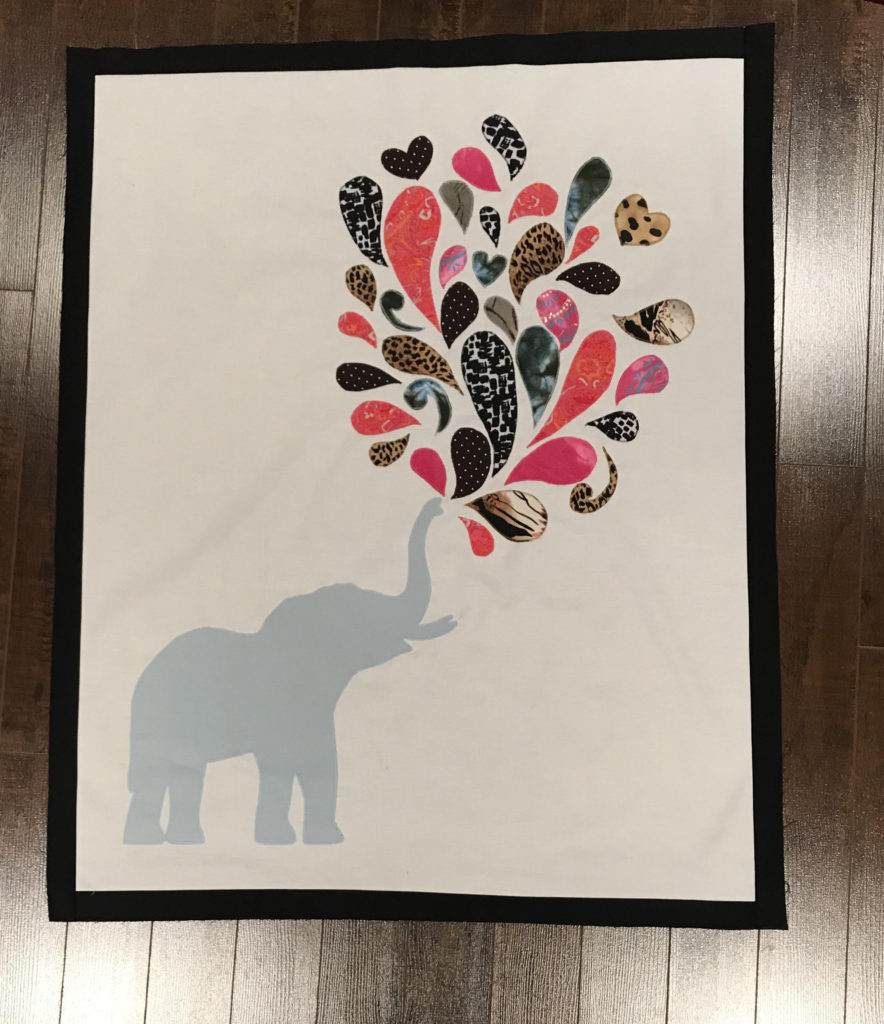
I gave the fabric a good press with a hot iron here to flatten out the seams.

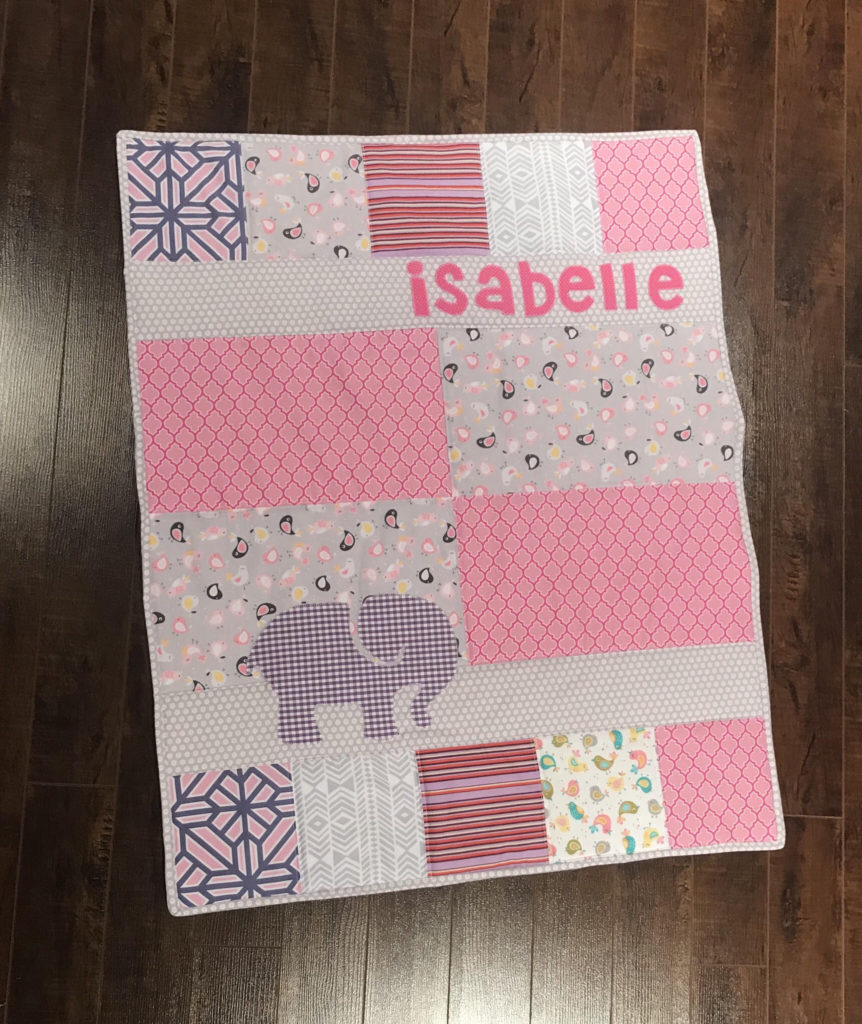
I picked out cotton batting for the centre of the quilt and a soft minky for the backside. Once I put the quilt together with right sides facing out and the batting in the middle, I started pinning the 3 pieces together. Lots and lots and lots of pins. The next step is to quit down the fabric. This essentially means you will sew all 3 pieces together in some pattern, which will help the blanket keep its shape over time as it gets washed more and more.

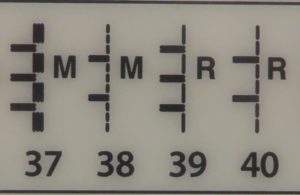
I quilted down along each seam on the quilt, both sides of the seam in fact. So I essentially made railroad tracks right on top of each seam. This part takes a bit of time but really does add to the blanket.

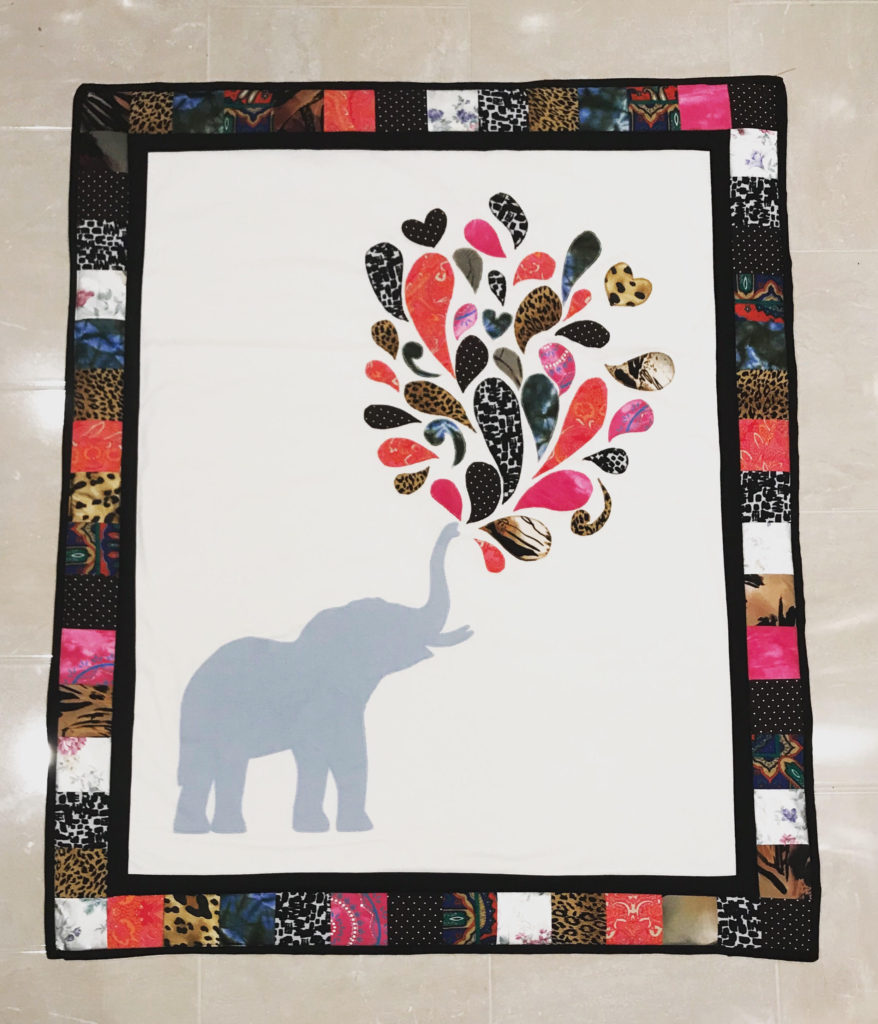
Once the quilting down was complete, I made the binding for the edge of the quilt. I cut 2.5″ wide strips of cotton and used this technique to join it to the quilt.

Some people hand sew the binding in place but I don’t typically do that. I actually don’t enjoy hand sewing, and the time commitment is significant.

Voila! A personalized gift that will get used over and over and over and over…..

The next blanket was quite simple and was made for a customer. She gave me permission to share this project with you.

The customer had seen fabric by Amy Butler called Bliss Bouquet (in Teal) and fell in love. She wanted a baby blanket made for her soon-to-be-arriving baby girl. She wanted a basic blanket with minky on the back.

This fabric is very difficult to get, but I was fortunate enough to find it at The Fabric Merchant here in St. John’s, NL. Don’t even get me started on how much I love this store…

I picked up a slightly cream colored minky fabric and got sewing. She wanted a blanket that was 28X33″.

I started by ironing the cotton Amy Butler fabric. I cut out a rectangle that was 32X37, to ensure I had plenty for a nice folded edge over the minky.

I cut the minky and the cotton batting to 28X33.

I laid out the pieces on my floor and smoothed out any wrinkles.

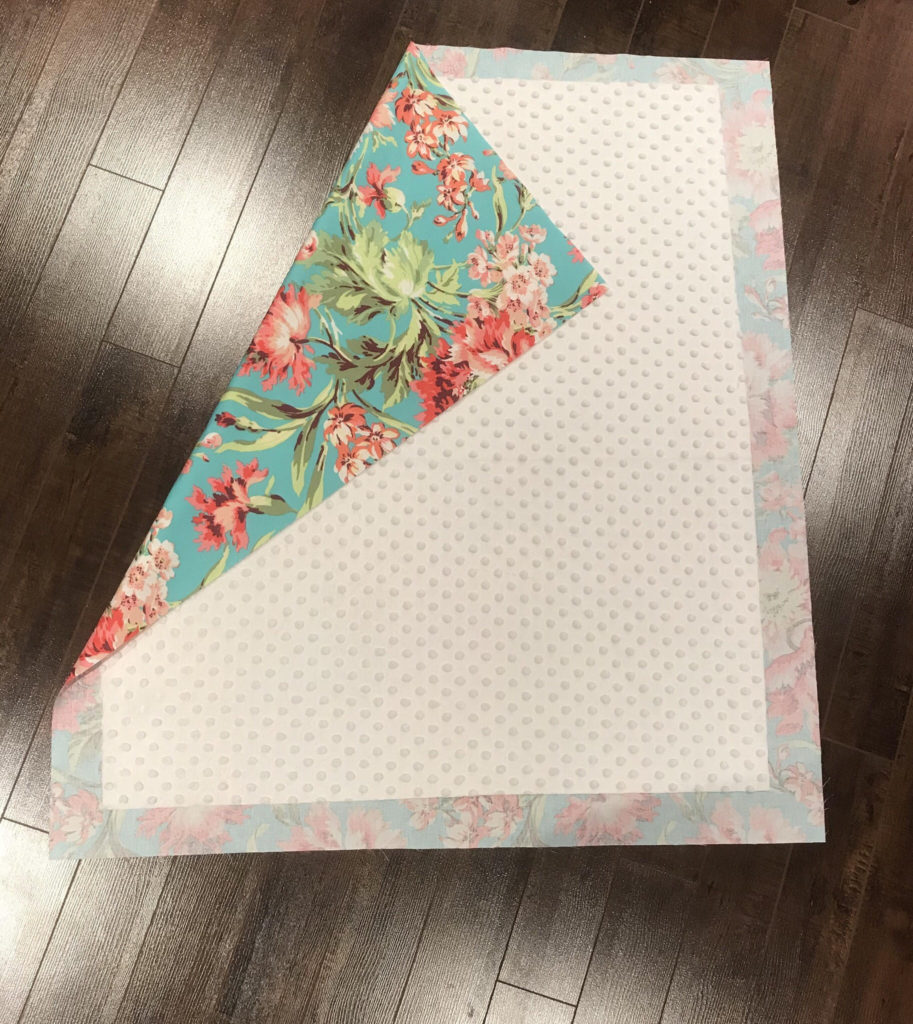
Next I went around the edge of the blanket, folding down the printed cotton twice, and pinning in place in preparation for sewing.

I zig zag stitched around the blanket and it was done!

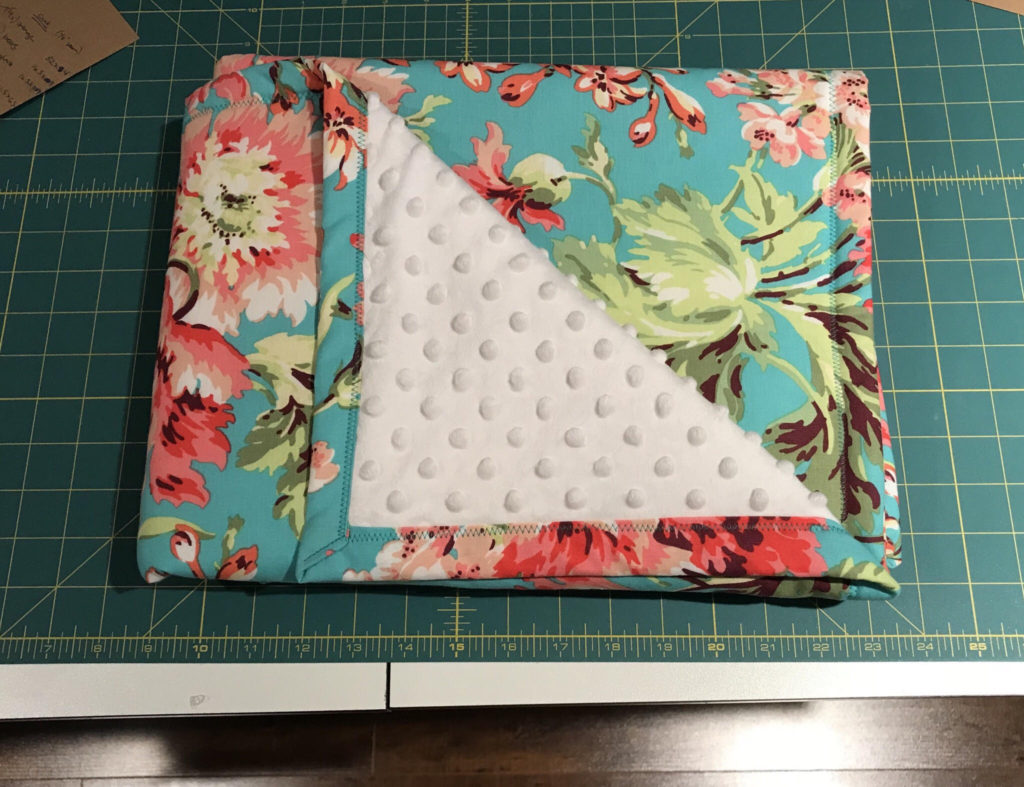
This blanket is so soft and pretty, and took about an hour to make.

There are many variations of baby blankets and they really do make wonderful gifts. You can get really creative and mix colors and prints, and you never have to do the same blanket twice.

I hope you’ve enjoyed this post. Thanks for stopping by today!

Heather

Diaper Cover

With my baby turning 1 year old this month (sniff!!) I am preparing for all things birthday! More to come on his birthday party (in an upcoming post!) but today I am making a diaper cover (or 2) for his cake smash photos.

Thankfully my sister-in-law is a very talented photographer (J.MacPherson Photography….check her out!) and always allows lots of time for Connor’s photos, so we have the opportunity to do outfit changes, which is good because I am usually very indecisive over what he will wear.

I picked up fabric and a pattern our local Fabricville. The pattern is Kwik Sew (K0102) by Ellie Mae Designs. There are tons and tons of free diaper cover patterns online but I was out shopping anyhow so decided to pick this one up.

Connor is tall but slender, so I looked at the size chart and went with the XL which is said to be a 12-18m. I made the first diaper cover and felt it was a little snug on him, particularly the elastic around the legs and the waist. So the second time I made it I added an inch to the elastic measurements (legs and waist) and it was a much better fit.

This diaper cover is intended to be made from cotton or broadcloth. In both iterations I used a printed cotton on the outside and a coordinating broadcloth for the liner. In hindsight I didn’t really need a lined diaper cover since it’s only going to be for a photoshoot, but I digress.

At first glance I was extremely pleased to see that you only need to cut out two pattern pieces for this project. You do two piece of your main fabric, two pieces of your liner. You will also cut 3 pieces of elastic.

This diaper cover took me about an hour to make, which was more time than expected. A couple of times throughout the pattern you have to turn the entire diaper cover inside-out or right side-out, plus you’re making casing for the elastic, stitching ends of elastic together, etc. Nothing difficult, but these things take a little time.

The result of that time and effort, though, is adorable. Here is the first cover I made:

And here’s the second iteration, with a little extra elastic for comfort:

I have another fabric to test out as well before I really decide which one I like best for the cake smash. These are so fun to make I have a feeling he will have an assortment of these for warm summer days this summer!

Overall I feel as though this pattern is well written. It’s a Kwik Sew but I wouldn’t necessarily say it’s a beginner pattern. I did feel like I had to re-read the instructions a few times to get the hang of it. After the first diaper cover, though, it was a breeze.

The pattern allows you to add ruffles or applique on the back, however I went for a plain version.

I will be testing out a free, unlined diaper cover pattern in the coming days, which I will also share with you.

I hope you’ve enjoyed today’s post!

Heather

Baby Sun Hat

I have always wanted to make adorable baby hats. Babies wear hats all year long – fuzzy hats, wool hats, fleece hats, baseball hats, bucket hats, you name it! Hats keep their little heads warm but also protect them from the harmful effects of the sun.

This week I found a pattern that I will share my review of today. It’s Kwik Sew 3989 and it’s a really darling little hat. This hat can be made plain or with one of 4 flowers (pattern included). I decided to do plain because I was using a rather lively patterned fabric.

This hat took me about 40 minutes to make. In sewing terms, that’s “kwik” indeed! I love the hat pattern.

I made this in size L (the largest size, unfortunately) because it’s a gift for Connor’s friend who is turning 1 this week! Happy Birthday, Brooke!

I did lengthen the chin strap as well. It’s adjustable because it has a velcro closure, so you could also make it a little more snug. If the strap is too snug it may be uncomfortable for the baby or the Velcro may irritate their delicate skin.

My model today is a coffee tin.

This pattern was  easy and quick. The instructions were extremely easy to follow and I was able to make a second hat a little quicker than the first.

For this pattern you need 0.8 metres of fabric (0.5 metres for hat, 0.3 metres for lining), with 0.4 metres of interfacing, plus a very small piece of Velcro. If you’re an avid sewist there’s an excellent chance you can make this hat from scraps in your stash.

I will remake this hat soon in a more neutral print, and *possibly* do a couple for my son.

I hope you’ve enjoyed this pattern review. Happy Sunday!

Heather

DIY Tutu

Recently I had the tremendous pleasure of making a tutu for one of my favourite babies in the whole world. The occasion was her 1st birthday and I convinced her mama to let me take a crack at making an outfit for her photos. Amy, thanks for taking a chance on me!

I had a vision of a very full tutu with several shades of pink, but I also knew I wanted lots of texture! I decided to make a tutu with an elastic waist as opposed to a ribbon waist. Ribbon (specifically the bow) can be difficult to position properly on a squirmy baby for photos, so I played it safe.

I looked up measurements for a 12 month old baby girl and most people agreed that 15 inches seemed to be the average waist circumference, and a tutu 8 inches in length seemed appropriate. I headed on over to our local Fabricville store and found the perfect combination of tulle.

Materials:

  • 9m of assorted tulle
  • 17 inch strip of 1 inch elastic (white)
  • Needle & thread
  • Scissors
  • Measuring tape

I selected baby pink, bubblegum pink, dusty rose, gold and bubblegum pink flocked tulle. I got less of the dusty rose, flocked and gold as I knew those would be accent pieces. I used 9 meters of tulle in total, with very little left over, surprisingly.

I used 1 inch elastic and formed a loop, overlapping and stitching the ends together. The loop needed to be 15 inches when complete, so I cut 16.5 inches to allow a decent overlap. I used clips to hold it in place. I then stitched the overlap of the elastic together.

To make the tutu I would cut strips of tulle just over double the length I needed, as the tulle would fold in half over the elastic and would be looped in place. So I smoothed out the tulle and cut strips that were 6 inches wide by 16 or 17 inches long. I wasn’t too precise with this as I knew I could trim pieces when I was done. I forgot to get a photo of the gold once it was cut, but you get the idea.

Next I looped the elastic waistband over the lid of a container I had. Some people use cardboard, but you can use whatever you have.

To secure the tulle over the elastic I folded each piece in half. Lay the folded tulle flat against the elastic, wrap the cut edges around the elastic and pull through the loop at the top. Pull tightly to secure. Make sure you are wrapping in the same direction for each piece of tulle.

Once you’ve done this, the top view of your waistband will look like this:

The underside of the tutu will look like this:

I added the tulle fairly methodically, particularly when I was adding in the flocked, gold and dusty rose tulle. I wanted to ensure they were evenly spaced, so I roughly alternated colours.

Once it was done I took a final measurement of the waistband (as adding in a lot of fabric can make the elastic stretch) and laid the tutu flat for an inspection. I trimmed the longer pieces to ensure it was the proper length all around. If you do notice that your waistband has stretched, removing a few pieces of tulle evenly throughout the tutu will help.

The tutu ended up being exactly as full and textured as I had hoped. I loved making it and it took about 90 minutes in total, including the time it took to cut the tulle.

Happy 1st Birthday, little sweetheart!

Heather

Easy Easter Bib

This weekend is Easter and it’s my son’s first one! I can’t say he’s excited about the Easter Bunny, but mostly because he hardly knows what a bunny is.

Recently I learned to applique and I am completely in love with it. I literally want to applique everything I see! Pillows, tote bags, placemats, blankets, you name it.

Today I’m making an appliqued Easter bib.

I have used this bib pattern by Nana Company a number of times, so rather than reinventing the wheel, I will use this pattern. Here is the link: http://nanacompany.typepad.com/nanacompany/2014/03/the-classic-pretty-little-baby-bib-pattern-diy.html#comment-6a0147e2980363970b01a73d89e39b970d

Following Nana Company’s pattern, cut out the bib. I am using a scraps of fabric from my stash, so a simple cotton on the front and a flannel on the back.

To applique this bib you will need the following:

  • A small piece of contrasting fabric
  • Optional: A piece of white felt for a fuzzy bunny tail
  • A printed bunny silhouette (my husband drew the bunny by hand for this tutorial. Thanks, Matt!)
  • Heat’N Bond Lite
  • A threaded sewing machine (or a needle and thread if you’re into hand applique, which I am not)
  • A hot iron with the steam setting turned OFF (per Heat’N Bond Lite instructions)

Look at your bib and decide how big you want the bunny. Mine was roughly 3 inches high. Print the bunny silhouette to the appropriate scale. Cut a rectangular piece of fabric just slightly bigger than the measurements of your bunny, and cut a matching piece of Heat’N Bond Lite.

Do the same with the white felt for the bunny tail, if you are doing this step.

The best way I can describe applique is that you are essentially making a fabric sticker. So the wrong side of the fabric (not the patterned side) will face the webbed side of the Heat’N Bond Lite. When the fabric and Heat’N Bond are sandwiched together, the paper backing will be visible on one side and the (right side) printed fabric on the other.

Using your hot iron (again, no steam!) you will iron on the paper side of the Heat’N Bond, with the fabric underneath. Don’t press for too long, just a few seconds should do the trick. When in doubt, read the instructions on the Heat’N Bond Lite.

Let the paper cool for a few seconds before attempting to pick it up. Once it’s cool, you’re ready to cut out the silhouette.

You will trace the bunny onto the paper backing of the Heat’N Bond Lite. For this project it may not matter much, but if you were doing this with, for example, letters or numbers you would need to flip your template over before tracing so as to create a mirror image. Otherwise if you just trace directly onto the paper, you will have a backwards letter or number. You only make this mistake once or twice.

Cut out on your trace marks. You should now have a bunny silhouette with printed fabric on one side, paper backing on the other. Remove the paper backing and lay the silhouette on the front of your bib. Once you’re happy with the placement, iron over the top for a few seconds. This will secure the bunny to the bib. You’re now ready to applique.

On your sewing machine you should have several different stitches to choose from. I’m using the Janome Horizon Memory Craft 8200 (hello, dream machine!) and I use stitch number 39 for applique. I sometimes use contrasting thread for applique, but today I’m using matching thread.

I turn the sewing speed down when I applique to avoid going off course.

Once you have appliqued all the way around the silhouette (and around the tail, if you choose), snip the threads and get ready to sew the bib front to the bib back. I added a strip of ribbon across the bib before sewing the front to back.

You can follow Nana Company’s instructions for sewing the bib and attaching a snap closure. An alternative would be velcro, which I find easier and often more durable.

Once you’ve finished sewing the bib I would give it a quick press with the iron (this time with steam on to ensure the wrinkles are gone), and it’s ready to wear!

I also made an Easter bib for a friend of mine today. I’ve posted it below, just for another easy custom bib idea. I used felt for the pink square and the “e”. Appliqued around both.


Thanks for checking out my post today! I hope you enjoyed it. Hoppy Easter!!

Heather