This weekend is Easter and it’s my son’s first one! I can’t say he’s excited about the Easter Bunny, but mostly because he hardly knows what a bunny is.
Recently I learned to applique and I am completely in love with it. I literally want to applique everything I see! Pillows, tote bags, placemats, blankets, you name it.
Today I’m making an appliqued Easter bib.
I have used this bib pattern by Nana Company a number of times, so rather than reinventing the wheel, I will use this pattern. Here is the link: http://nanacompany.typepad.com/nanacompany/2014/03/the-classic-pretty-little-baby-bib-pattern-diy.html#comment-6a0147e2980363970b01a73d89e39b970d
Following Nana Company’s pattern, cut out the bib. I am using a scraps of fabric from my stash, so a simple cotton on the front and a flannel on the back.
To applique this bib you will need the following:
- A small piece of contrasting fabric
- Optional: A piece of white felt for a fuzzy bunny tail
- A printed bunny silhouette (my husband drew the bunny by hand for this tutorial. Thanks, Matt!)
- Heat’N Bond Lite
- A threaded sewing machine (or a needle and thread if you’re into hand applique, which I am not)
- A hot iron with the steam setting turned OFF (per Heat’N Bond Lite instructions)
Look at your bib and decide how big you want the bunny. Mine was roughly 3 inches high. Print the bunny silhouette to the appropriate scale. Cut a rectangular piece of fabric just slightly bigger than the measurements of your bunny, and cut a matching piece of Heat’N Bond Lite.
Do the same with the white felt for the bunny tail, if you are doing this step.
The best way I can describe applique is that you are essentially making a fabric sticker. So the wrong side of the fabric (not the patterned side) will face the webbed side of the Heat’N Bond Lite. When the fabric and Heat’N Bond are sandwiched together, the paper backing will be visible on one side and the (right side) printed fabric on the other.
Using your hot iron (again, no steam!) you will iron on the paper side of the Heat’N Bond, with the fabric underneath. Don’t press for too long, just a few seconds should do the trick. When in doubt, read the instructions on the Heat’N Bond Lite.
Let the paper cool for a few seconds before attempting to pick it up. Once it’s cool, you’re ready to cut out the silhouette.
You will trace the bunny onto the paper backing of the Heat’N Bond Lite. For this project it may not matter much, but if you were doing this with, for example, letters or numbers you would need to flip your template over before tracing so as to create a mirror image. Otherwise if you just trace directly onto the paper, you will have a backwards letter or number. You only make this mistake once or twice.
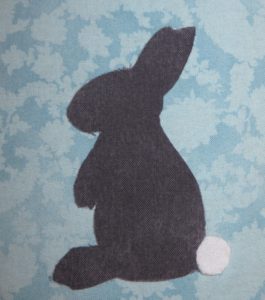
Cut out on your trace marks. You should now have a bunny silhouette with printed fabric on one side, paper backing on the other. Remove the paper backing and lay the silhouette on the front of your bib. Once you’re happy with the placement, iron over the top for a few seconds. This will secure the bunny to the bib. You’re now ready to applique.
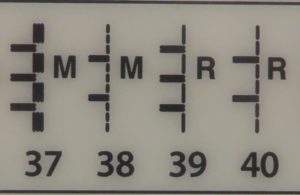
On your sewing machine you should have several different stitches to choose from. I’m using the Janome Horizon Memory Craft 8200 (hello, dream machine!) and I use stitch number 39 for applique. I sometimes use contrasting thread for applique, but today I’m using matching thread.
I turn the sewing speed down when I applique to avoid going off course.
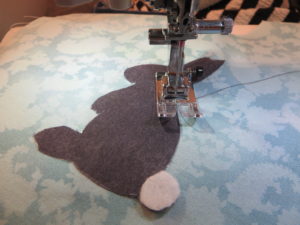
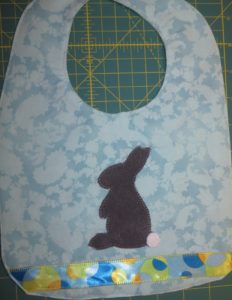
Once you have appliqued all the way around the silhouette (and around the tail, if you choose), snip the threads and get ready to sew the bib front to the bib back. I added a strip of ribbon across the bib before sewing the front to back.
You can follow Nana Company’s instructions for sewing the bib and attaching a snap closure. An alternative would be velcro, which I find easier and often more durable.
Once you’ve finished sewing the bib I would give it a quick press with the iron (this time with steam on to ensure the wrinkles are gone), and it’s ready to wear!
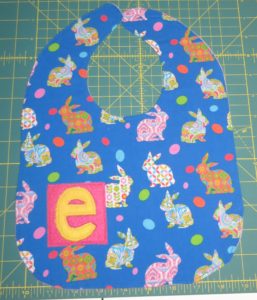
I also made an Easter bib for a friend of mine today. I’ve posted it below, just for another easy custom bib idea. I used felt for the pink square and the “e”. Appliqued around both.
Thanks for checking out my post today! I hope you enjoyed it. Hoppy Easter!!
Heather