2020 has felt like an entire decade so far, and it’s only mid-April. I live in a beautiful province here in Canada called Newfoundland & Labrador, and our weather is no joke. In January we had a snowstorm that was affectionately known as Snowmageddon, where our city shut down for a week under State of Emergency. It was several weeks before our residential streets were wide enough for traffic to flow in both directions. I had never seen anything like it, and it caused a major life disruption. All businesses were ordered closed, you weren’t allowed to drive on the City streets, and life seemed to come to a screeching halt. Slowly things got back to normal, but now we’re faced with a Health State of Emergency as the province braces under the COVID-19 pandemic. All non-essential businesses are shut down indefinitely once again.
I haven’t been able to blog much lately because I am working from home full time, plus I have my nearly-3 year old son home all day long. It leaves me with a couple of hours every evening to finish work I didn’t get done during the day, maybe do a bit of sewing, clean the house or go to bed early. Either way, my blogging has been taking a hit. It will get better, but right now we are all in survival mode.
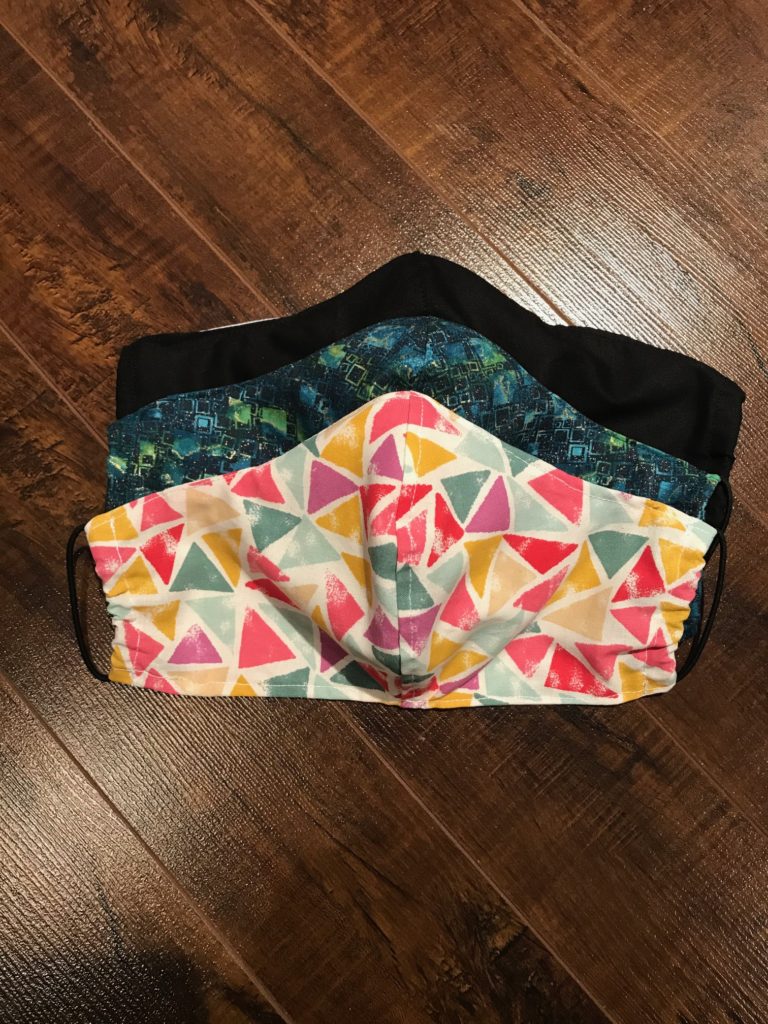
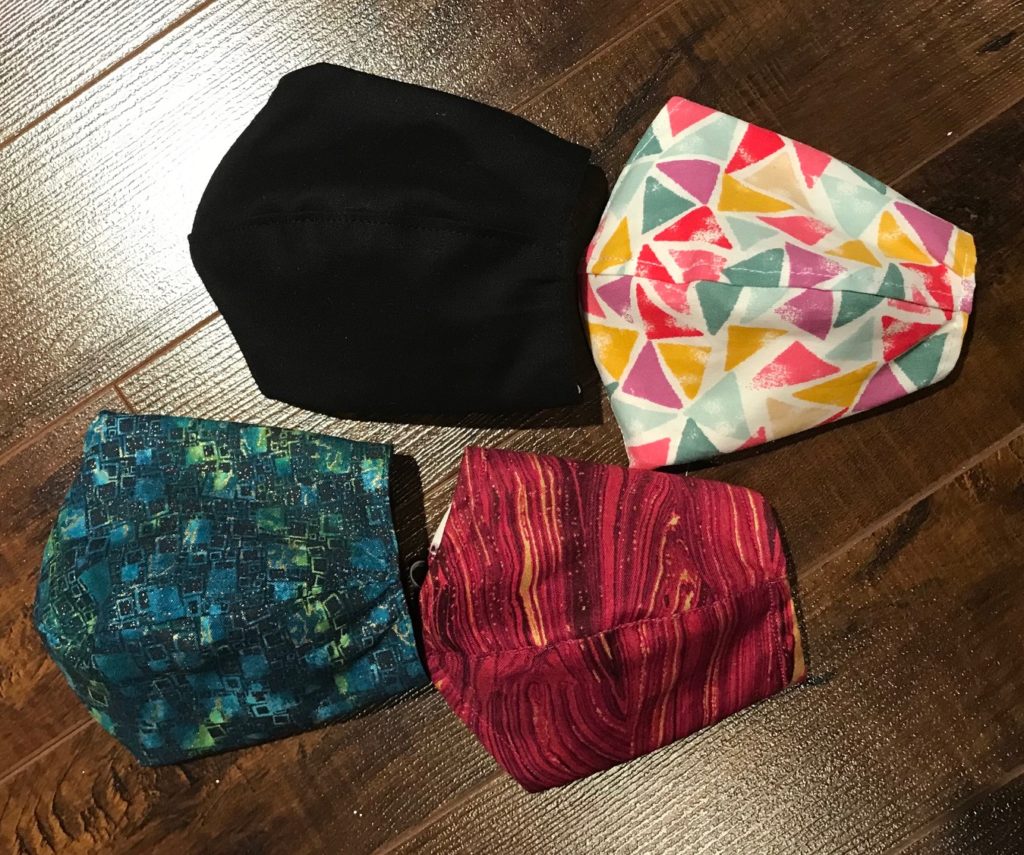
Last week our Chief Medical Officer of Health communicated to the province that we should all be wearing homemade face masks when we go out in public. There’s a global shortage of medical-grade personal protective equipment (PPE) so people had to start getting creative. Hence the double-layer cotton face mask was born.
A friend asked me to whip up a couple for her spouse, which I absolutely jumped at. Then came many, many other requests. These are really fun to make and do require a little bit of skill, particularly sewing the curved seam.
I sold upwards of 50 within a week, and now I’ve listed them in my Etsy shop. I’ve also created a coupon for those following my blog – MAKELIFECRAFTY10. Enter it when purchasing any of my face masks and you’ll get 10% off!
If you’re crafty and have some spare cotton and elastic around, there are a ton of free patterns online. There are different types – fans and cones are the two most common – and they each require different skill.
If you aren’t crafty or can’t seem to make these work for you, feel free to check out my shop. I ship within Canada for $3, or you can pickup for free in the local St. John’s area.
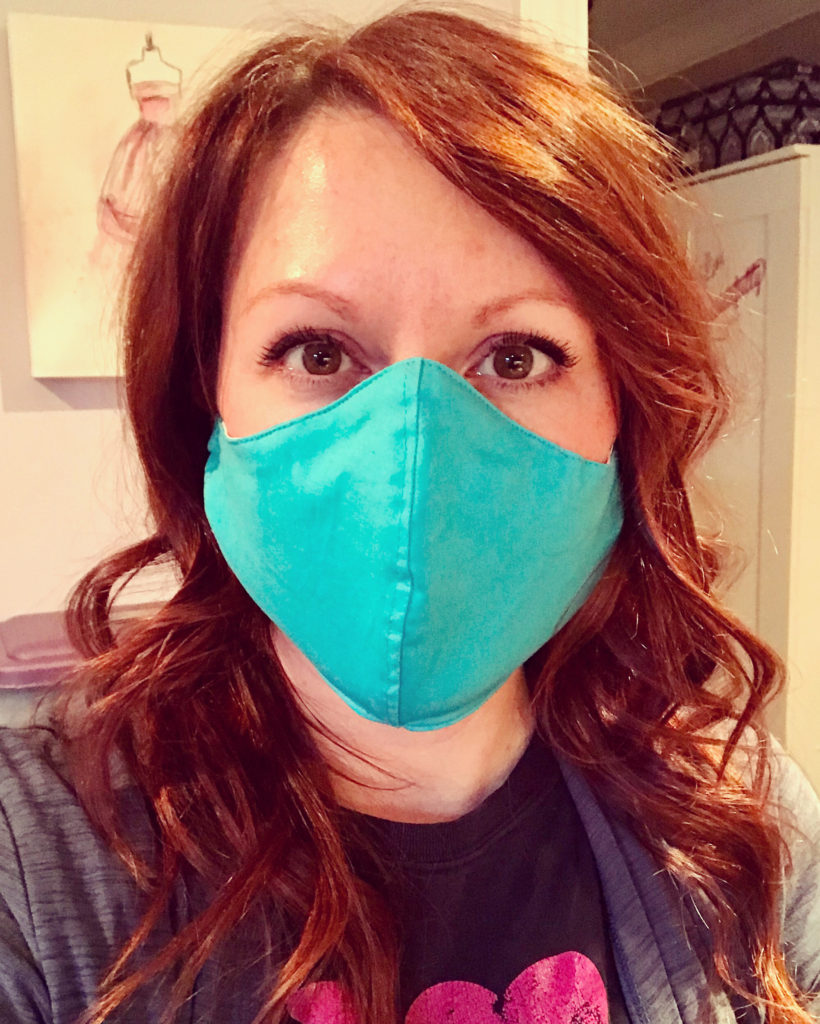
I hope each and every one of you are taking care of your physical and mental health during this wild ride. Praying we won’t need to wear these for long, but for now I’m whipping up masks with cute crabs, puffins, pussycats, polkadots, stripes or any other sweet print I have on hand.
This weekend I’ve been busy making aprons for toddlers. You might recall a previous post An Apron Pattern to Love and this apron follows a lot of the same instructions, however there are some differences for sure.
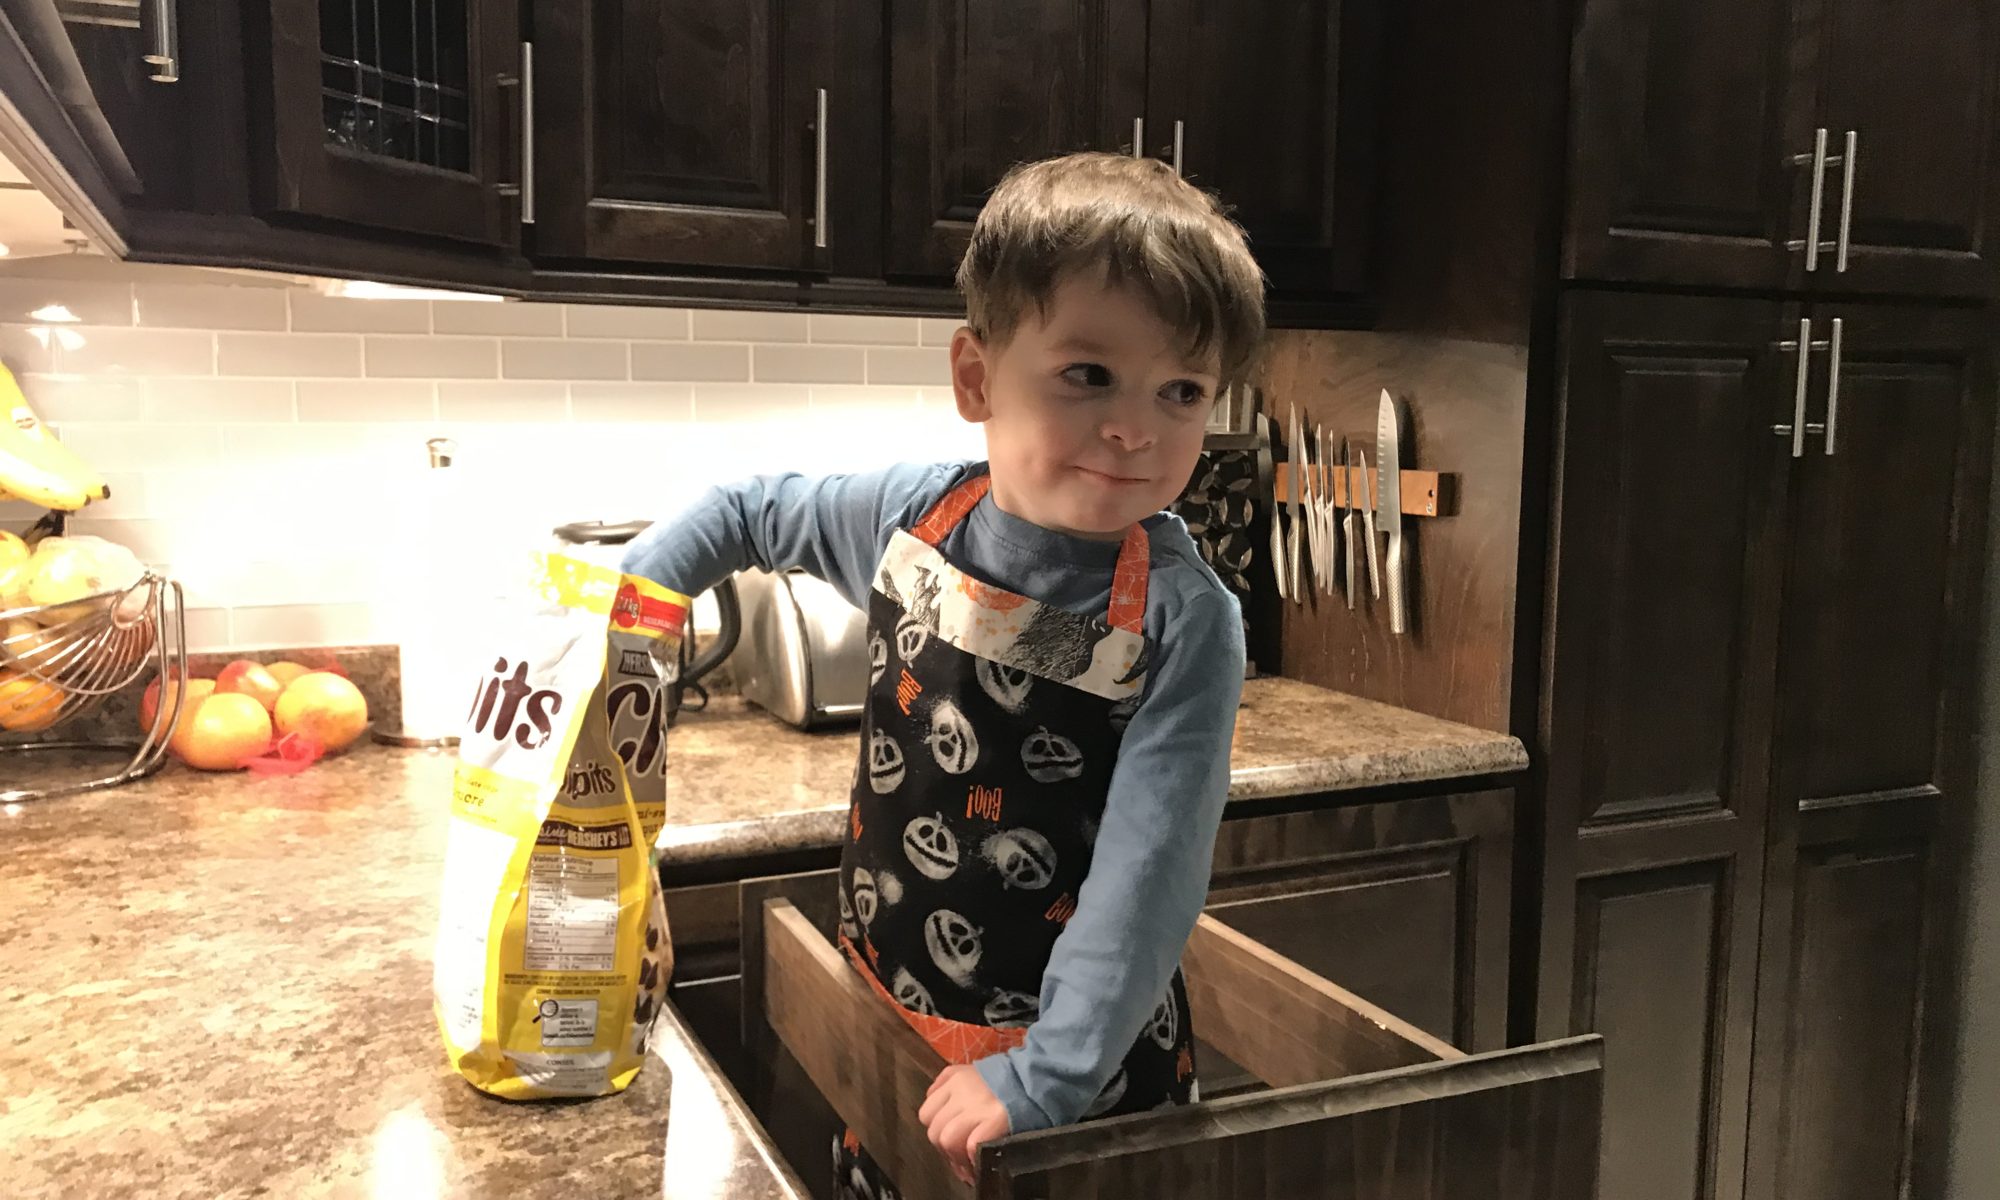
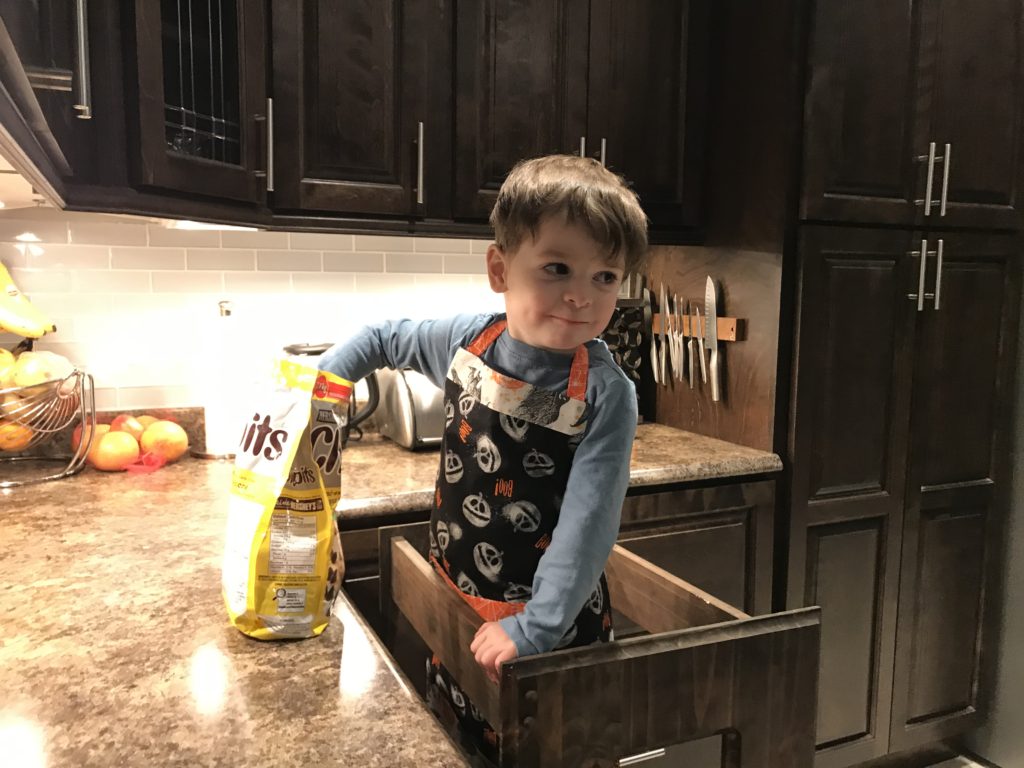
My son is nearly 3 years old and absolutely loves to bake and help prepare meals. He’s got a little learning tower in the kitchen so he can reach the countertop, and I often find him reaching for my aprons to wear. I made this one in a 3T-4T size.
My family is Halloween-obsessed. No joke. We spend weeks preparing costumes every year, and we go a bit nuts with decorating the outside of our house. The little one has caught the Halloween bug and just loves anything spooky!
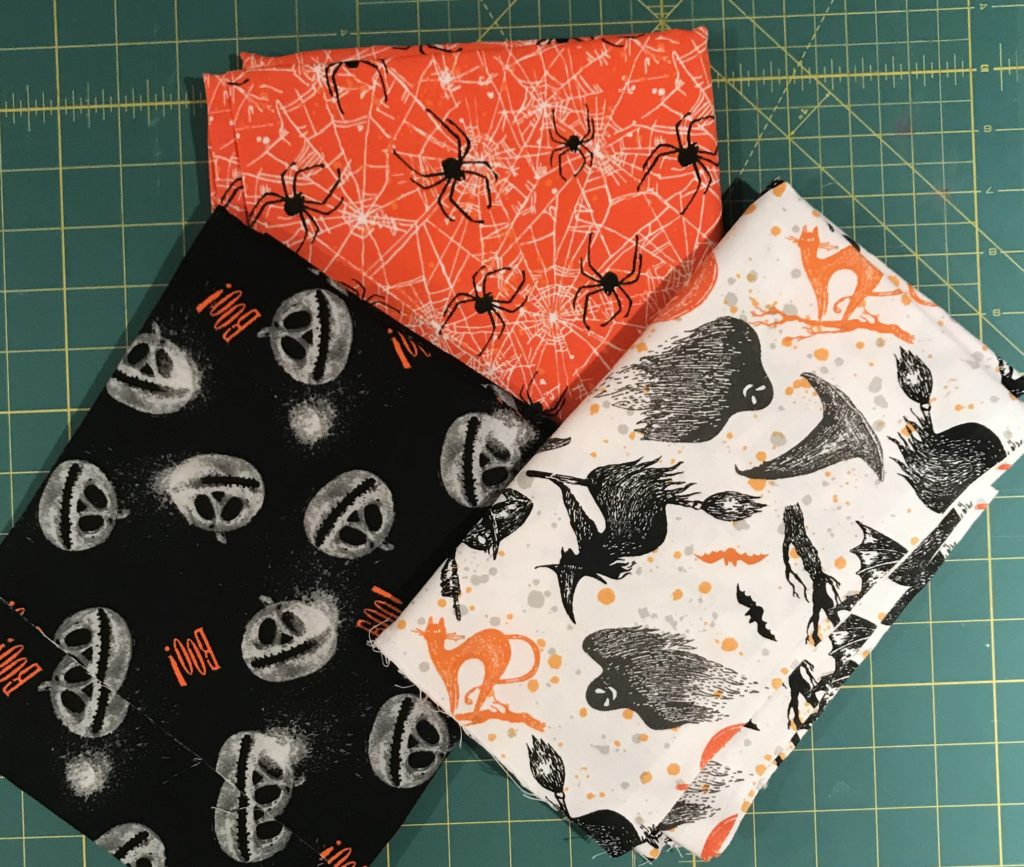
One way I make sewing a bit more economical is by buying seasonal fabric (Christmas, Halloween, Easter, etc) on clearance at the end of each season, to use the following year. I have a stash of Halloween fabric from years gone by, so there couldn’t have been a more perfect time to use my spookiest prints than for my sons first apron.
Materials needed for this tutorial:
3/4 meter of fabric (I used cotton, and I used 3 coordinating fabrics in smaller quantities)
Safety pin
Ruler
Cutting wheel
Cutting mat
Pins
In keeping with quilting rules, I did not pre-wash the cotton for this tutorial. If you’ve ever pre-washed cotton you will know that it frays and gets terribly tangly around the edges after going through the dryer.
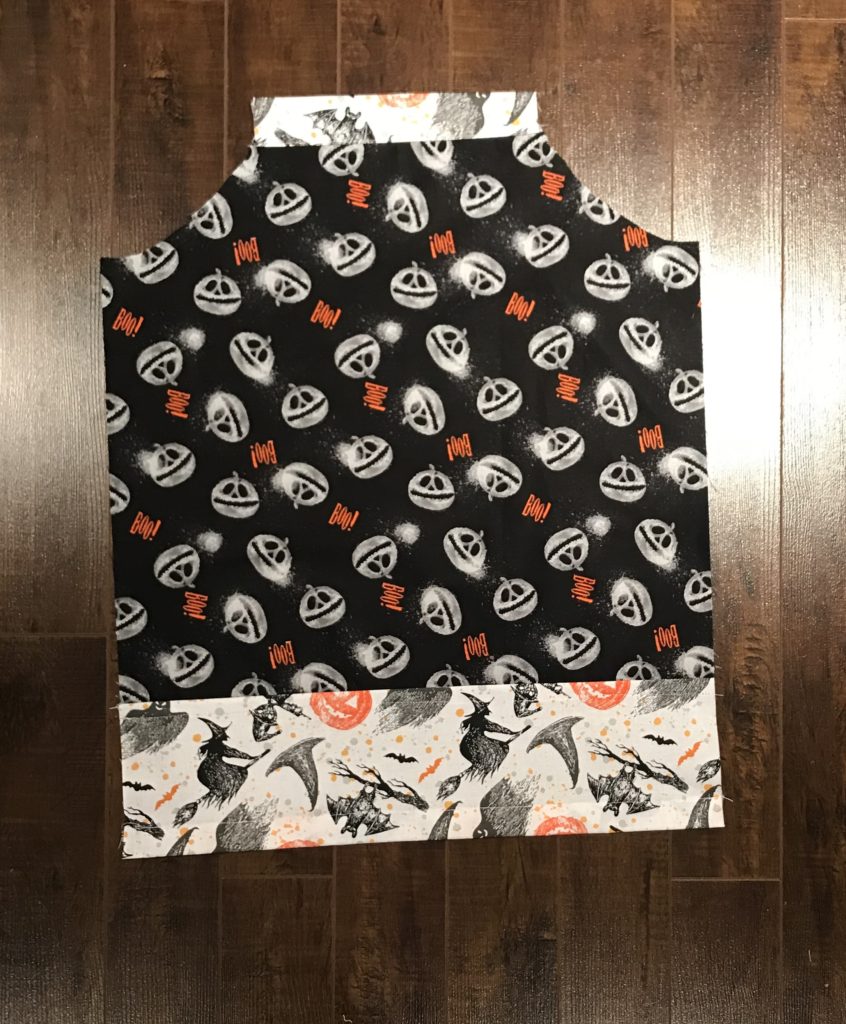
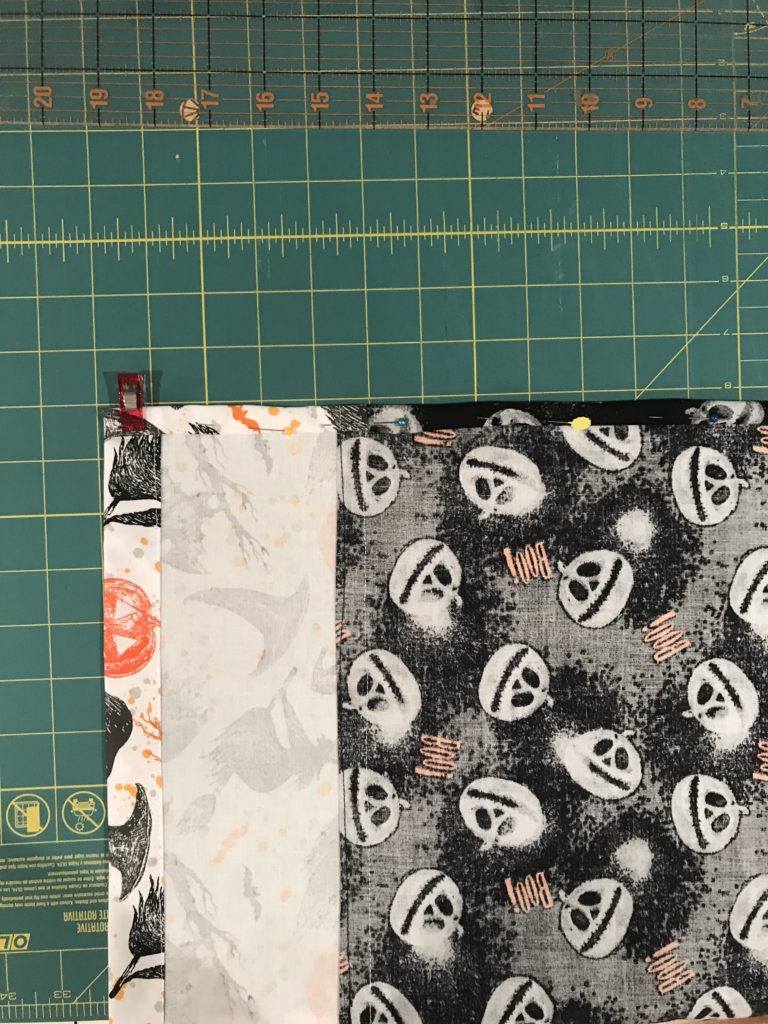
I started by ironing my fabric to get the creases out. I was using 3 coordinating Halloween fabrics so I selected one for the body, one for the trim (around bottom and top of apron), one for the pocket and tie.
Using my cutting mat I laid out the fabric for the body of the apron. Being aware of the direction of the print on the fabric, I cut a rectangle that was 19 inches wide and 28 inches long. In hindsight I probably could have gone with 25 inches long because the apron did end up being a bit long on my son, but as he grows it will still work for him.
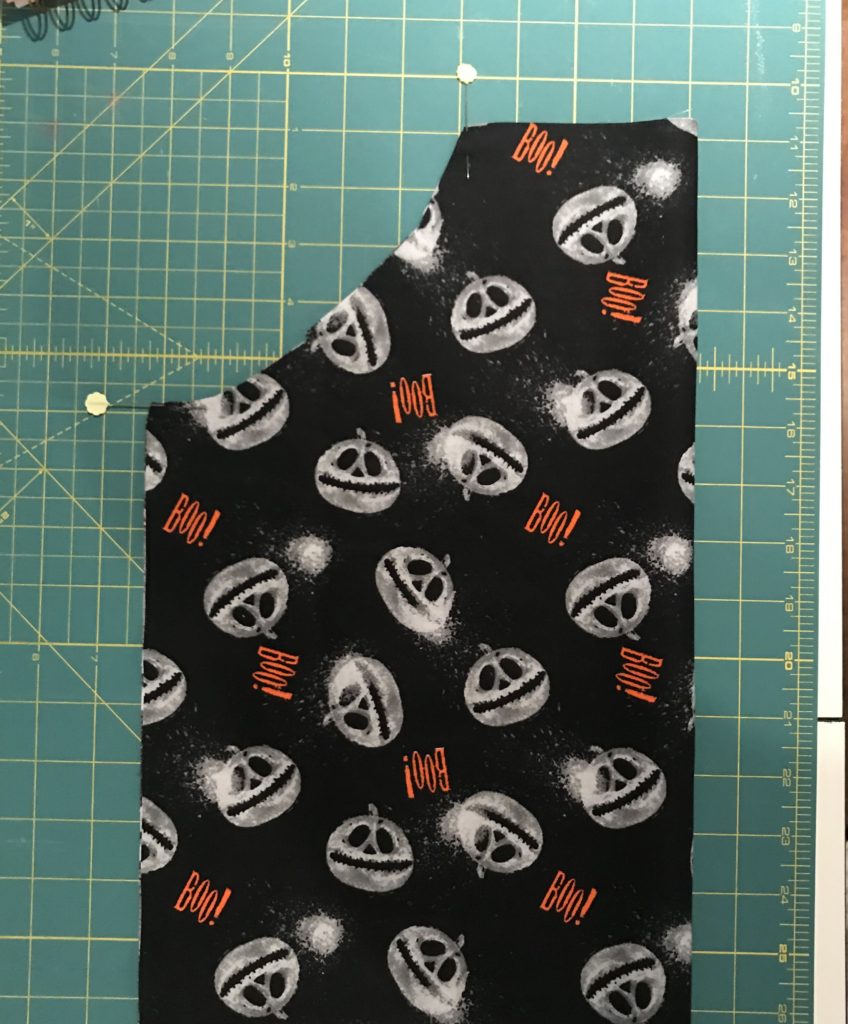
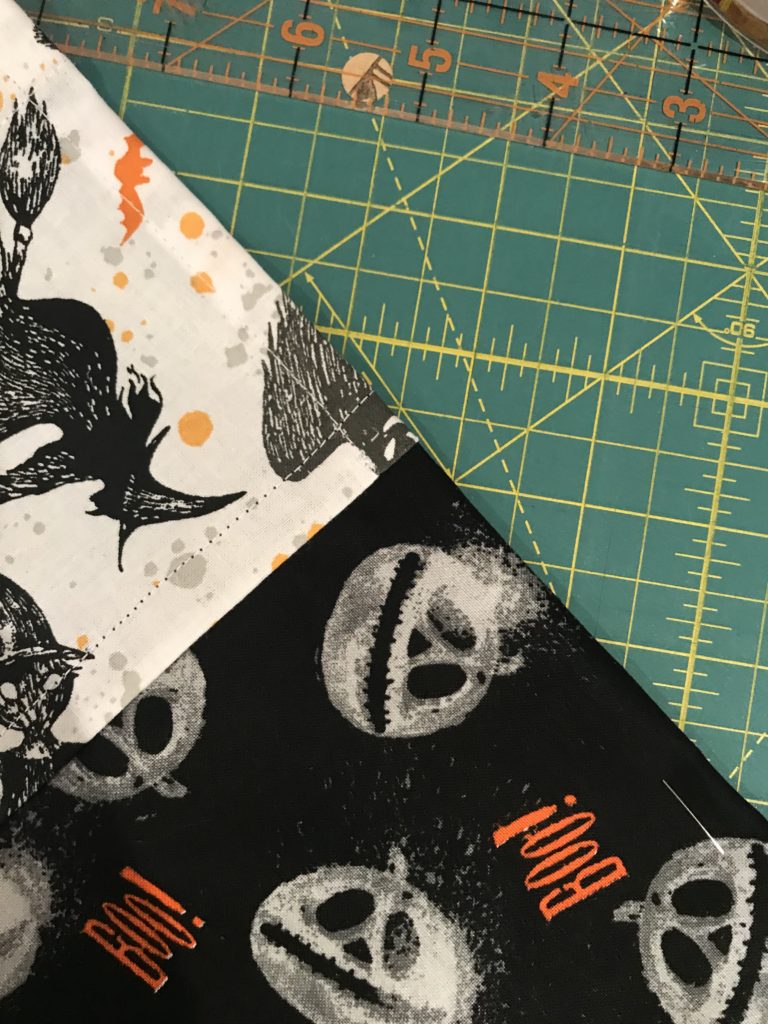
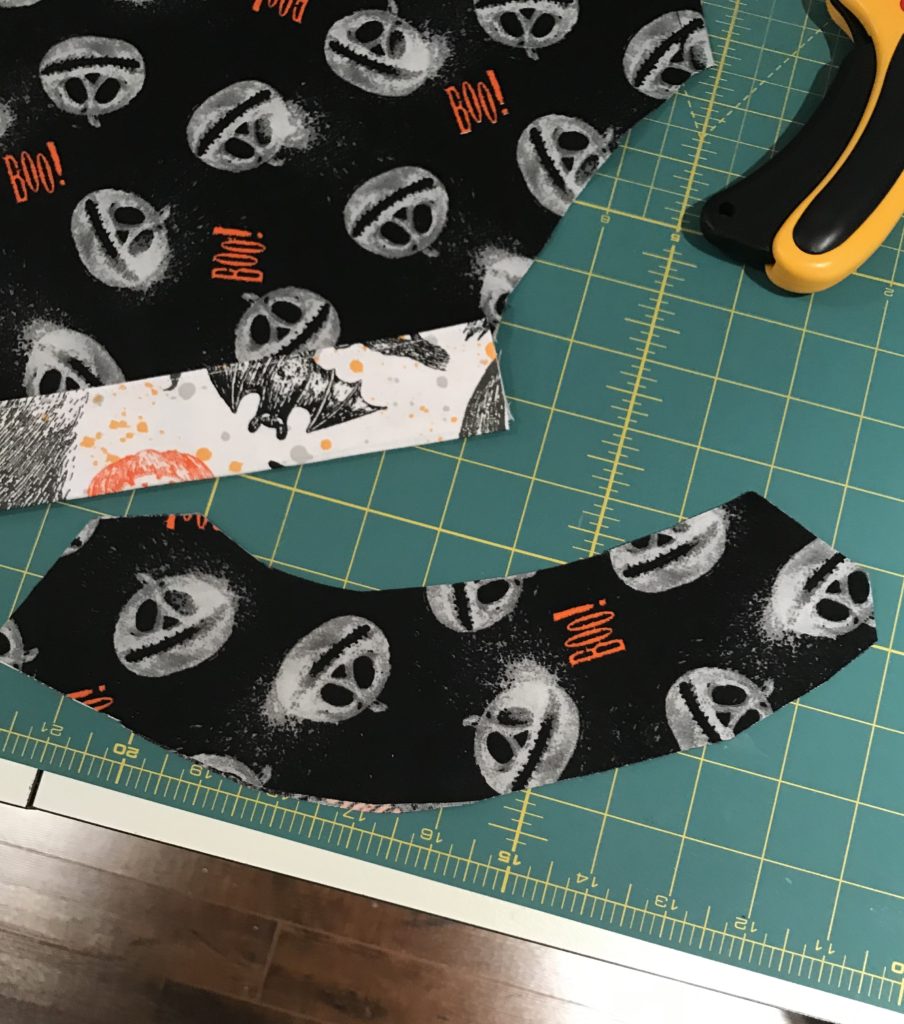
Once I had the 19WX28L rectangle cut I folded it in half lengthwise (the folded piece would now be 9.5WX28L). Working from the cut edge I measured down from the top 5 inches, placing a pin. Working now from the folded edge at the top of the apron body, I measured across 4 inches and placed a pin. The area between those two pins is the armhole.
Next you need to cut between those two pins. I’ve included a photo here so you can see the shape I use. If you make it too rounded it won’t fit nicely under the arms.
Once you’ve cut the armhole, you will start the trim piece for the chest and bottom of the apron. For the bottom (again, mind the direction of the print on your fabric!) I cut a piece that was 8 inches long and 19 inches wide. For the top I did 9 inches wide and 6 inches long.
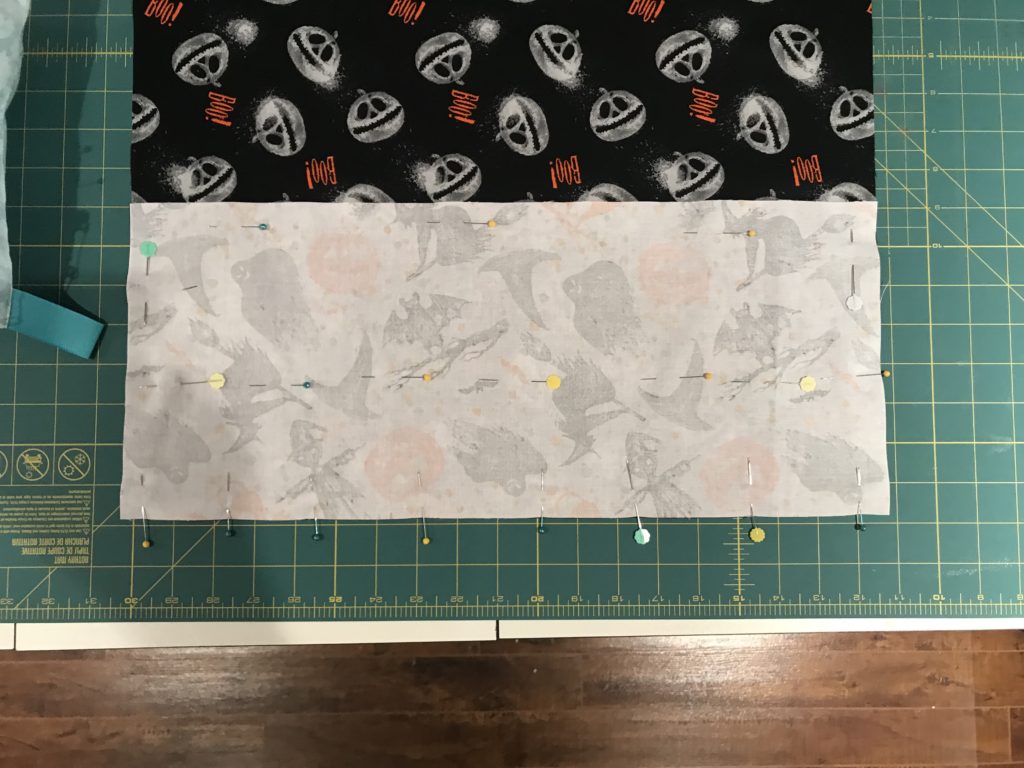
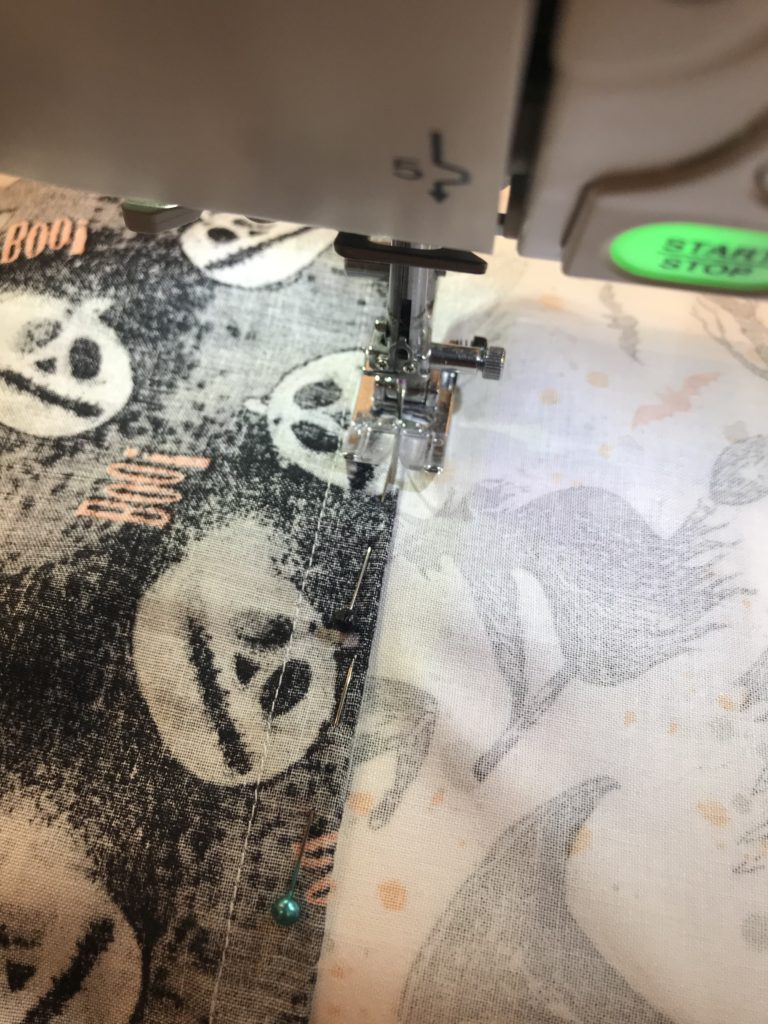
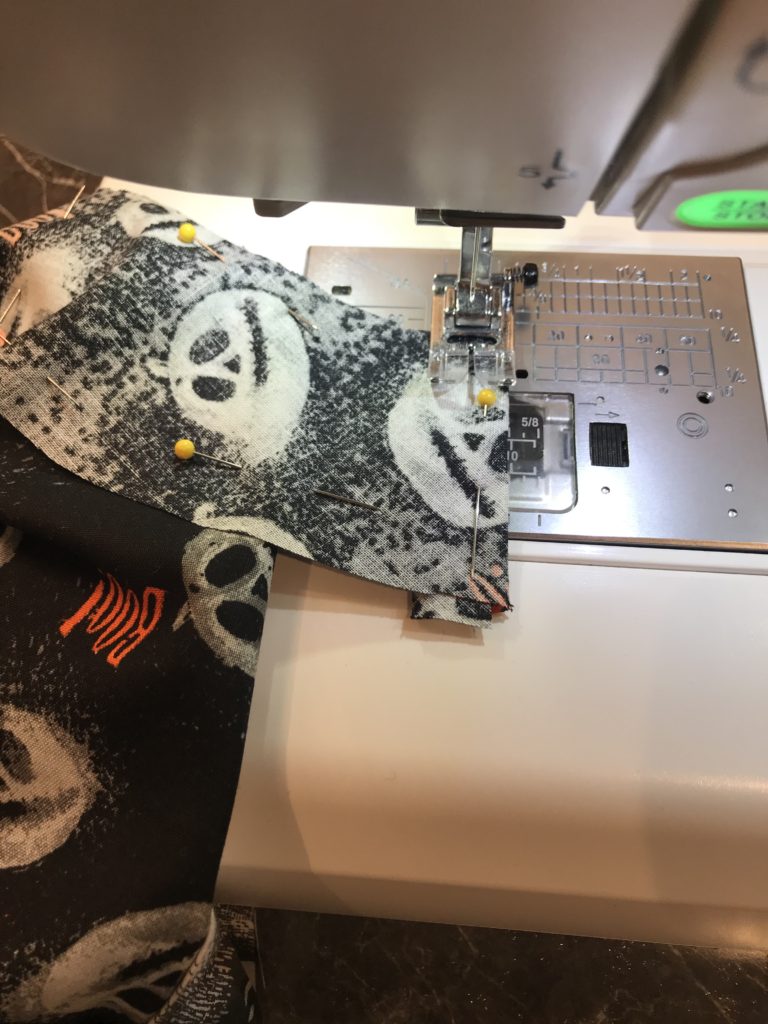
To attach the bottom piece I ensure both pieces of fabric are pressed and wrinkle-free. Then I flattened out the body of the apron and placed the rectangle for the bottom trim over top, with right sides together. I lined them up and pinned along the edge.
When I sew along this edge I use a 1 inch seam allowance, which is a lot but you’ll be making a bit of a pocket with this shortly so you will be thankful you’ve given yourself lots of fabric to work with.
Stitch along the edge. Once you’ve stitched, your 1 inch seam allowance is now 2 pieces of fabric, but we want to trim the lower piece.
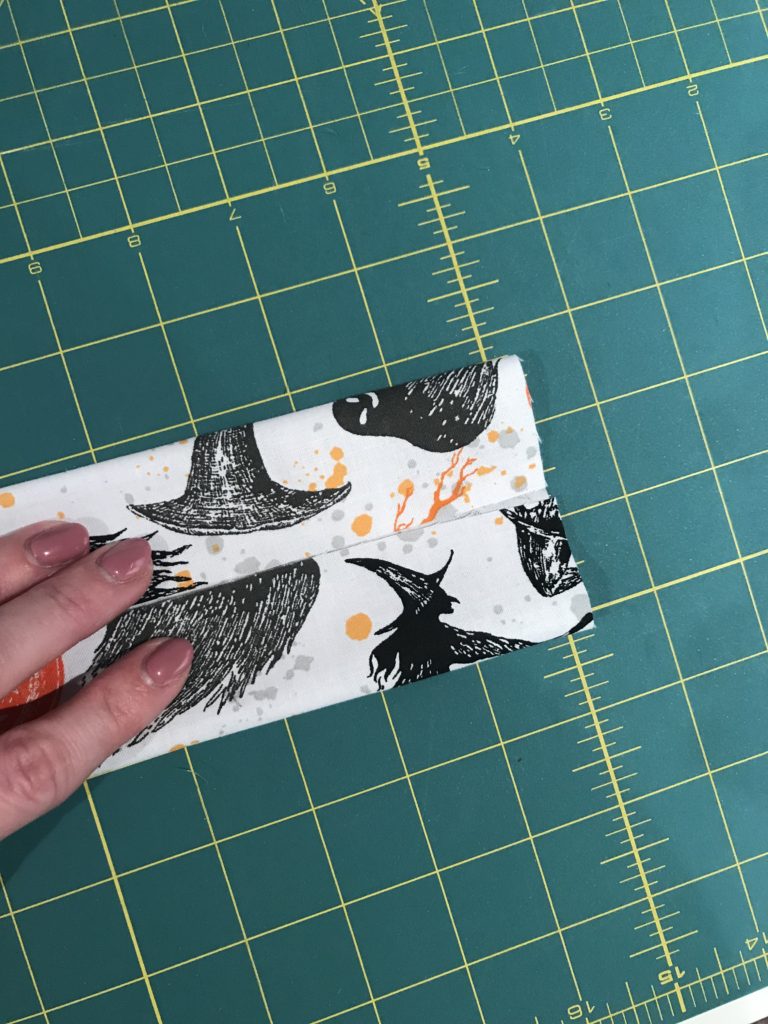
Next you want to press the main body piece of fabric (the seam allowance) downward, to cover the piece we just trimmed. Give it a good press, using steam.
The seam allowance will now be tucked up under itself, encasing the cut edge of the lower fabric.
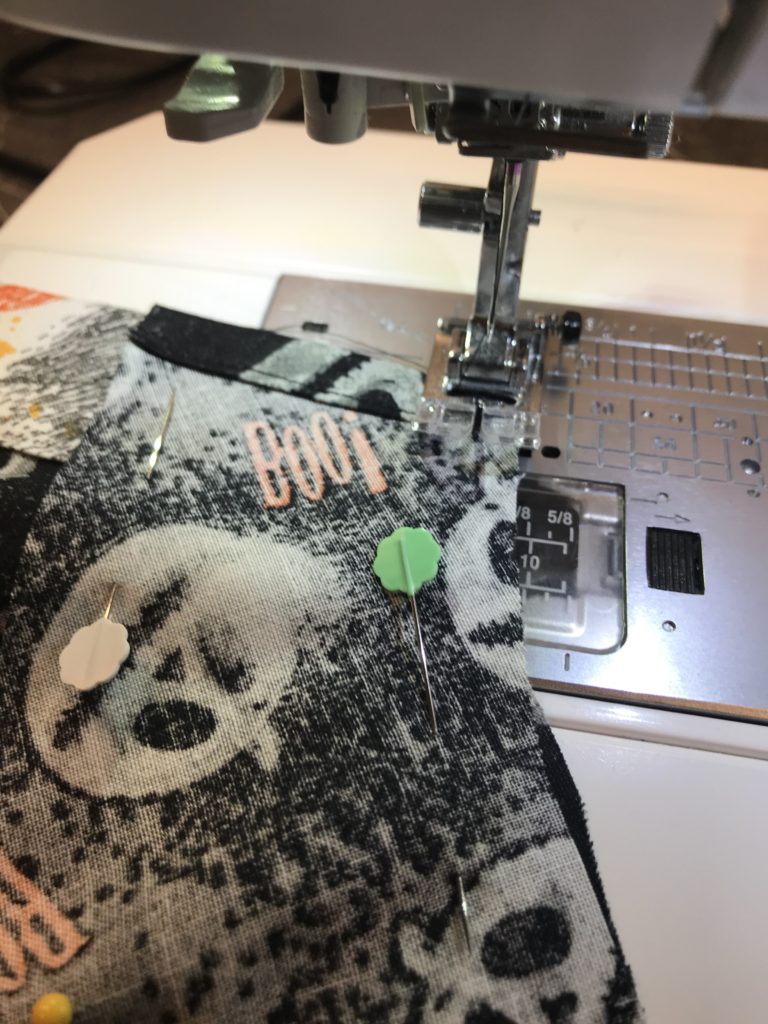
So you can see I tucked the main fabric under, pinning as I go, ensuring the other fabric is entirely covered. I then stitched along the folded edge. Note: For this stitching you will want to ensure you are using the matching thread and bobbin. The stitches will be visible from the front. Sometimes, for simplicity, I use whatever thread is already in my machine for non-obvious stitching, but from this point forward you will want to ensure you have spools and bobbins to coordinate.
Next I fold up the bottom edge of the apron to form the hem. I turn the hem up twice, 1 inch each time. I like the look of a thicker hem. So you are losing 2 full inches from the length of the apron by doing this, but it does give a nicer look.
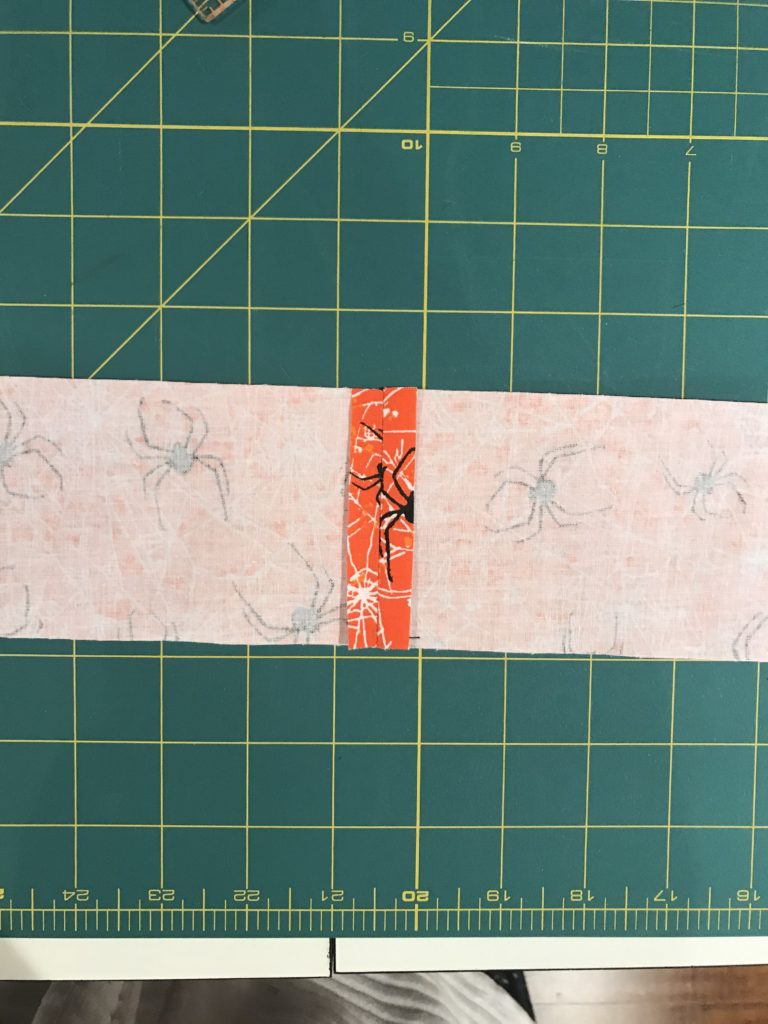
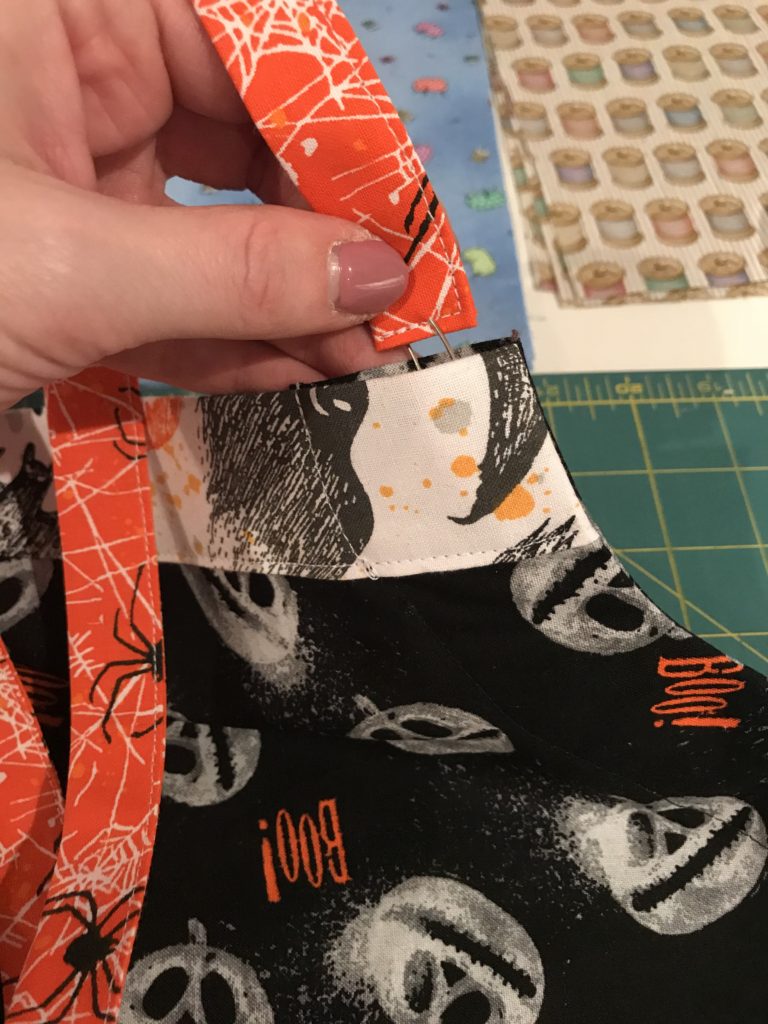
Next step is to attach the top piece of trim. So we’ve cut a piece that’s 9 inches wide by 6 inches long. Fold it down lengthwise (so the rectangle is now 3 inches by 9 inches) and give a good press. You’ll then take each of the cut edges and fold them inward.
Give it another good press, then fit it neatly over the top of the apron bib. Stitch.
Once that’s in place, give a good press with the iron. Your apron is now really starting to take shape!
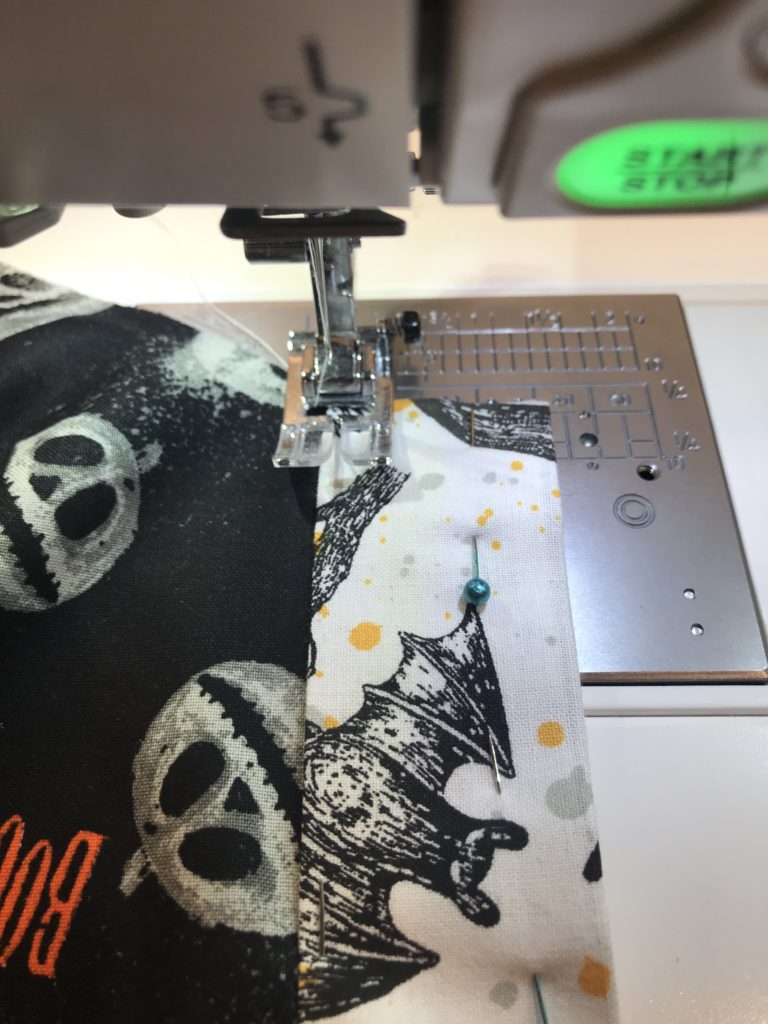
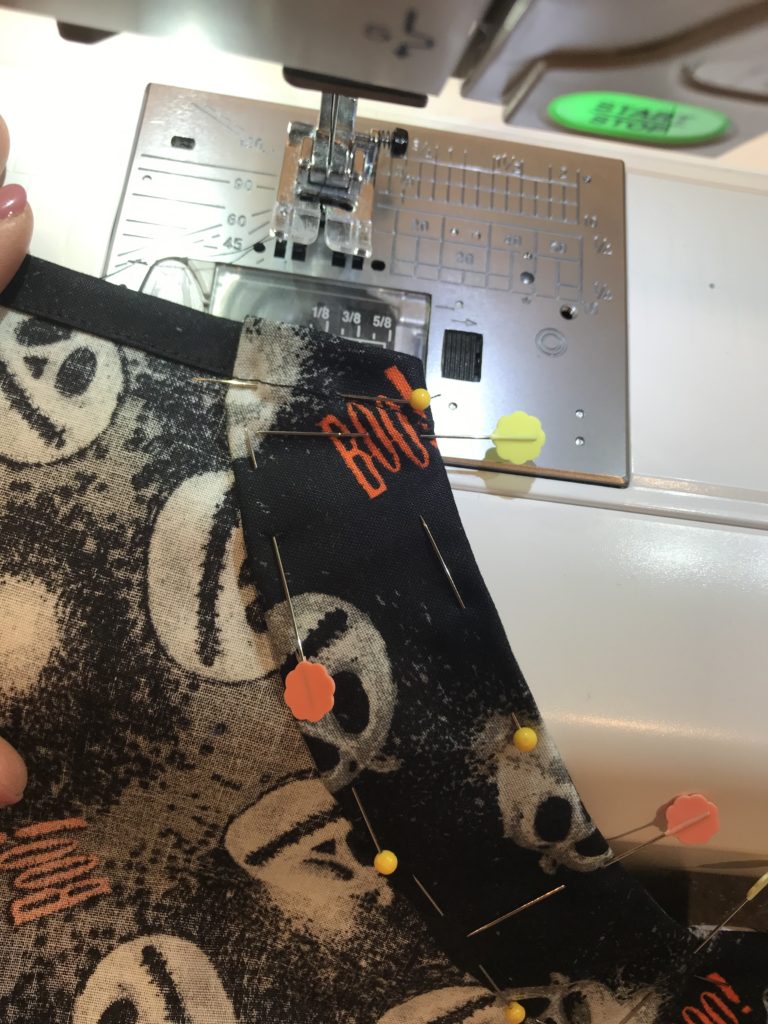
Next step is to sew the sides of the apron. You will want to use a narrower tuck here than we did for the hem. I use 1 inch for the sides, pressing, then tucking it in half to ensure no raw edges are visible.
When you are stitching the sides it’s important to remember that you have a different color for the trim than the body. This means you will want to switch out your spool and bobbin part-way up the sides. I usually start with the trim first (as the thread is still in there from doing the hem and the bib). So you’re just stitching to where the fabric changes to the main body on each side.
Now the body of the apron is sewn except for the armholes. This is the part I despise every time, but it’s a must. Some people use lining for their fabric for the armholes, but I rarely do that extra step. This apron is for a toddler who grows like a weed – it won’t be around long enough to worry about lining it.
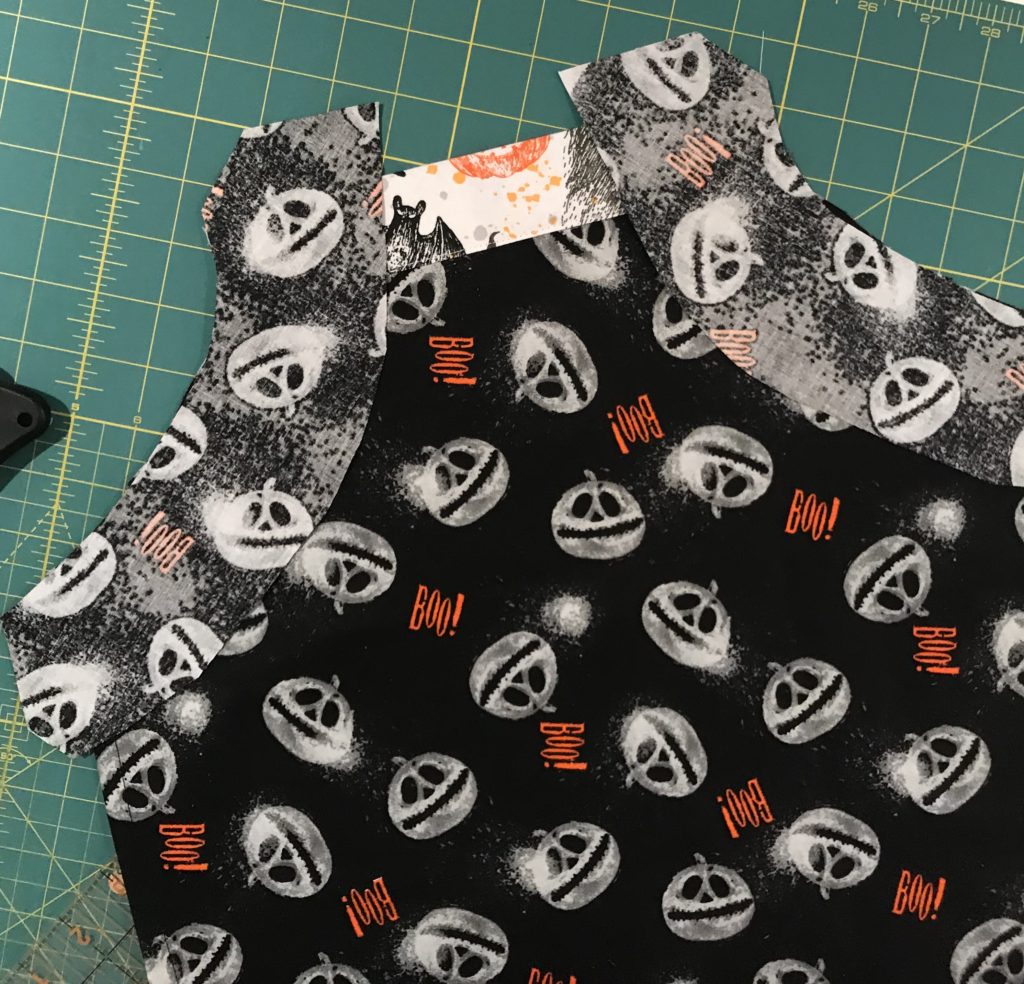
Here is the general shape you need for the armhole casings:
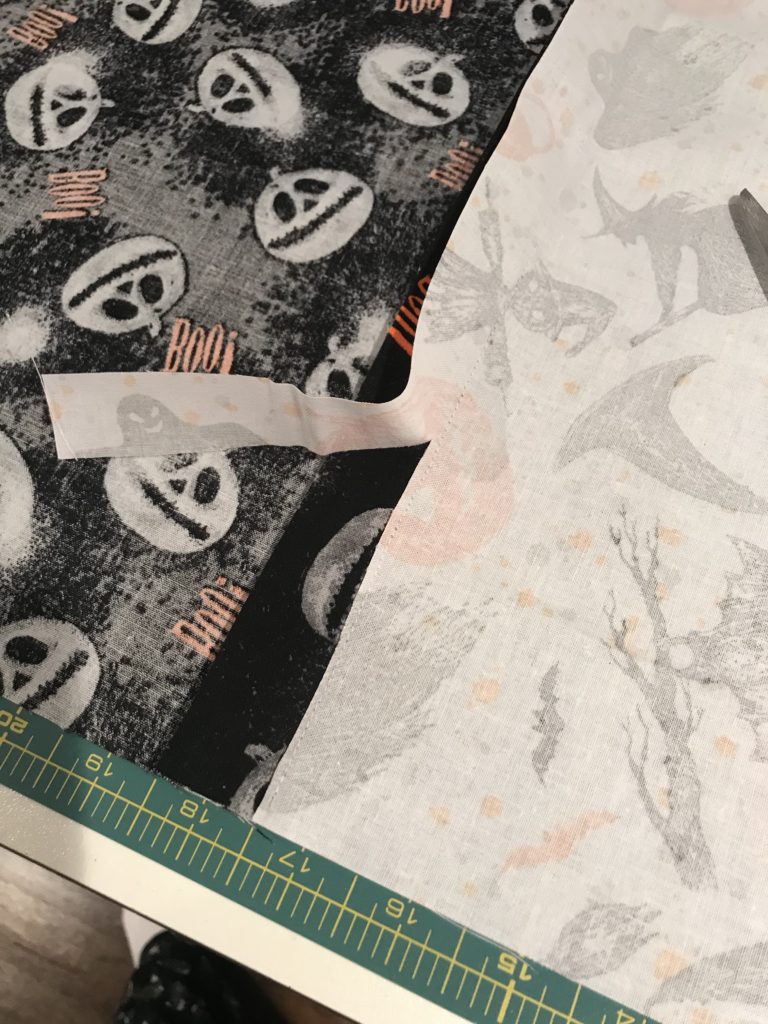
To make my own armhole casings (lining is optional here) I just take a rectangle of fabric and lay it flat against the front of the fabric (right sides together). One edge will follow the shape of the armhole you created, and then you basically measure out 2 – 2.5 inches and cut. You need to leave the ends about an inch longer so you can sew them under.
So for this next part, I’ll do my best to put it into words: You have to take that extra length and turn the ends in, and sew them shut. This facing will eventually have the apron strap fed through it, so you want to ensure the edge is not going to fray.
This next photo is where I am closing up the end of the facing (with the body folded away from the machine so I don’t accidentally stitch them together:
Then once the ends are all stitched, I attach to the armhole. I use about a 1/4 inch seam allowance here.
Once it’s attached to the body of the apron, you will turn it right side out, and press the seam firmly with an iron. Next you turn in the edge of the facing about 1/4 inch and pin along as you go. You will be leaving the ends open, again to thread the apron strap through.
Not unlike when we did the bottom trim, the top trim has two different patterned fabrics so you need to switch out thread and bobbin part-way through. If you look at the front of your apron you will notice your upper trim is about 1.5 inches. As you’re sewing the facing to the body of the apron, you are stitching over that trim. So I recommend switching out threads to give the best look.
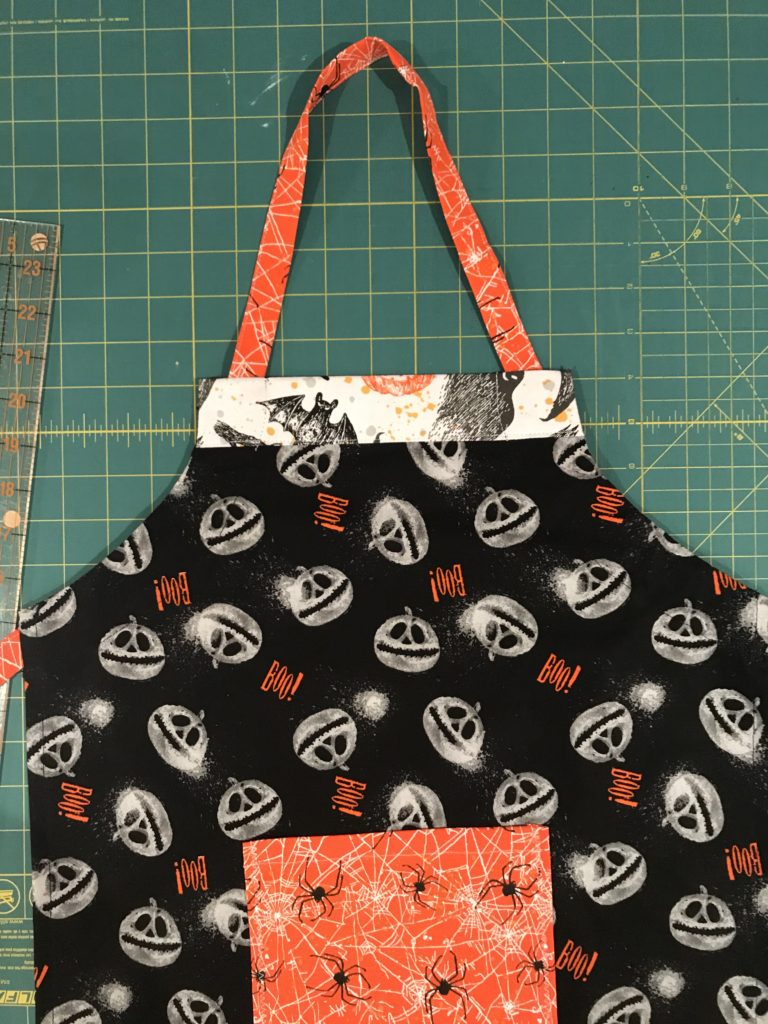
The hard part is officially done now! You’re ready to add a pocket and sew the apron strap.
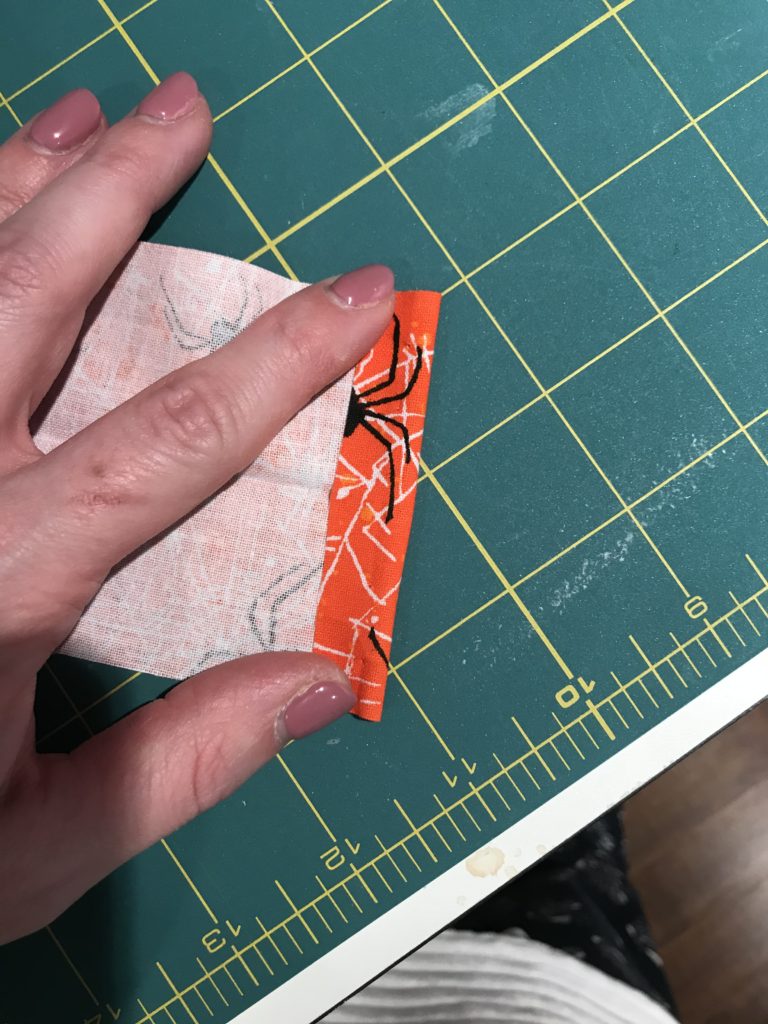
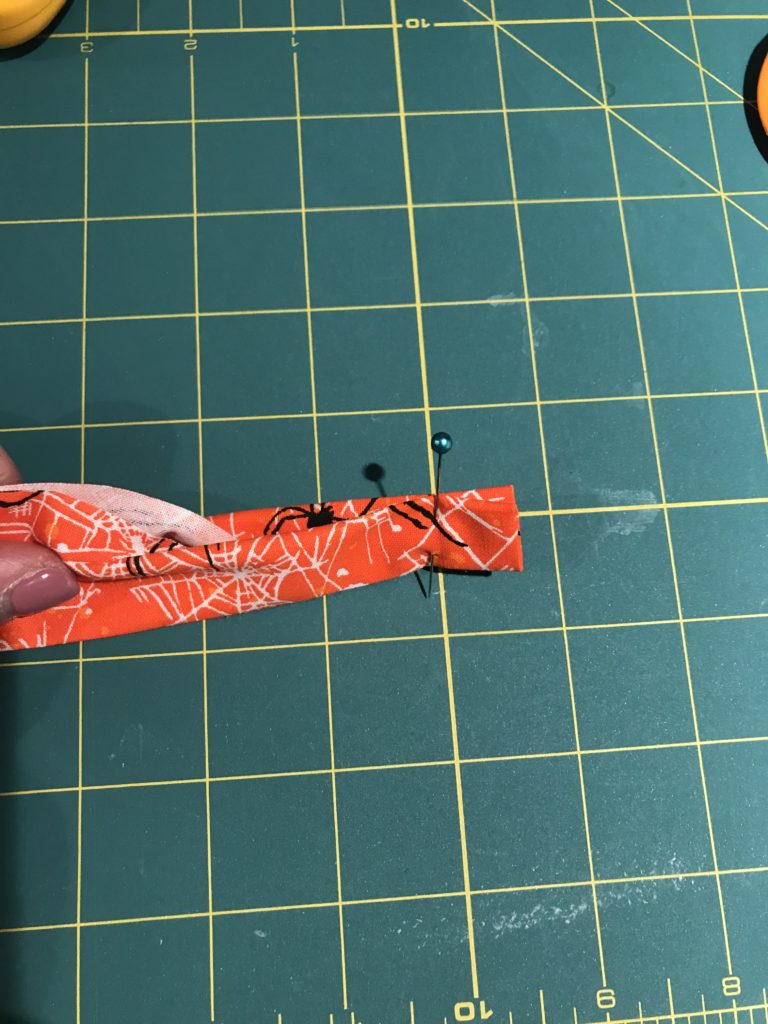
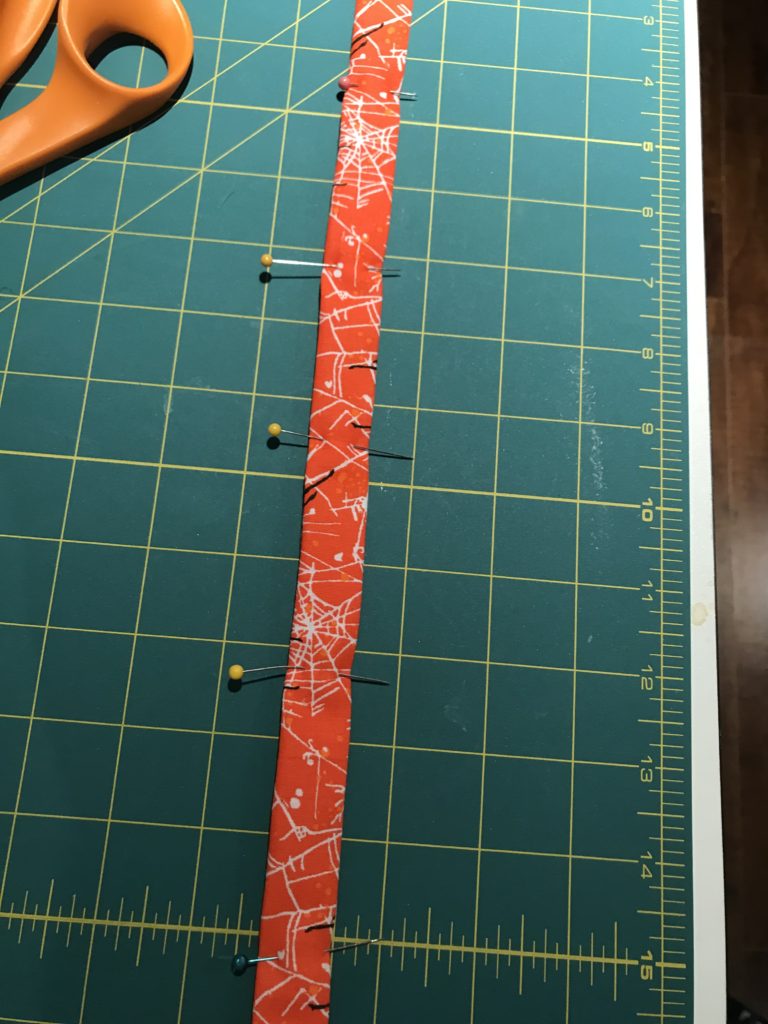
For the apron strap I cut two straps, about 36 inches each in length and 3 inches wide. Join them, right sides together. Press the seam open.
Press the ends of the strap over so no raw edge is visible.
Next you need to fold the strap in half (so now your dimension will be 1.5 inches X 72 inches). Press. Then tuck each of the cut edges under a second time.
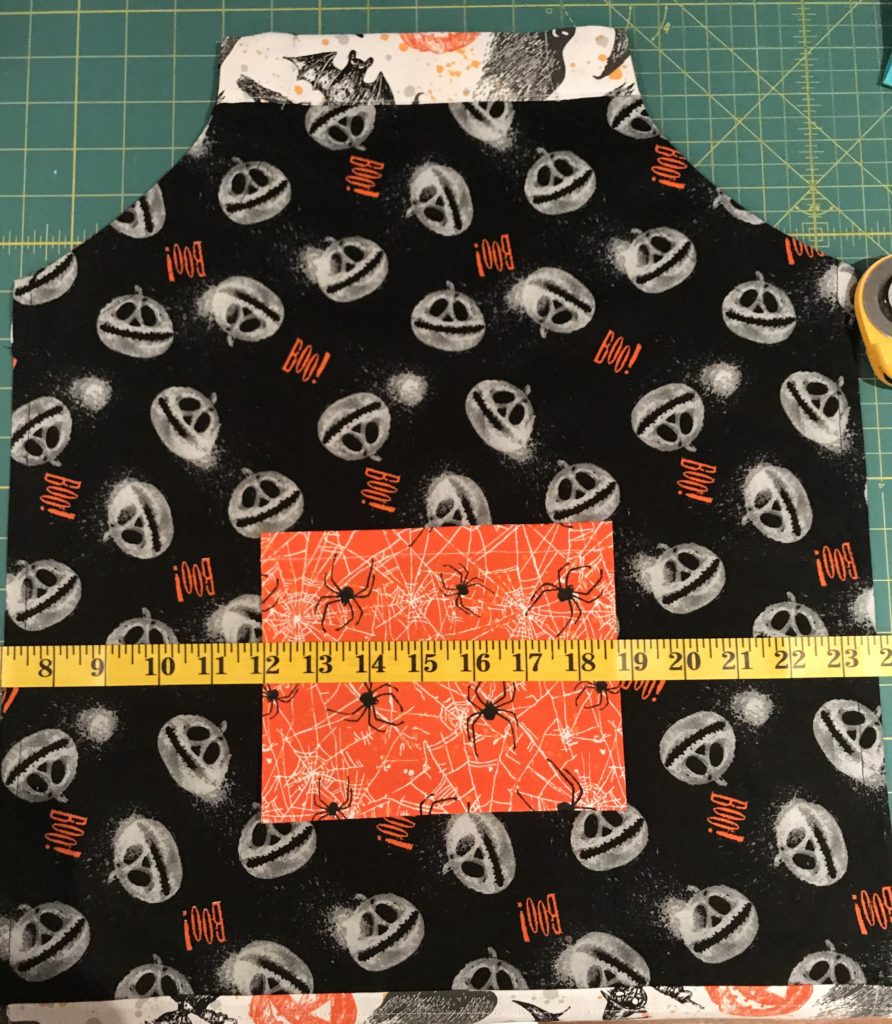
Set aside the strap and we’ll move onto the pocket. You can be really creative with pockets. You can do a big pocket, a small one, many small ones, a pocket on the bib, whatever you like. Add lace or ribbon to the top of the pocket to really dress it up.
I cut a square 8 inches by 7 inches wide. For the top of the pocket I fold down about 1/2 an inch, press, and fold down again. Stitch across the fold. If you want to add lace or ribbon, pin it on before stitching – two birds, one stone. Just be sure to use the right color thread, whichever option you choose. I like the look of the wide seam there. Then I press about 1/4 inch around the rest of the pocket.
Lay the pocket on the apron wherever you like. Measure across or from the bottom of the apron to ensure it’s straight.
Once it’s pinned in place, stitch around the three remaining sides, ensuring you backstitch properly at the top of the pocket where there’s likely to be more strain on the seam as the pocket gets used.
Give the apron a good press, using steam, and you’re ready to put the apron strap through the facings.
Back in my early years when I began sewing my mom taught me how to do this – attach a safety pin, close it up, and feed it on through. This is a great trick if you pull a string out of a hoodie or a drawstring out of pants.
As you do this, ensure your strap stays flat and doesn’t twist.
And you’re done! This is such a fun little project and once you’ve done it a couple of times, you can get these out in about an hour. They are a great stash-buster and they make great gifts.
You can personalize aprons by appliqueing a name or initial on it. I’ve also seen people applique things like mixing spoons or cupcakes on them. One day I’ll find time to try that out.
Other ways to personalize would be including decorative stitching, embroidery, decorative ribbons or lace, buttons, etc. The possibilities really are endless.
My little Halloween-loving toddler, on his learning tower modeling his new apron!
Thanks for stopping by and checking out my post today!
Oh, and when you go to wash this apron it’s best to knot the strap together because it’s adjustable, so it can come out in the vigorous washing machine. If it comes out you can always use the safety pin trick above to thread it back through.
With fall in the air here in St. John’s I’m dreaming of all things cozy! Fluffy, furry throw blankets…knit cowls…cozy ponchos. So much to do and so very little time!
I picked up a stretchy, black knit fabric a few years back with the intention of making a cardigan, however it’s been sitting in my stash untouched ever since. A couple of weeks back I decided to turn it into a poncho for work (when the air conditioning gets the better of me).
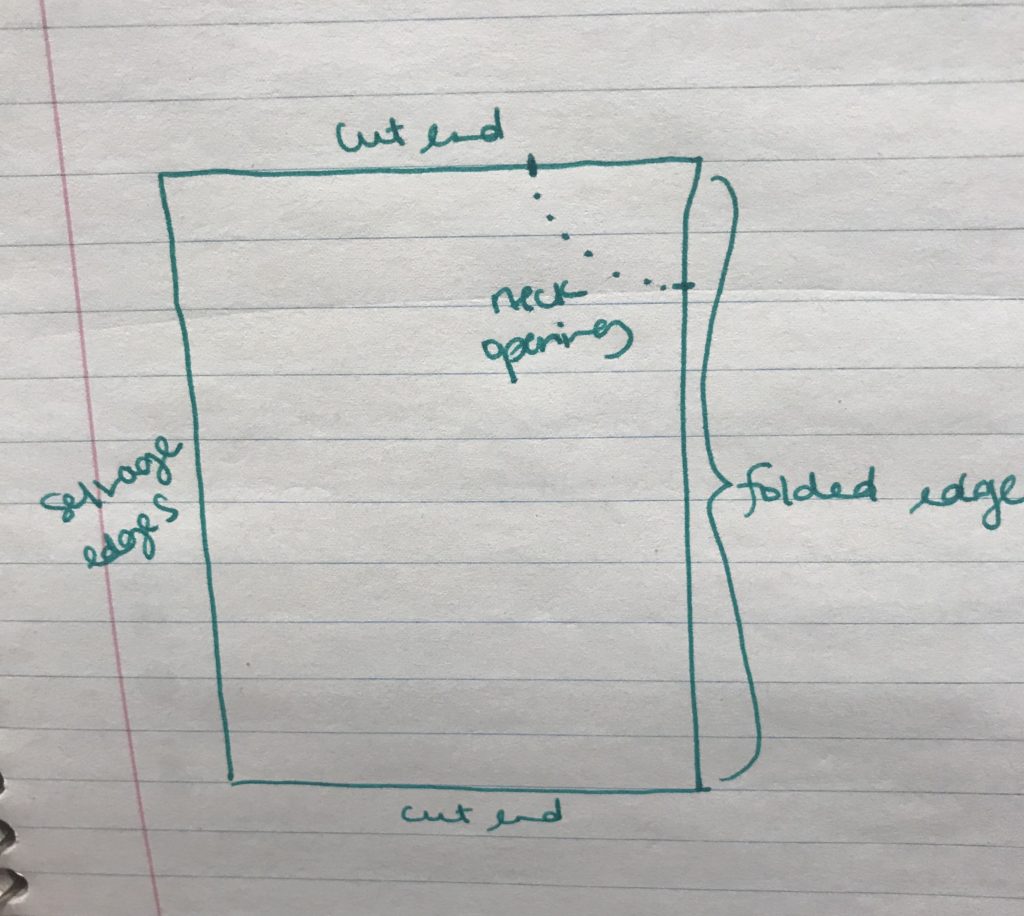
I forgot to take pictures along the way so I’ve drawn out a diagram of the fabric for your viewing pleasure (sarcasm!)
Here’s what you’ll need for this tutorial:
1 meter of fabric
medium or large buttons (optional)
I started by laying out the (folded) meter of fabric on the floor, with right sides together. When I say folded I mean the selvage edges are together (see diagram below). I evened up the cut edges to ensure I had clean lines to work with.
A meter of fabric will make a rectangular poncho, so it will be asymmetric. If you want a symmetric poncho, measure the width of the fabric and then cut the length of folded fabric to that same length. I like the asymmetric look.
If your fabric frays easily, you will want to consider serging around the whole piece of fabric now, or you can zigzag.
Starting from the folded side of the fabric, I measured down 9 inches from the corner and marked it with a pin. Then I measured 9 inches in the other direction along the cut edge and marked that with a pin. The area between the two pins is the neck opening.
You will want to leave one side folded , which is one less seam to sew! Pin along the cut edge from the 9 inch mark to the end. Sew along that seam using a 1/2 inch seam allowance.
Turn the garment right side out.
You can pick up your poncho now with just one seam sewn, and ready to wear! For the neck opening, you can either fold the triangles of fabric inside (as I do) or outside, whatever you think looks better.
Depending on your fabric you may choose to hem the bottom of the poncho as well, but this fabric didn’t need it.
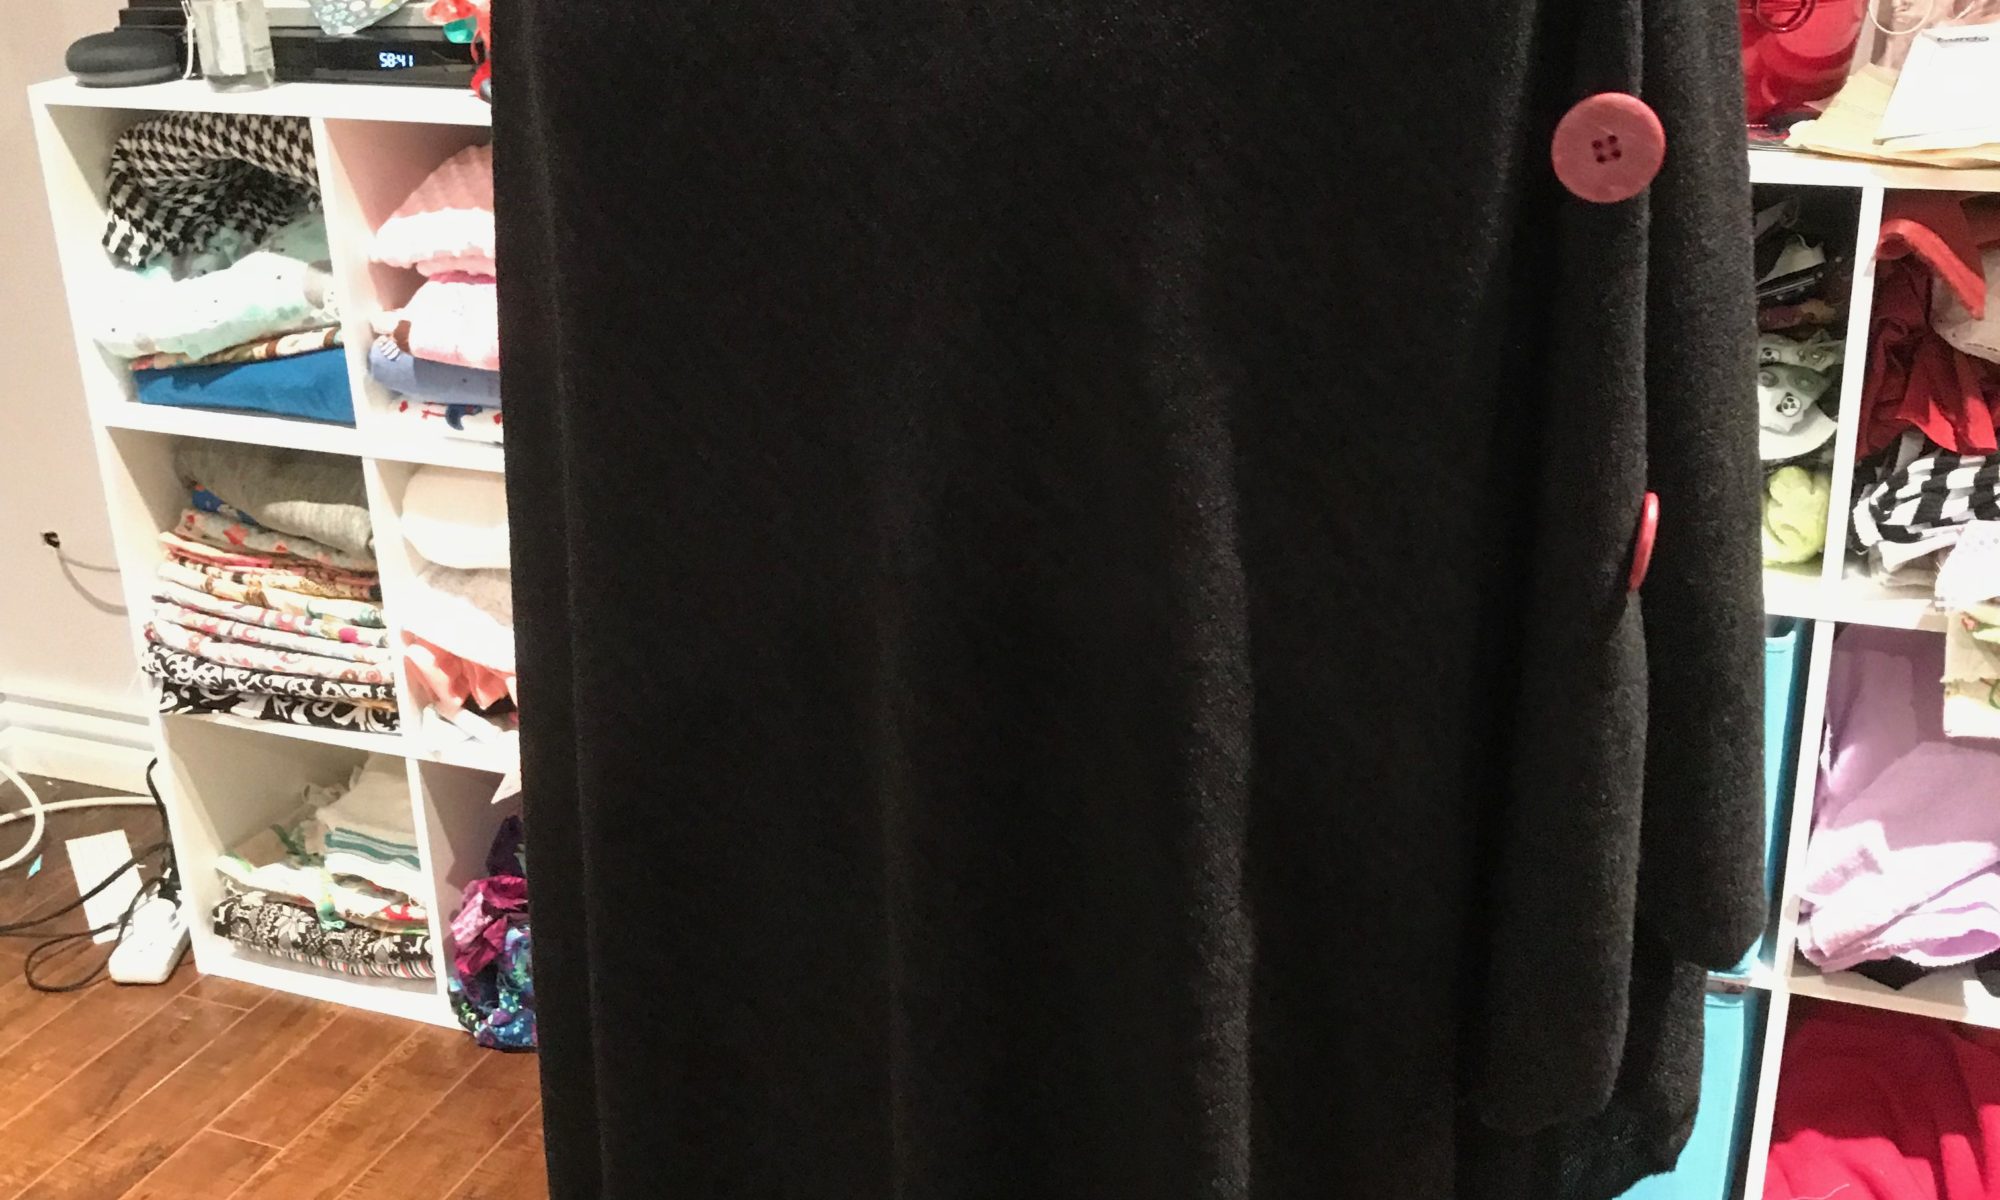
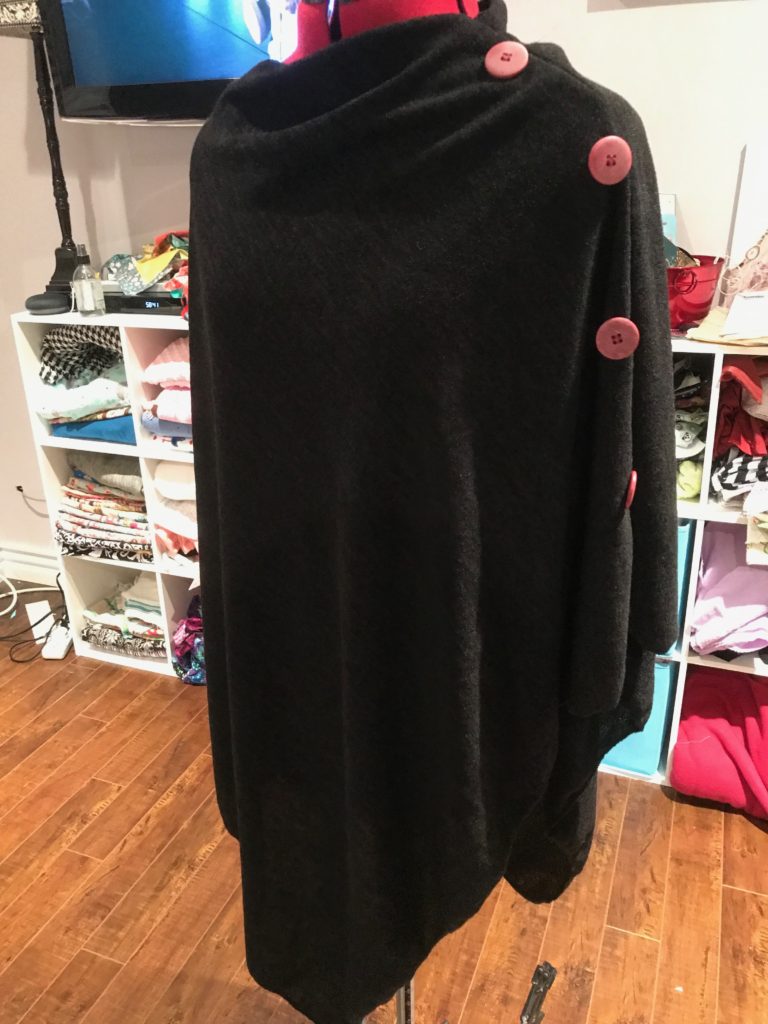
I dressed up this basic black poncho with some buttons I had in my stash. I placed them evenly down the shoulder seam. Since they are only decoration, it’s about 10 minutes work to do this piece but it really does change the look of the poncho.
I’ve made this poncho in plain fabric, plaids, tweeds, etc. Every version has been cute. The key is to choose a fabric that isn’t too stiff or heavy as you want it to hang and have good movement.
Using a slightly heavier wool-blend fabric can provide a bit more warmth for outdoor wear, but this one is perfect for the office.
If you use a fabric that frays nicely (think: plaid) you can also intentionally fray along the bottom edges, which takes a little time but looks really cute as well.
Scarves are such a versatile accessory and can transform an outfit instantly, so they are high on my list of favorite things to make. For awhile I was really into infinity scarves but I’m over that. I moved onto blanket scarves but often found them challenging to style because they were so big and bulky. I like a statement scarf but not something that feels suffocating.
I never was one for plaid but I can tell you that when I spotted this fabric I couldn’t put it down. The colors make it perfect to wear with jeans and black tee, but it also isn’t a bad choice to pair up with a leather jacket or a long sleeved dress.
One very nice thing about flannel is that you do NOT need to finish the edges, so no-sew all the way if you want. As you wash and dry it you may notice it frays, but typically that only makes it look even better. It’s possible the first time you wash and dry this scarf you may need to trim a few random threads around the edges, but fraying won’t be an ongoing issue.
Materials needed for this project:
1 meter of flannel fabric (makes 2 scarves)
Scissors
Rotary cutter and ruler (completely optional)
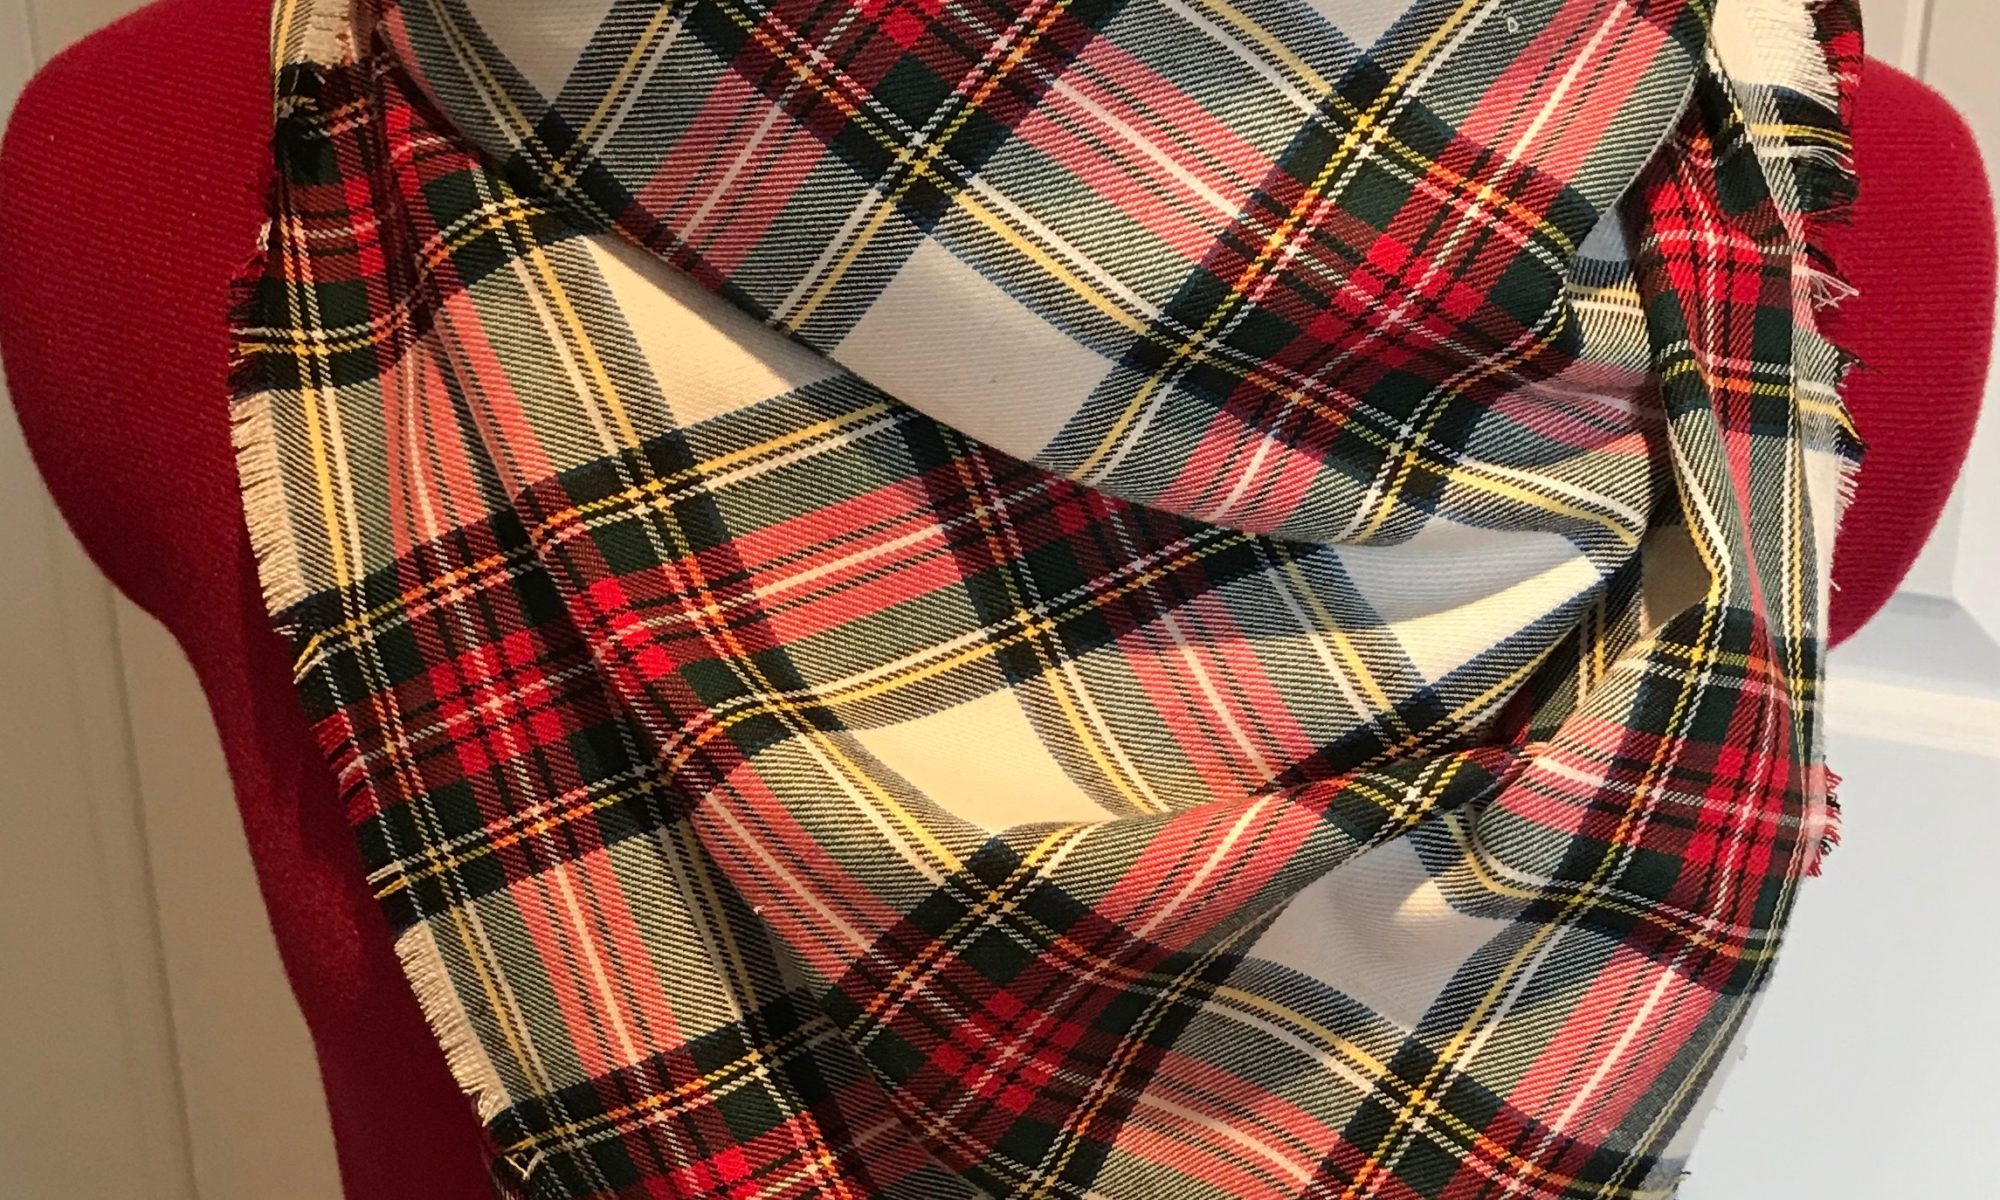
After bringing this beautiful plaid home I pressed it with an iron to get all the wrinkles out, then laid flat on the foor. I placed my ruler along the diagonal (from top right corner to bottom left corner) so as to form 2 large triangles.
Cut along that diagonal line. Here I did take a moment to kind of square-up the fabric because the width of this particular fabric didn’t form a symmetrical triangle.
Once I had the two triangles cut I tugged gently at the loose threads along the unfinished edges and pulled to cause a little fraying.
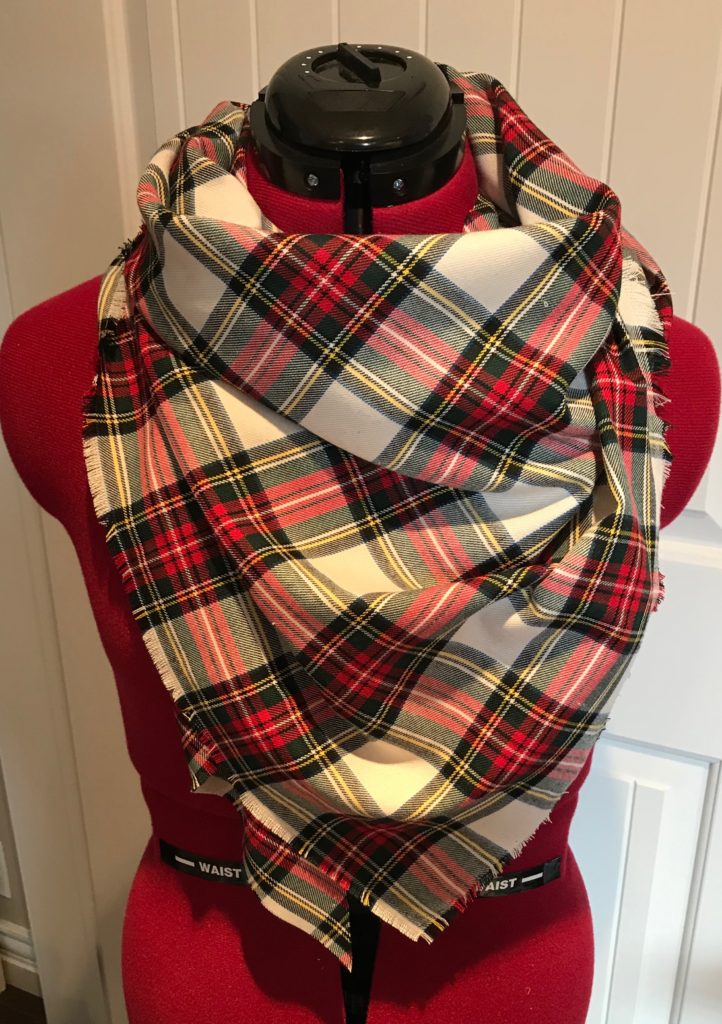
That.Is.It. End of tutorial. You now have two beautiful scarves. Keep one for yourself and pass the other along to a friend. 15 minutes and you’re done.
If the scarf feels too bulky you can trim it down a bit and keep trying it on until it feels right for you.
Recently I had the tremendous pleasure of making a memory quilt for a baby who will be arriving in just a couple of short months. The quilt is made in memory of the grandmother of the soon-to-arrive baby, using her scarves, tshirts and pyjamas.
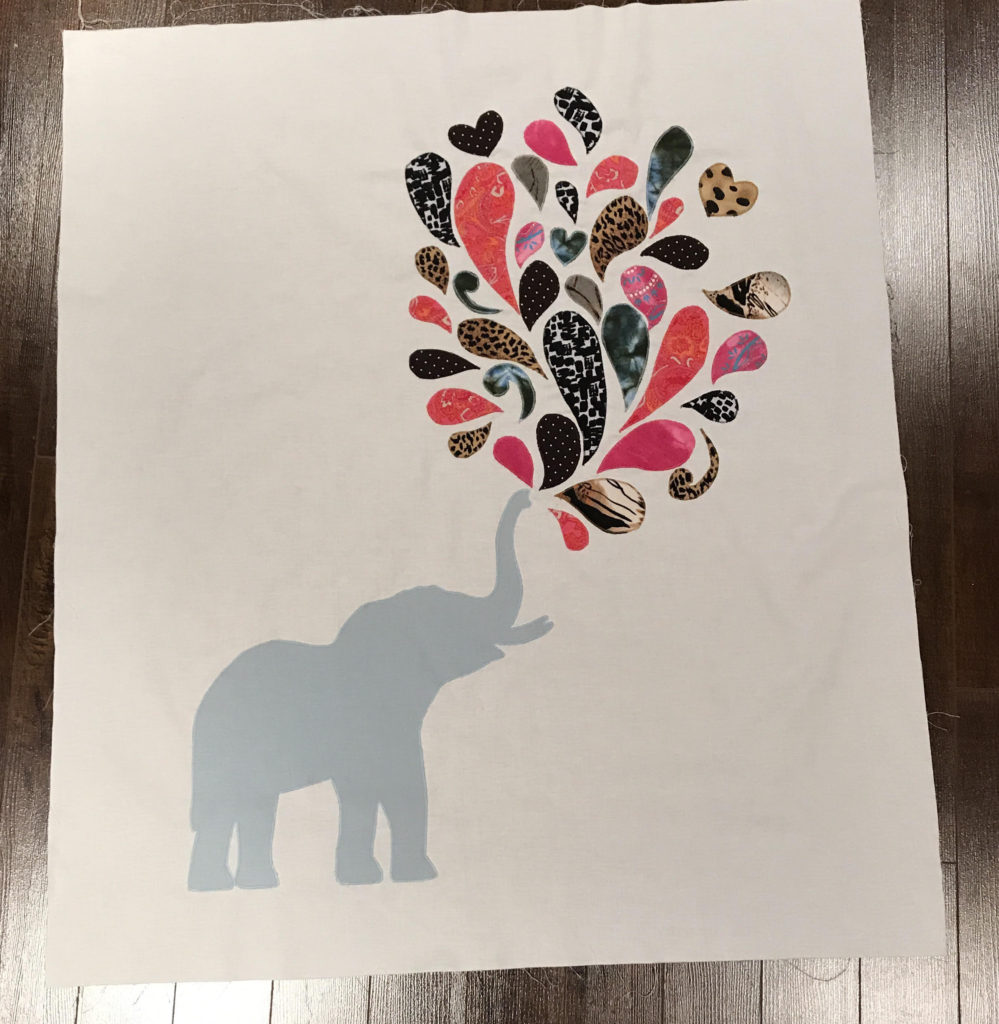
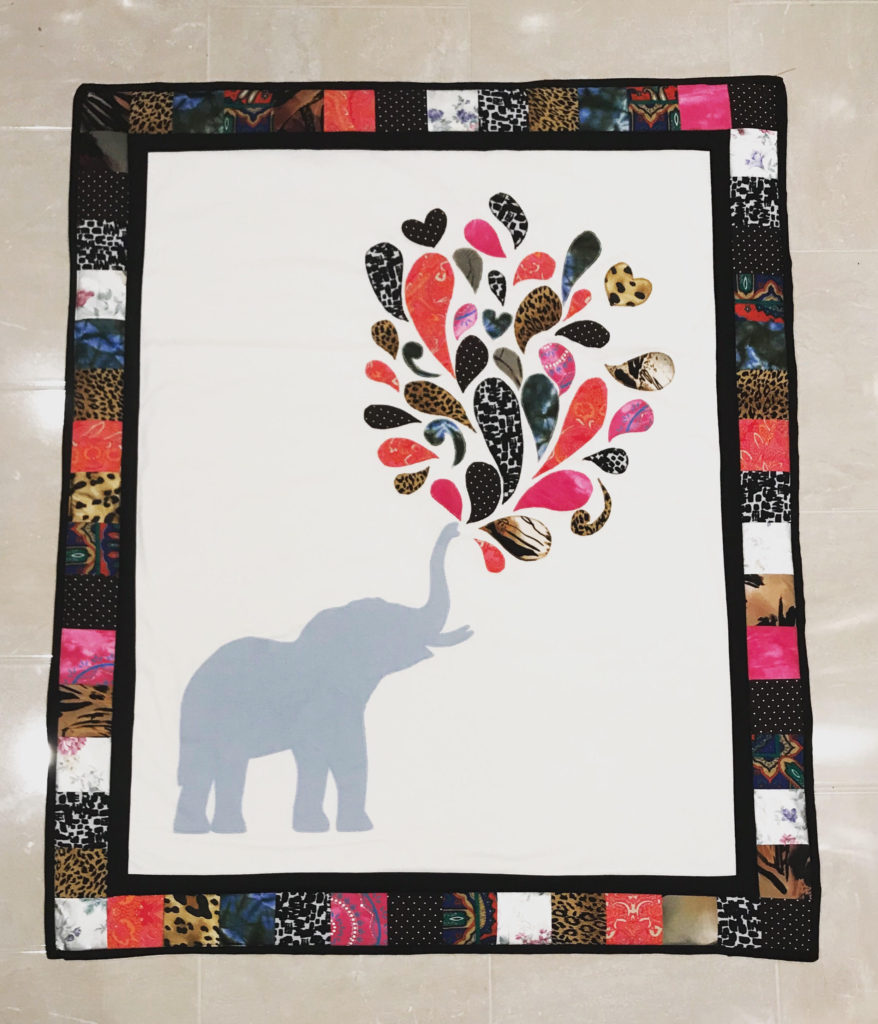
I had pondered the design of this quilt for quite some time. I came up with an elephant puffing water out of its trunk, with the water droplets made from pieces of her clothes, and a patchwork border.
I set out to get fabric for the elephant and the main body of the quilt. I headed down to The Fabric Merchant and met with Shelley to discuss my project. We planned out the colors, the border, the design, etc. It’s so good to bounce ideas off a really experienced quilter. An hour later I emerged with the supplies I needed.
I planned out the size of the quilt and drew up a rough draft of how it would look. I decided to do 3X3 (unfinished) squares of fabric to form the border. One challenge with this quilt is the variety of fabrics I had to work with – cotton for the body of the quilt, flannel on the back, but then there was everything from polyester to jersey to silk for the border and water droplets. I stabilized most of the fabric before sewing, just to save myself a headache.
I printed a silhouette of an elephant and cut it out of cotton, with applique paper for the backing. Then I drew out the water droplets and cut those out of the memory fabric, with applique paper on back as well.
I went with color coordinated thread for the applique in this case. Instead of my typical applique stitch I chose a tight zigzag stitch, as this blanket will probably be washed frequently and I want the design to hold up over time.
I stitched the elephant in place and then started adding the water droplets. Of course attaching them to the quilt with the iron was tough because, again, each fabric was a different weight and composition, and I was constantly changing settings on my iron to avoid scorching the pieces.
The applique took about 1 hour in total, so it went by pretty quickly.
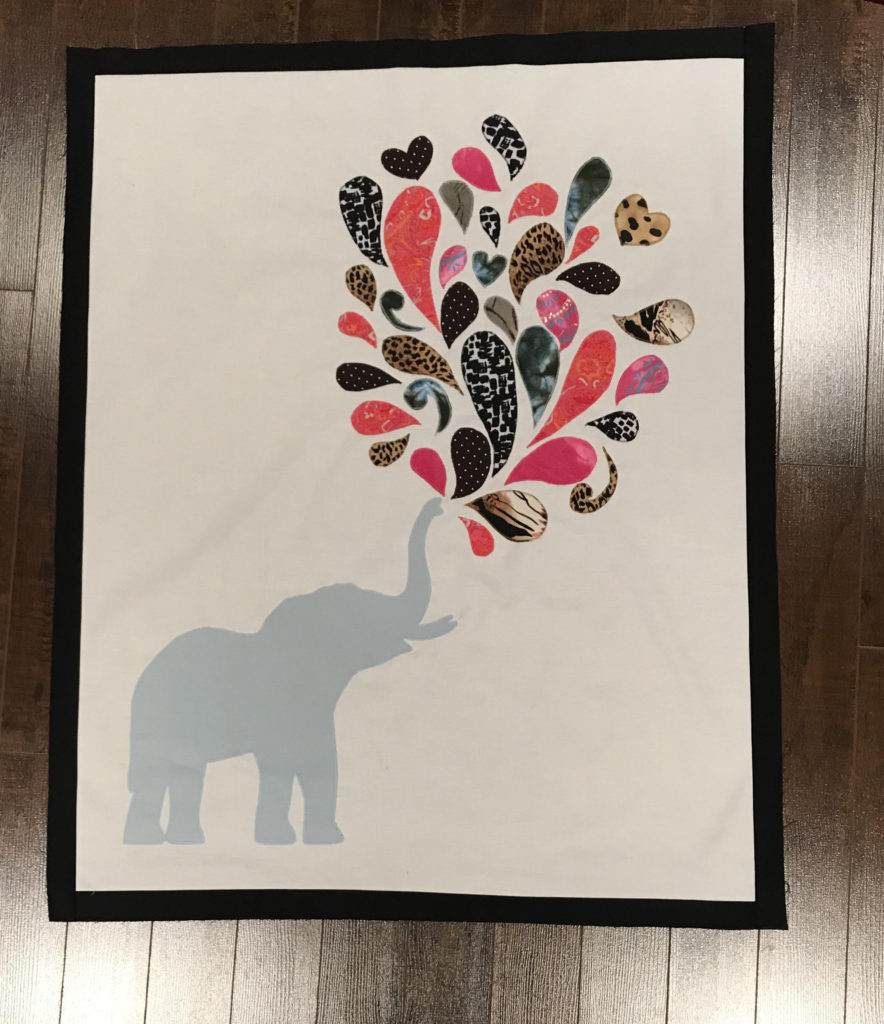
Once the applique was done I added a black border to the blanket before stitching the colored border in place.
I finished the quilt with a black binding.
After I took this photo I quilted this down a bit with some white hearts on the white space to give this a bit more durability.
This project was so fun to design and create, and I would absolutely love to take on more keepsake projects down the road.
I hope you enjoyed this post today! Thanks for stopping by.
My most frequent sewing project is, without a doubt, baby blankets. All different shapes, colors, themes, sizes. It’s my favorite gift to give at a baby shower, and you can pretty much rest assured the receiver won’t get a duplicate.
Whether you’re doing tummy time, reading books on the couch or heading outside for a picnic, baby blankets are sure to get used.
Recently I’ve had the pleasure of making a bunch of blankets, so tonight I will walk you through my process. There are plenty of standard sizes for blankets, but you can absolutely use your imagination when planning out your blanket.
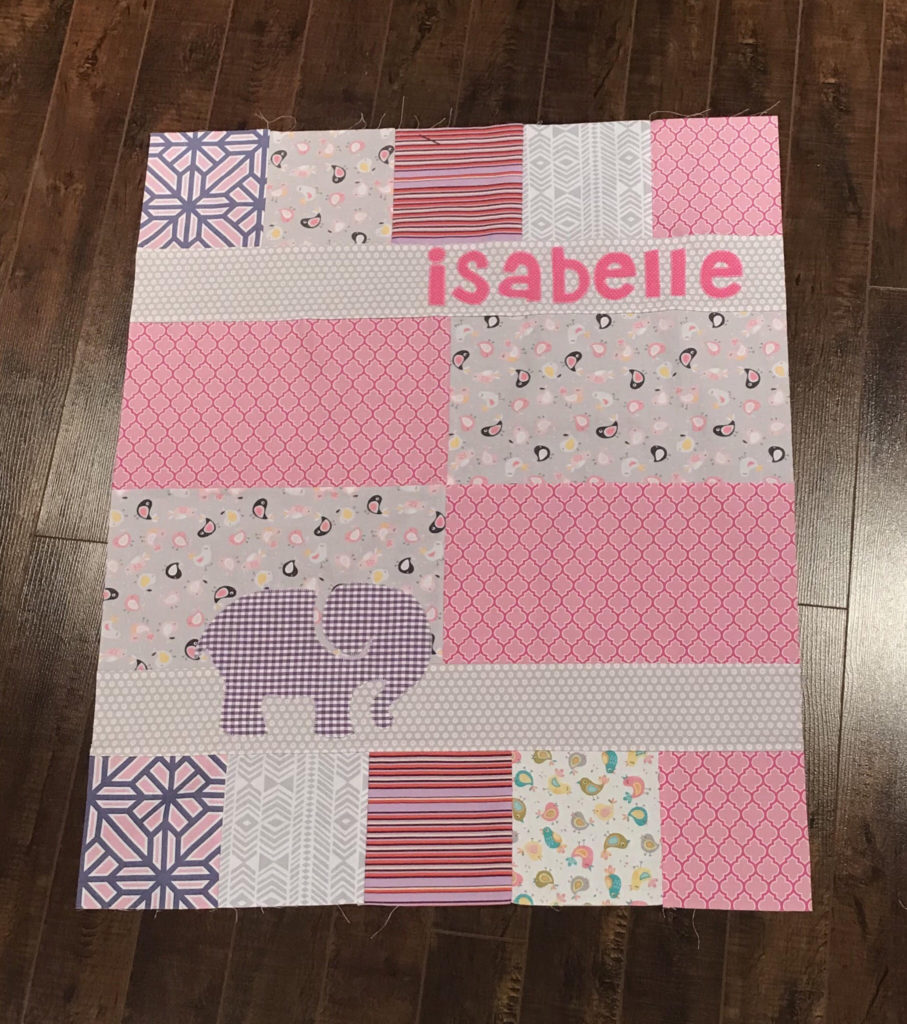
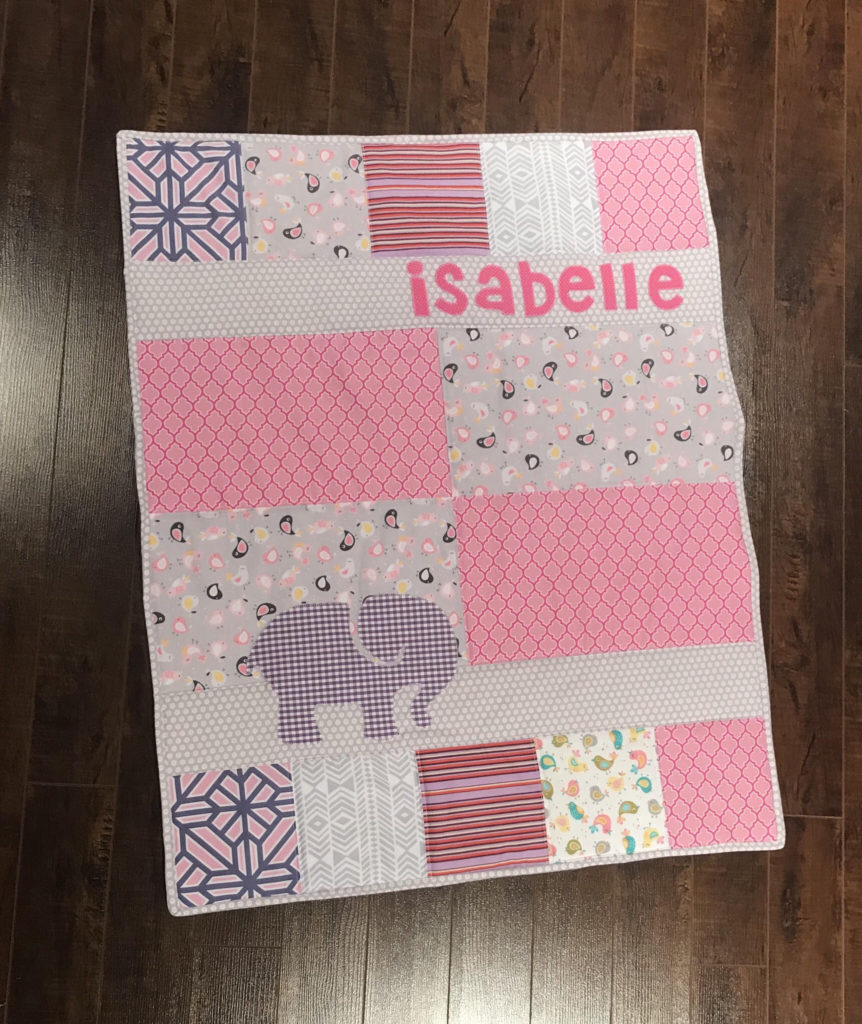
The first blanket was made for a new baby in my very extended family, I will say. A beautiful little girl named Isabelle. I actually used fabric from my stash (still working away at it…….) and I was really happy with it.
Previously I had used these exact fabrics to make Big Sis and Little Sis blankets for a good friend of mine. I made a mini version of that quilt for Isabelle.
I started by drawing out a pattern. I cut 10 6X6″ blocks for the top and bottom of the quilt. I cut 2 30X4″ pieces for the long rectangular sections. Then I cut 4 15X8 pieces for the center. I knew that once I joined the pieces I could trim the uneven edges caused by the seam allowances. Sometimes I am more precise, but this time I didn’t feel the need to be.
I used a 1/4″ seam allowance and joined the blocks across each row. Once each row was formed, I joined them horizontally to form the blanket.
It came together quite quickly as there weren’t that many pieces. This is a photo of the quilt top once I appliqued the elephant and her name.
I gave the fabric a good press with a hot iron here to flatten out the seams.
I picked out cotton batting for the centre of the quilt and a soft minky for the backside. Once I put the quilt together with right sides facing out and the batting in the middle, I started pinning the 3 pieces together. Lots and lots and lots of pins. The next step is to quit down the fabric. This essentially means you will sew all 3 pieces together in some pattern, which will help the blanket keep its shape over time as it gets washed more and more.
I quilted down along each seam on the quilt, both sides of the seam in fact. So I essentially made railroad tracks right on top of each seam. This part takes a bit of time but really does add to the blanket.
Once the quilting down was complete, I made the binding for the edge of the quilt. I cut 2.5″ wide strips of cotton and used this technique to join it to the quilt.
Some people hand sew the binding in place but I don’t typically do that. I actually don’t enjoy hand sewing, and the time commitment is significant.
Voila! A personalized gift that will get used over and over and over and over…..
The next blanket was quite simple and was made for a customer. She gave me permission to share this project with you.
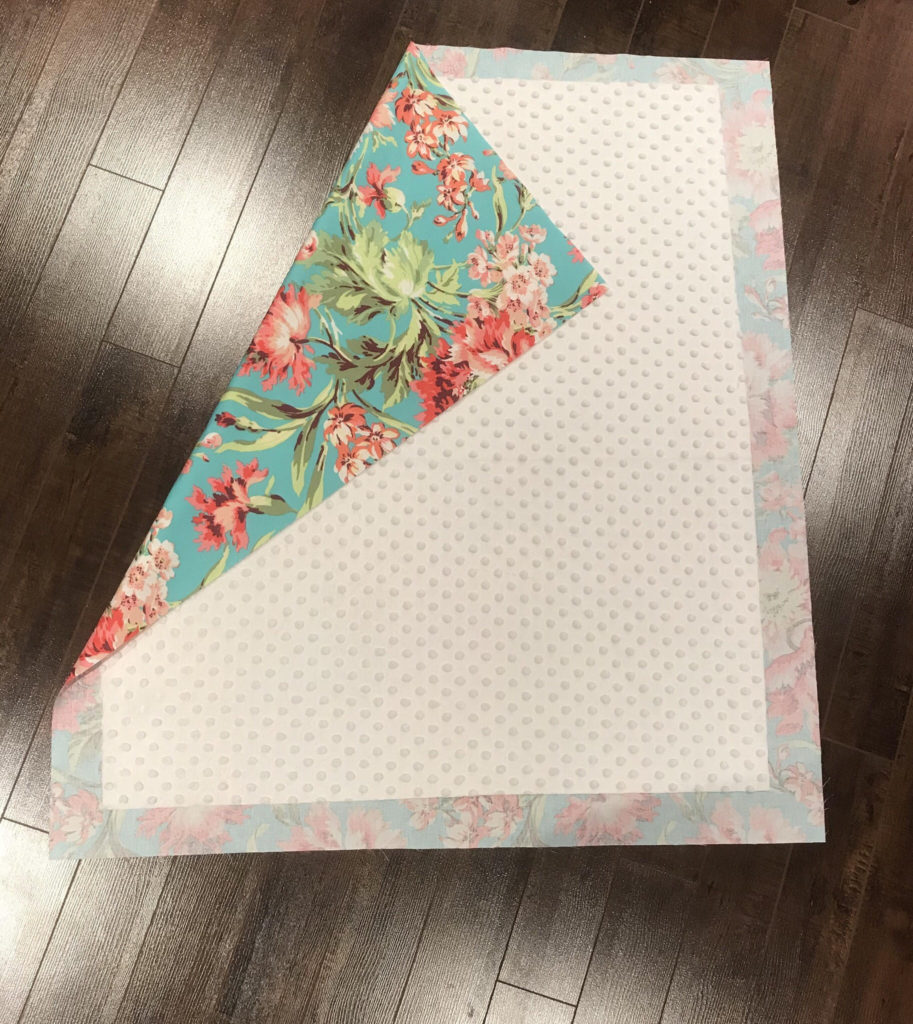
The customer had seen fabric by Amy Butler called Bliss Bouquet (in Teal) and fell in love. She wanted a baby blanket made for her soon-to-be-arriving baby girl. She wanted a basic blanket with minky on the back.
This fabric is very difficult to get, but I was fortunate enough to find it at The Fabric Merchant here in St. John’s, NL. Don’t even get me started on how much I love this store…
I picked up a slightly cream colored minky fabric and got sewing. She wanted a blanket that was 28X33″.
I started by ironing the cotton Amy Butler fabric. I cut out a rectangle that was 32X37, to ensure I had plenty for a nice folded edge over the minky.
I cut the minky and the cotton batting to 28X33.
I laid out the pieces on my floor and smoothed out any wrinkles.
Next I went around the edge of the blanket, folding down the printed cotton twice, and pinning in place in preparation for sewing.
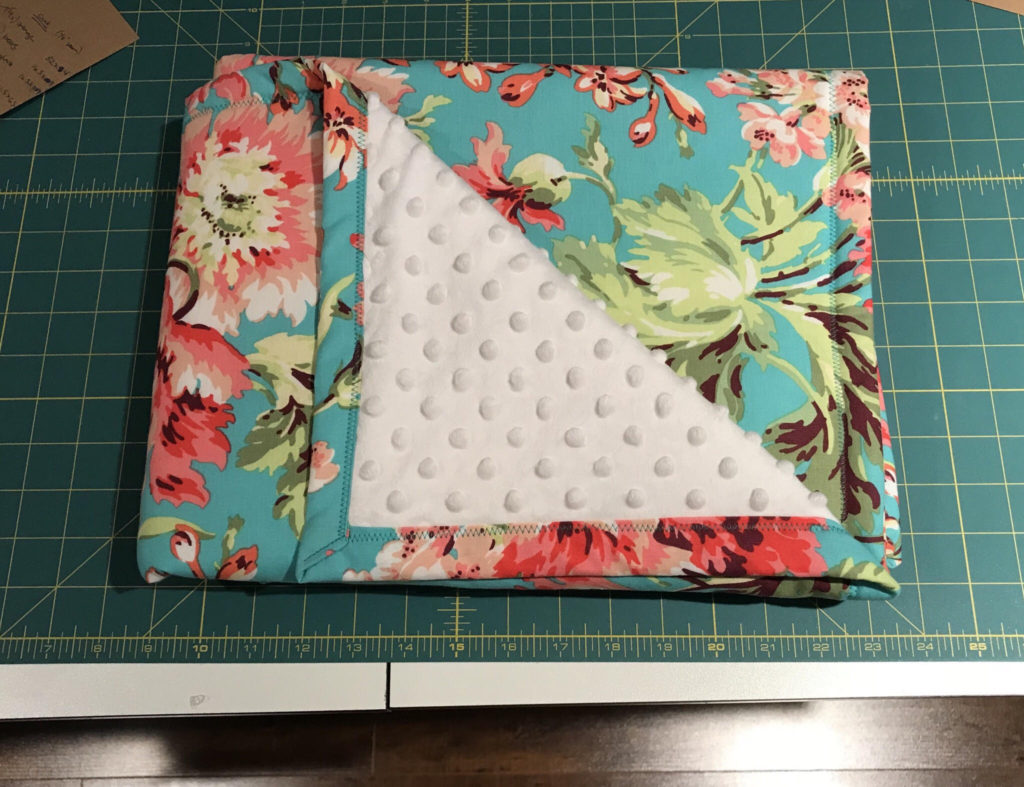
I zig zag stitched around the blanket and it was done!
This blanket is so soft and pretty, and took about an hour to make.
There are many variations of baby blankets and they really do make wonderful gifts. You can get really creative and mix colors and prints, and you never have to do the same blanket twice.
I hope you’ve enjoyed this post. Thanks for stopping by today!
Leading up to Connor’s birthday party I was looking at options for a fun birthday tshirt! My husband lives in baseball-style shirts so I thought it would be cute to dress him up in one of those.
I picked up the shirt from the sale rack at Old Navy for about $5.
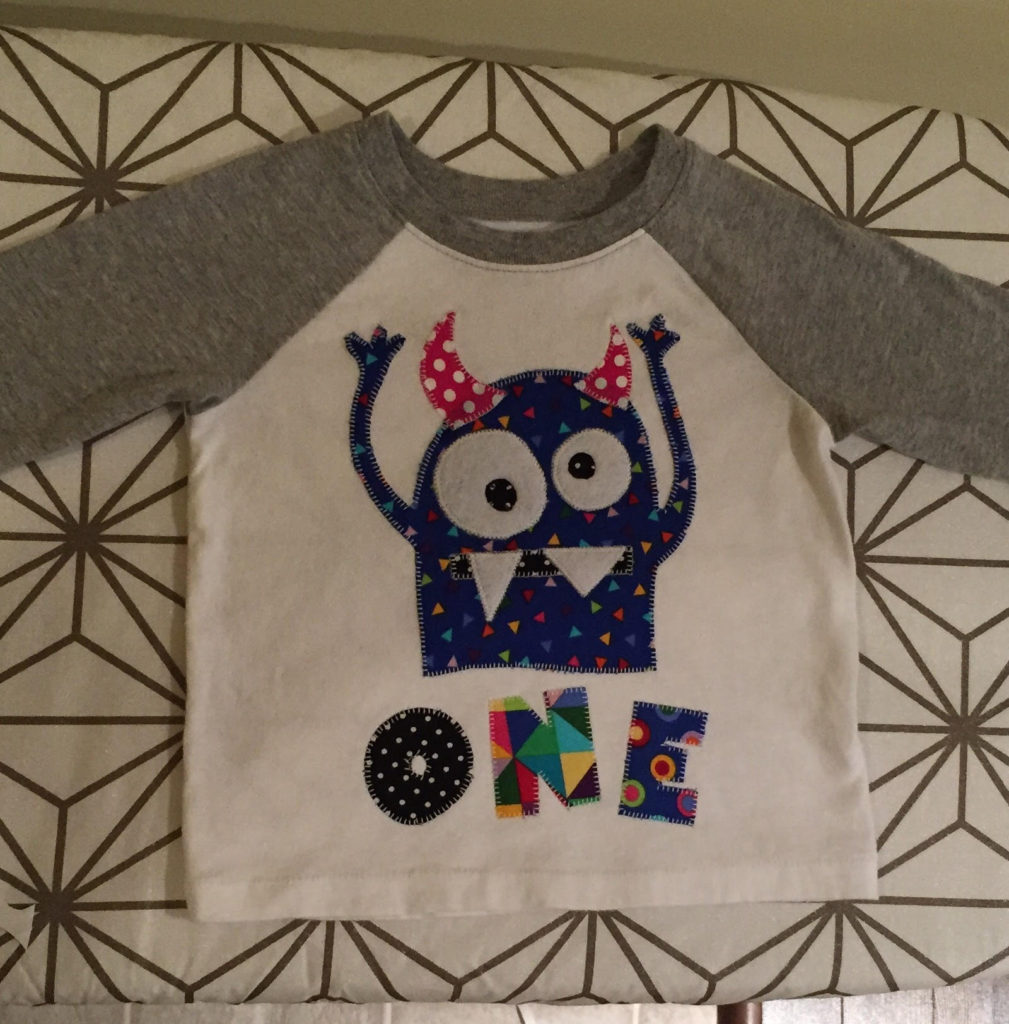
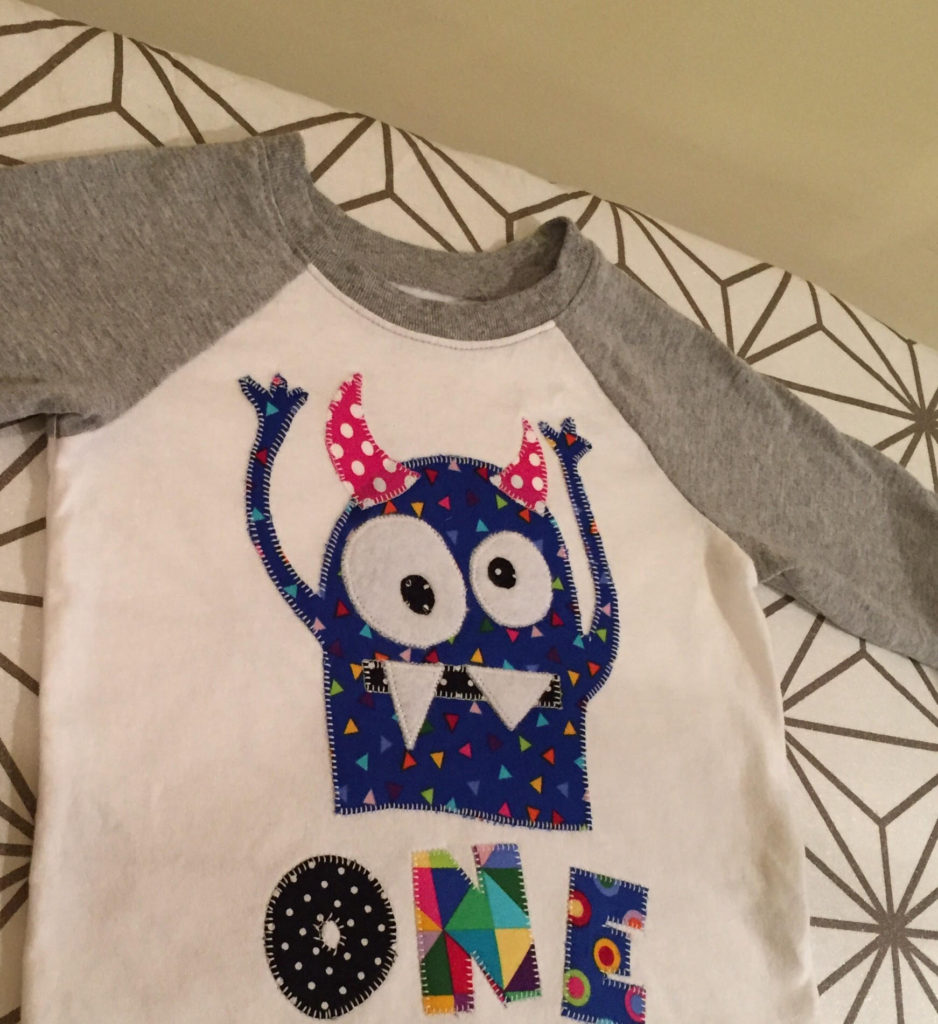
I decided to test out my applique skills for this project, knowing it would be a bit more involved than what I’ve done in the past. I enlisted the help of my darling husband as he has mad drawing skills. We looked at how big the monster should be (based on how big the shirt was), and started to plan out the project.
We looked up some images on Google for monster birthday shirts and came across a design we loved. This is not our original idea, though Matt did draw it by hand. Within a few minutes he had drawn this little guy:
To applique this, he had to cut out (from paper) all of the layers separately to make a pattern, so first he cut the body (with arms attached), then the horns, then the eyes, then the mouth, then the teeth. We spent some time coming up with the best color scheme for the monster.
Then he cut out the letters (from paper) for “one” and we chose fabric to match the monster.
Here are the materials you will need for this project:
A paper pattern (you can create your own)
Heat’N Bond Lite
Coordinating fabric
Scissors
Contrasting or coordinating thread
Iron
Lightweight interfacing (optional but helpful)
Once your pattern is cut out of paper you will want to iron the Heat’N Bond Lite to the back of the fabric per the instructions on the package.
Use your pattern pieces to cut out the fabric pieces.
Position the monster body on the shirt where you think it best fits. Position the letters for “One” underneath. Once you’re happy with the placement, peel the backing off of the Heat’N Bond Lite and make sure the steam setting is turned OFF on your iron. Iron these pieces in place.
Next you will add on the horns, the white part of the eyes and the mouth. Press those in place.
At this stage I would cut a piece of interfacing and place on the inside of the shirt. This is optional, however if the shirt fabric is really stretchy or flimsy, a little stabilizer on the back does help with the applique, especially when going around the tiny little monster fingers.
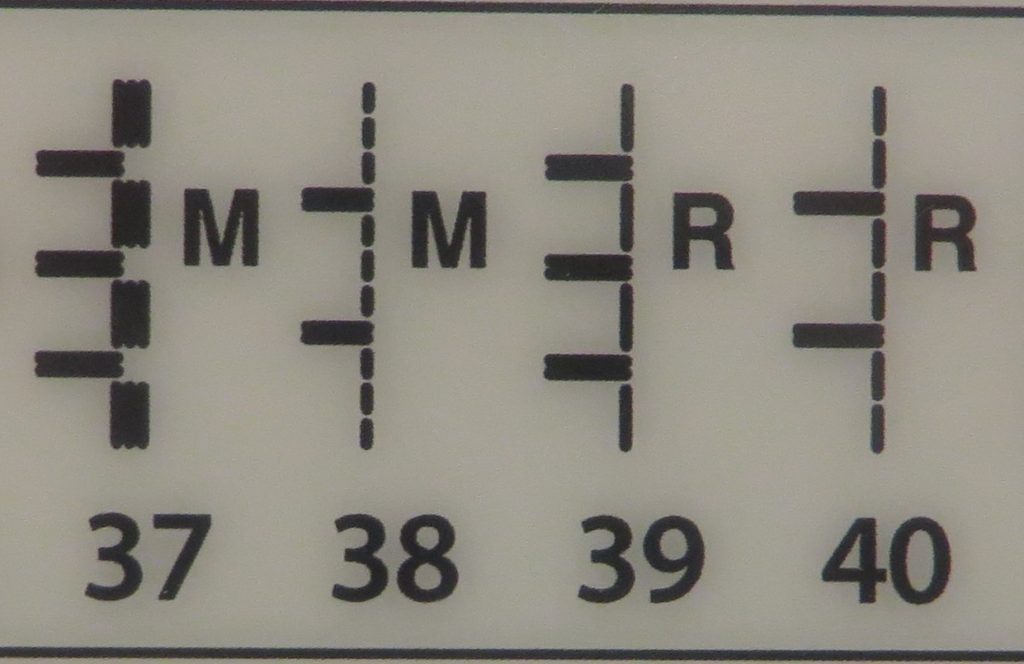
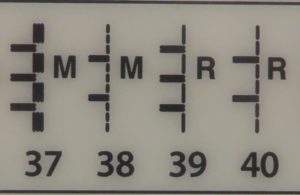
Before adding on the pupils and the teeth, applique all of those pieces in place. To applique you can use either a very small, tight zigzag stitch on your machine or a regular applique stitch. The zigzag may be best if this is an item you plan to wash and wear often, as the zigzag will be best at preventing fraying over time. But this shirt was to be worn once and then put in a memory box for Connor, so I went with the traditional applique stitch. On my Janome Horizon Memory Craft 8200 it’s stitch 39.
Once you’ve appliqued all the way around these pieces (using either a contrasting thread or a matching thread), you can iron the pupils and teeth in place as pictured here:
Applique the last pieces added.
Give the shirt a good press with your iron and it’s ready to wear! I did throw this one through the washer to soften up the appliqued fabric a bit before wearing.
This project can take a little time, maybe 90 minutes or so. But the result was so darn cute I would do it all over again!
There’s something SO adorable about a little baby sitting in a high chair munching on cake. Of course the trend these days is to dress up that high chair with a banner or a garland.
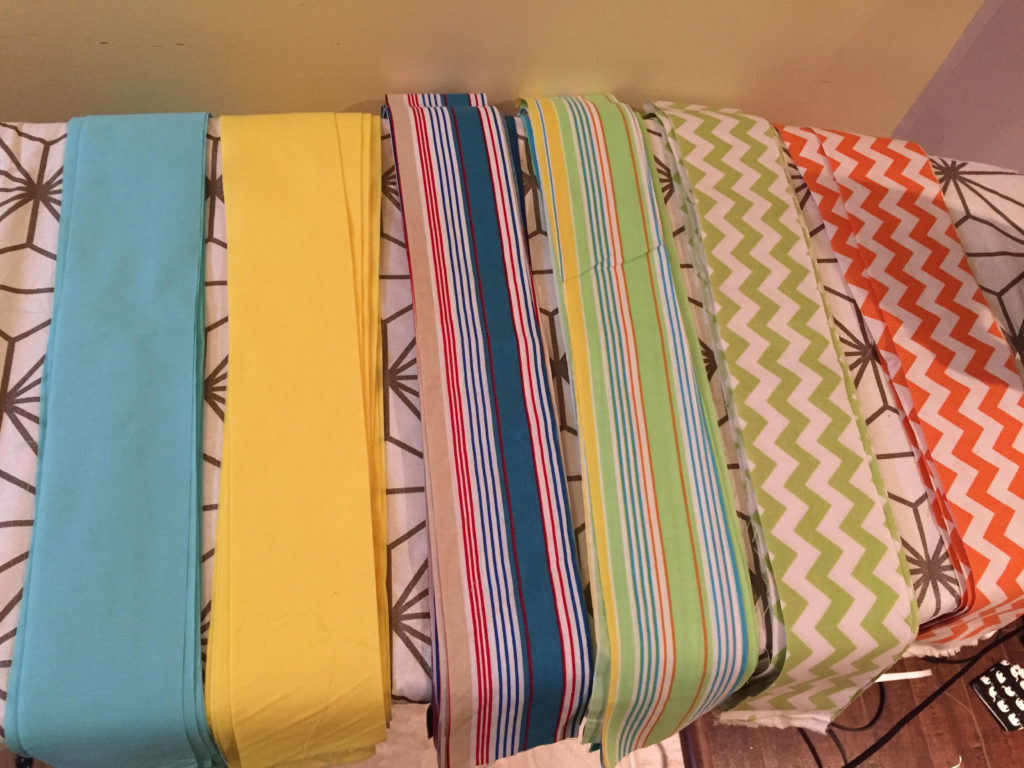
For Connor’s monster themed party I decided to do a really fun high chair banner. I headed to Fabricville and hit up the sale rack, scoring a great deal on some really adorable printed cottons. I also picked up some inexpensive broadcloth in complementary colors.
Here are the materials needed for this tutorial:
2.5 metres (total) of cotton and/or broadcloth
1/4 metre of fabric for hanging banner
1/4 metre of fabric for back of hanging banner (optional)
Scraps of fabric (cotton, broadcloth, felt, denim) for applique on banner
6ft piece of twine
Pinking shears
Scissors
Heat N’Bond Lite (for applique on banner)
If you just want to make a garland (without the hanging banner in the centre) you don’t need the Heat N’Bond Lite, scraps of fabric, or either of the 1/4 metres of fabric.
To start I strung a piece of twine (roughly 7-8ft long, which is way longer than it needed to be) and tied each end to handles on my cabinets. This will make it easier to loop the cotton pieces.
First you should iron all of your fabric. I forgot to do this somehow and ended up ironing each piece of fabric individually. Hello, time waster!
Once your fabric is ironed you will cut strips of fabric 3 inches wide by 42 inches long. If you have a rotary cutter, ruler and cutting mat this is a breeze. But it can easily be done with scissors as well. It doesn’t have to be exact. I did more of the fun prints and fewer of the solids.
Cut 28 strips in total.
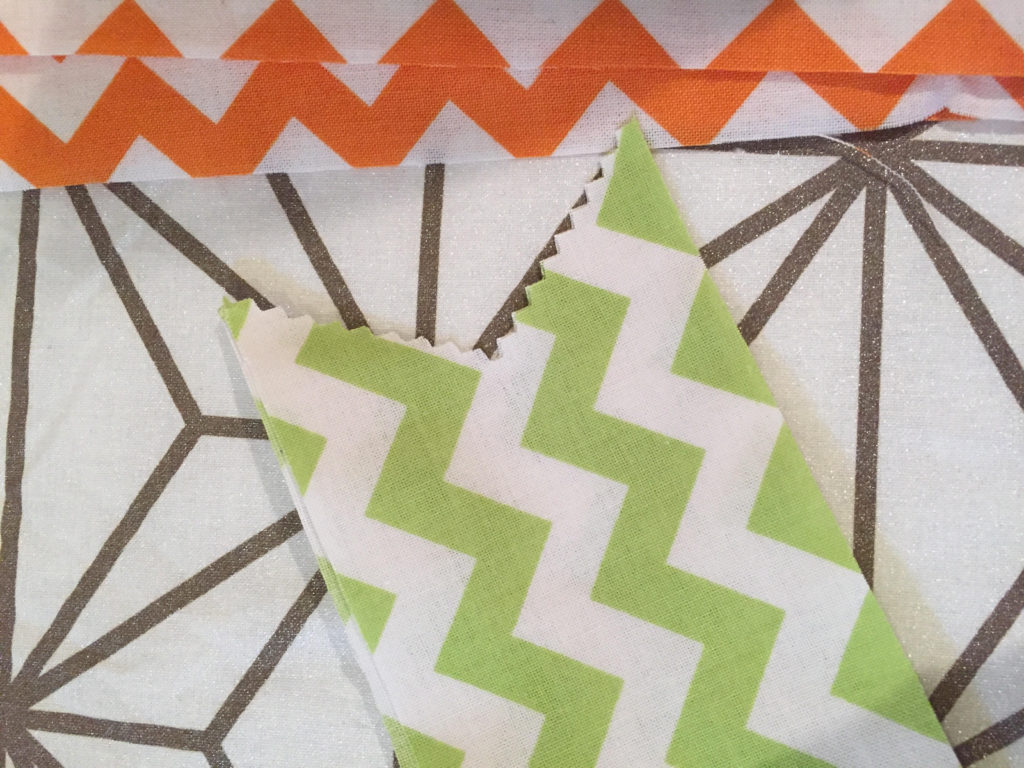
Once all of your strips are cut, fold each piece lengthwise and cut the ends with pinking shears. Here are a few options for the ends:
Cut straight across
Cut on a diagonal
Fold fabric in half and cut a diagonal, making a V shape once the fabric is opened up again (pictured)
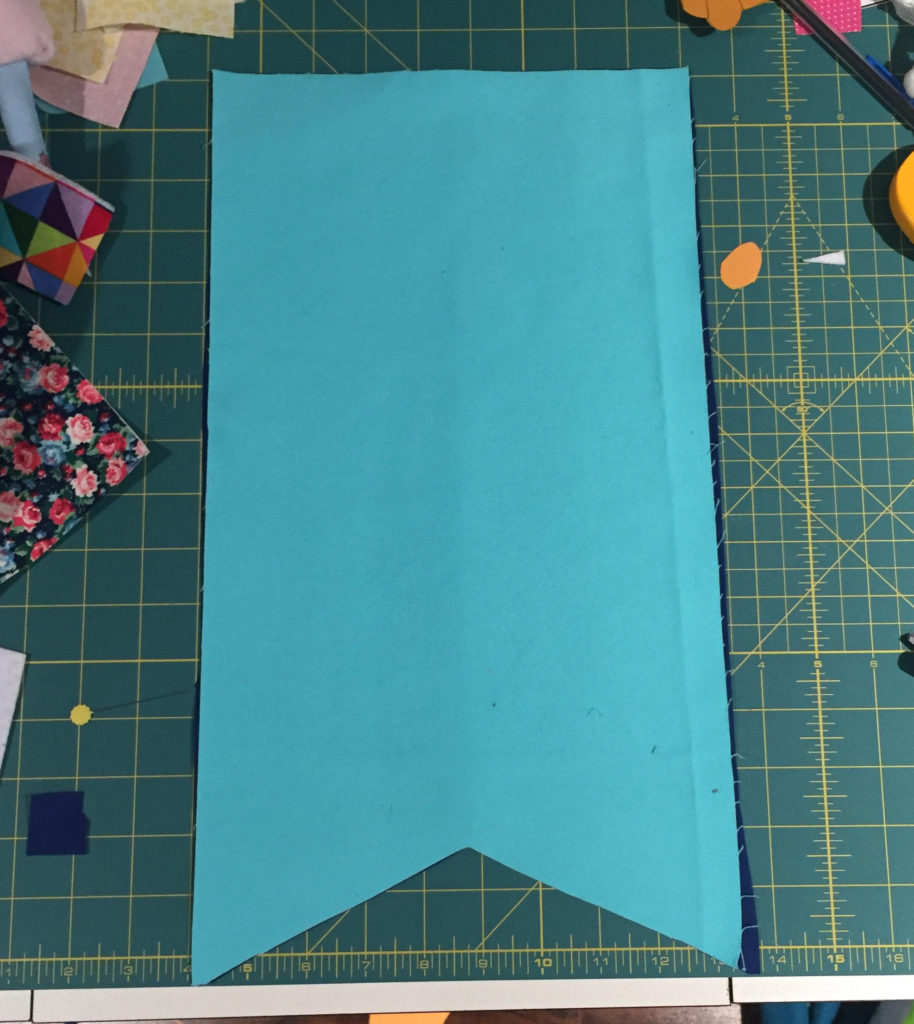
If you’re making a hanging banner you will want to cut out two pieces of fabric (from your 1/4 metre pieces) that will be 17 inches long by 9 inches wide. Iron these pieces of fabric and set aside.
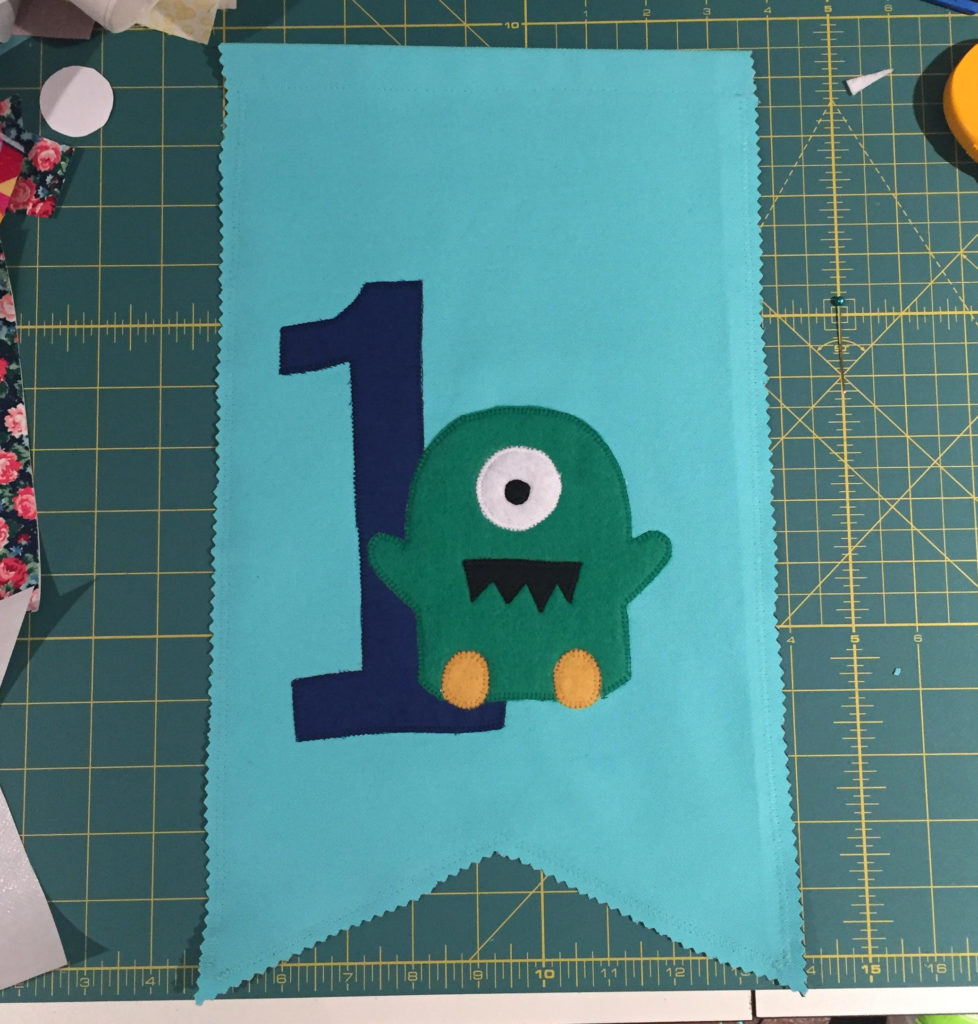
Take your scraps of fabric and attach to the Heat N’Bond Lite per the instructions on the package. Take a look at the fabric and decide how large you want the applique design. In the appropriate size, cut out the numbers, shapes, letters, etc that you want on your banner. I did the number “1” and the monster freehand but you can certainly trace something if you’re more comfortable.
Place both pieces of 9X17 fabric together, right sides facing out, and turn down one of the short ends (one of the the 9 inch ends) about 1/2 an inch. Press. Turn down again and press. Using a straight stitch, stitch along the first folded edge to form a pocket for the twine to go through.
Next you will want to attach the applique designs to your hanging banner per the instructions on the Heat N’Bond Lite. Always make sure you are turning off the steam setting when using applique paper.
Once the design is placed and pressed on, you are ready to applique. I have a Janome Horizon Memory Craft 8200 sewing machine and I use stitch number 39 for applique.
Separate the two layers of the hanging banner. You want to applique only the front piece, as the back piece will later get attached to hide all of the threads and make the project look neater.
Stitch along the outer edge of all applique pieces using either a contrasting thread or a matching thread.
Place both 9X17 pieces of fabric together. The bottom edge can be left straight or you can repeat the “V” pattern that I did on the bottom edge of the cotton pieces.
Next I did a zigzag stitch along the perimeter of the banner, stitching the front and back pieces together. I did not stitch over the ends of the pocket where the twine will thread through.
Once the perimeter is stitched, I used my pinking shears to clip the edges, just for texture.
String the twine through the pocket of the banner. If you are having difficulty with this, I recommend wrapping the twine around one side of a safety pin a few times, then threading the safety pin through the pocket.
Centre the banner along the twine.
You are now ready to string on all of those beautiful pieces of cotton and/or broadcloth! This is my favorite part.
You will use the same technique for this project as you would from my DIY Tutu tutorial. If you go to this video you will get an excellent demonstration of the looping technique at about 3mins 30secs.
Continue looping evenly on either side of the hanging banner. I made each side a mirror image of the other, but you can do it more randomly.
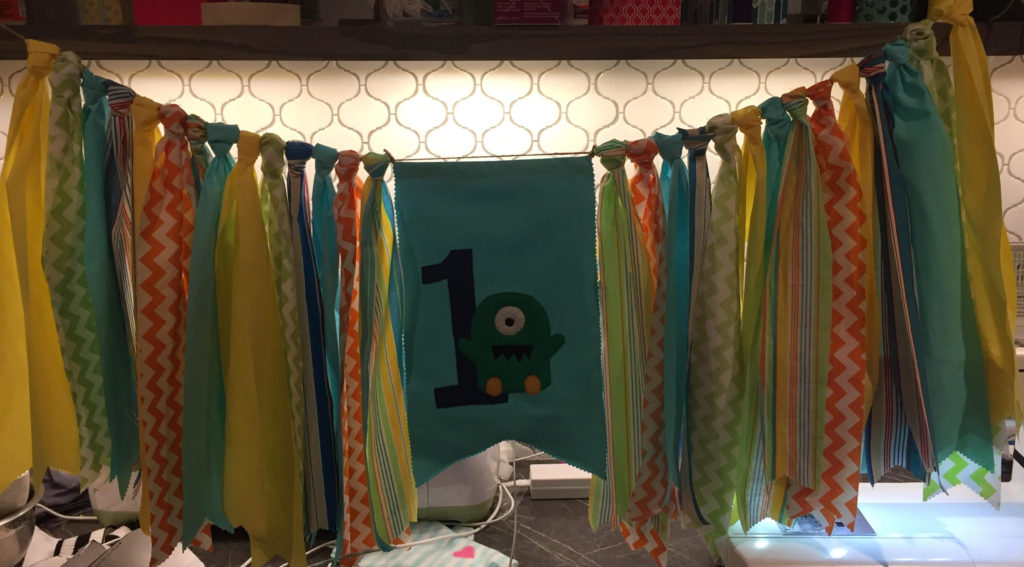
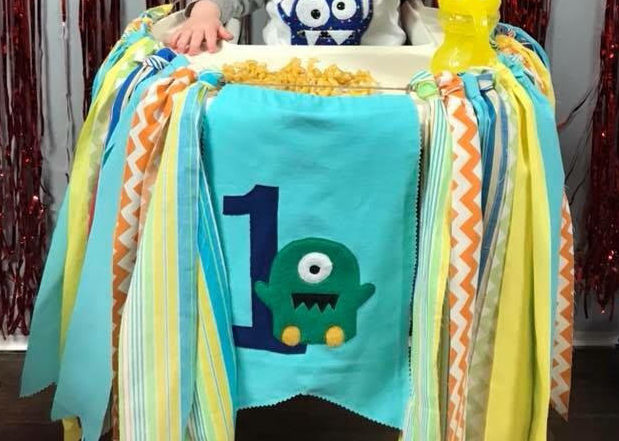
Once you’ve added in all of your pieces, you are done! Your high chair is ready to party!
This is such an easy project, especially if you are simply making a garland and skipping the hanging banner in the centre. You can use any color combination you like.
This weekend is Easter and it’s my son’s first one! I can’t say he’s excited about the Easter Bunny, but mostly because he hardly knows what a bunny is.
Recently I learned to applique and I am completely in love with it. I literally want to applique everything I see! Pillows, tote bags, placemats, blankets, you name it.
Following Nana Company’s pattern, cut out the bib. I am using a scraps of fabric from my stash, so a simple cotton on the front and a flannel on the back.
To applique this bib you will need the following:
A small piece of contrasting fabric
Optional: A piece of white felt for a fuzzy bunny tail
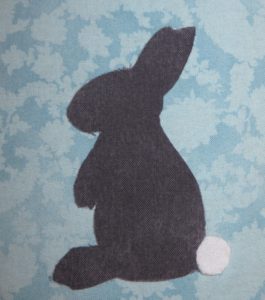
A printed bunny silhouette (my husband drew the bunny by hand for this tutorial. Thanks, Matt!)
Heat’N Bond Lite
A threaded sewing machine (or a needle and thread if you’re into hand applique, which I am not)
A hot iron with the steam setting turned OFF (per Heat’N Bond Lite instructions)
Look at your bib and decide how big you want the bunny. Mine was roughly 3 inches high. Print the bunny silhouette to the appropriate scale. Cut a rectangular piece of fabric just slightly bigger than the measurements of your bunny, and cut a matching piece of Heat’N Bond Lite.
Do the same with the white felt for the bunny tail, if you are doing this step.
The best way I can describe applique is that you are essentially making a fabric sticker. So the wrong side of the fabric (not the patterned side) will face the webbed side of the Heat’N Bond Lite. When the fabric and Heat’N Bond are sandwiched together, the paper backing will be visible on one side and the (right side) printed fabric on the other.
Using your hot iron (again, no steam!) you will iron on the paper side of the Heat’N Bond, with the fabric underneath. Don’t press for too long, just a few seconds should do the trick. When in doubt, read the instructions on the Heat’N Bond Lite.
Let the paper cool for a few seconds before attempting to pick it up. Once it’s cool, you’re ready to cut out the silhouette.
You will trace the bunny onto the paper backing of the Heat’N Bond Lite. For this project it may not matter much, but if you were doing this with, for example, letters or numbers you would need to flip your template over before tracing so as to create a mirror image. Otherwise if you just trace directly onto the paper, you will have a backwards letter or number. You only make this mistake once or twice.
Cut out on your trace marks. You should now have a bunny silhouette with printed fabric on one side, paper backing on the other. Remove the paper backing and lay the silhouette on the front of your bib. Once you’re happy with the placement, iron over the top for a few seconds. This will secure the bunny to the bib. You’re now ready to applique.
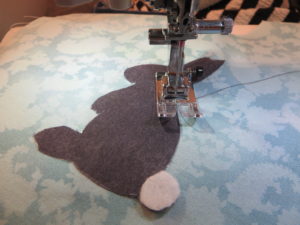
On your sewing machine you should have several different stitches to choose from. I’m using the Janome Horizon Memory Craft 8200 (hello, dream machine!) and I use stitch number 39 for applique. I sometimes use contrasting thread for applique, but today I’m using matching thread.
I turn the sewing speed down when I applique to avoid going off course.
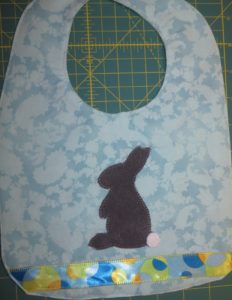
Once you have appliqued all the way around the silhouette (and around the tail, if you choose), snip the threads and get ready to sew the bib front to the bib back. I added a strip of ribbon across the bib before sewing the front to back.
You can follow Nana Company’s instructions for sewing the bib and attaching a snap closure. An alternative would be velcro, which I find easier and often more durable.
Once you’ve finished sewing the bib I would give it a quick press with the iron (this time with steam on to ensure the wrinkles are gone), and it’s ready to wear!
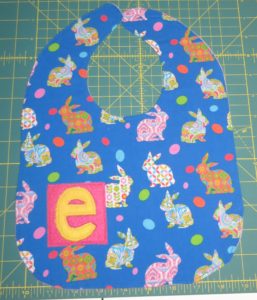
I also made an Easter bib for a friend of mine today. I’ve posted it below, just for another easy custom bib idea. I used felt for the pink square and the “e”. Appliqued around both.
Thanks for checking out my post today! I hope you enjoyed it. Hoppy Easter!!