
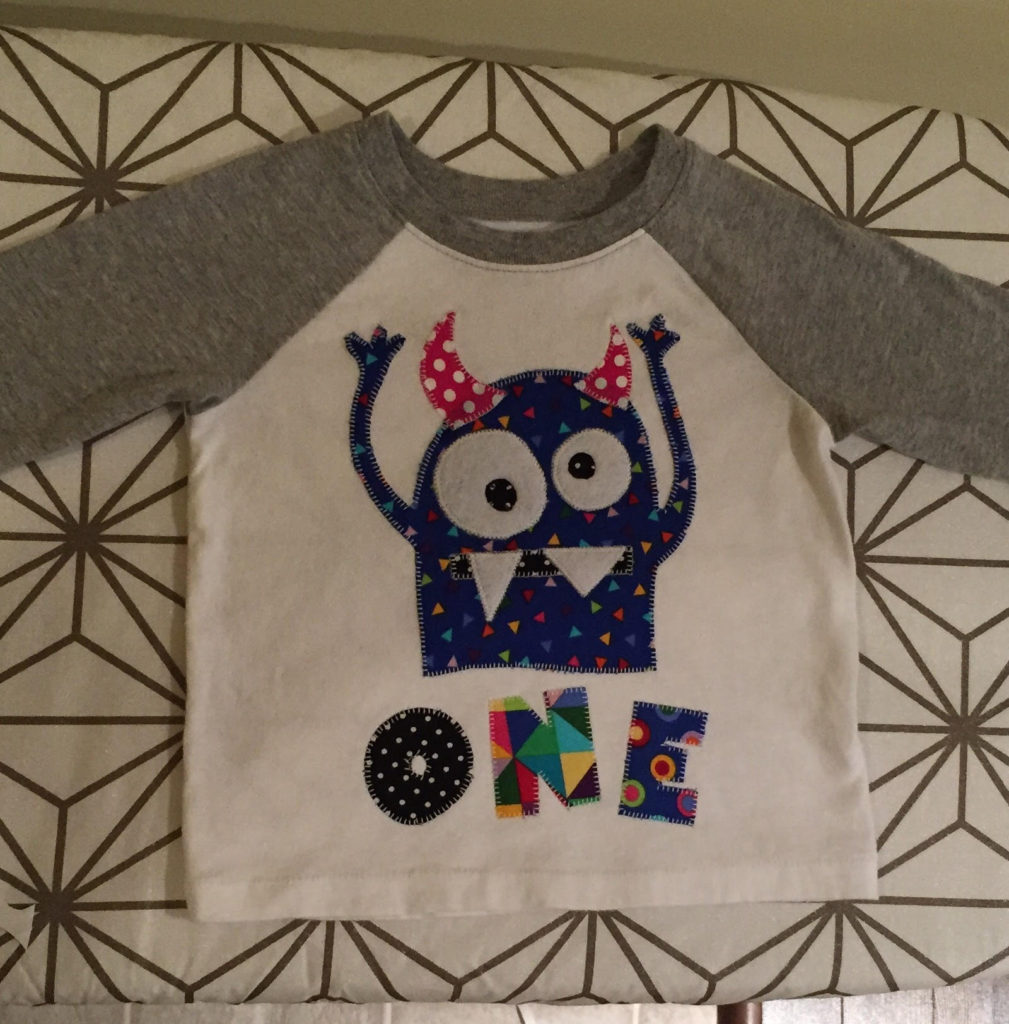
Leading up to Connor’s birthday party I was looking at options for a fun birthday tshirt! My husband lives in baseball-style shirts so I thought it would be cute to dress him up in one of those.
I picked up the shirt from the sale rack at Old Navy for about $5.
I decided to test out my applique skills for this project, knowing it would be a bit more involved than what I’ve done in the past. I enlisted the help of my darling husband as he has mad drawing skills. We looked at how big the monster should be (based on how big the shirt was), and started to plan out the project.
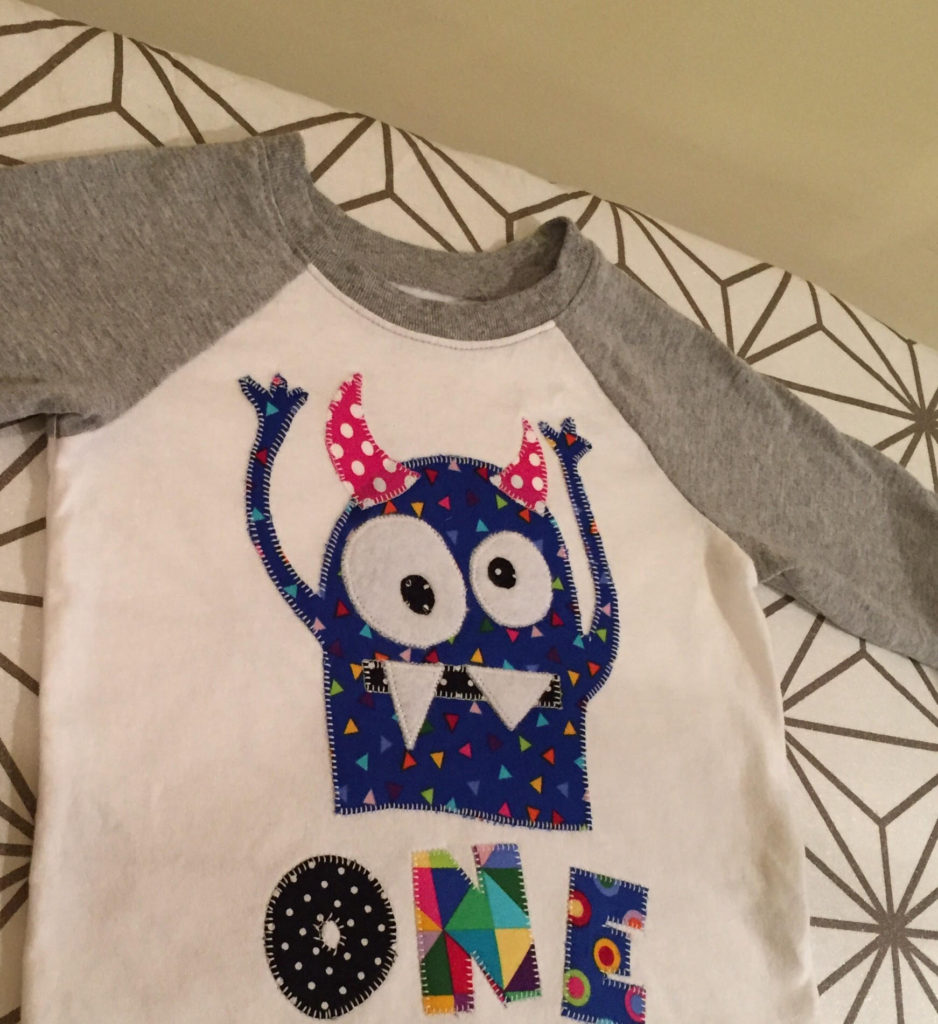
We looked up some images on Google for monster birthday shirts and came across a design we loved. This is not our original idea, though Matt did draw it by hand. Within a few minutes he had drawn this little guy:

To applique this, he had to cut out (from paper) all of the layers separately to make a pattern, so first he cut the body (with arms attached), then the horns, then the eyes, then the mouth, then the teeth. We spent some time coming up with the best color scheme for the monster.
Then he cut out the letters (from paper) for “one” and we chose fabric to match the monster.
Here are the materials you will need for this project:
- A paper pattern (you can create your own)
- Heat’N Bond Lite
- Coordinating fabric
- Scissors
- Contrasting or coordinating thread
- Iron
- Lightweight interfacing (optional but helpful)
Once your pattern is cut out of paper you will want to iron the Heat’N Bond Lite to the back of the fabric per the instructions on the package.
Use your pattern pieces to cut out the fabric pieces.
Position the monster body on the shirt where you think it best fits. Position the letters for “One” underneath. Once you’re happy with the placement, peel the backing off of the Heat’N Bond Lite and make sure the steam setting is turned OFF on your iron. Iron these pieces in place.
Next you will add on the horns, the white part of the eyes and the mouth. Press those in place.
At this stage I would cut a piece of interfacing and place on the inside of the shirt. This is optional, however if the shirt fabric is really stretchy or flimsy, a little stabilizer on the back does help with the applique, especially when going around the tiny little monster fingers.
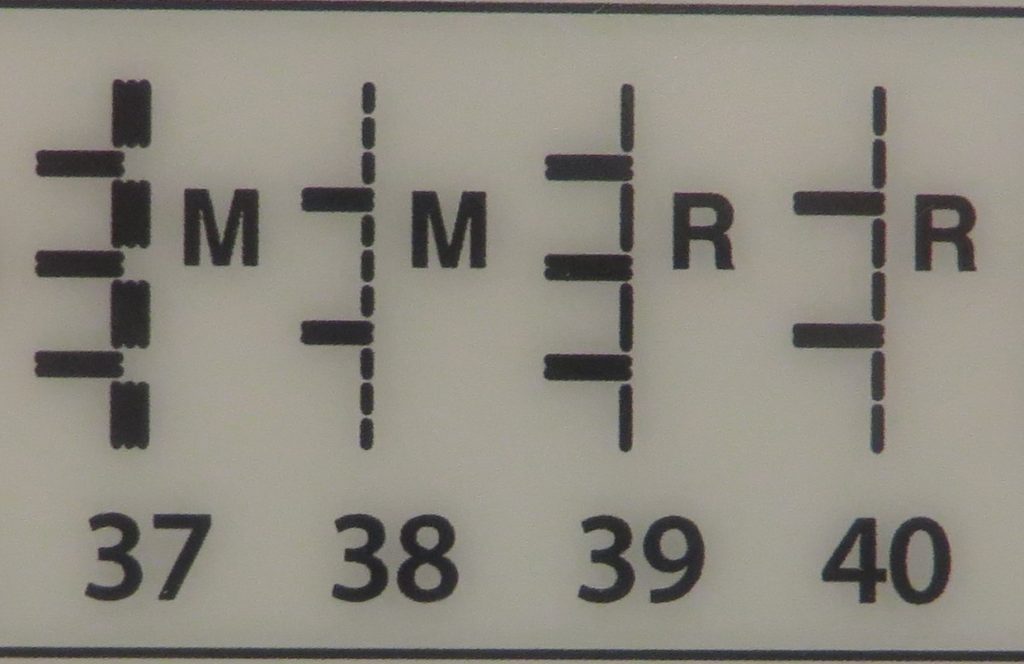
Before adding on the pupils and the teeth, applique all of those pieces in place. To applique you can use either a very small, tight zigzag stitch on your machine or a regular applique stitch. The zigzag may be best if this is an item you plan to wash and wear often, as the zigzag will be best at preventing fraying over time. But this shirt was to be worn once and then put in a memory box for Connor, so I went with the traditional applique stitch. On my Janome Horizon Memory Craft 8200 it’s stitch 39.
Once you’ve appliqued all the way around these pieces (using either a contrasting thread or a matching thread), you can iron the pupils and teeth in place as pictured here:
Applique the last pieces added.
Give the shirt a good press with your iron and it’s ready to wear! I did throw this one through the washer to soften up the appliqued fabric a bit before wearing.
This project can take a little time, maybe 90 minutes or so. But the result was so darn cute I would do it all over again!
Thanks for checking out my post.
Heather
Of course, what a magnificent blog and illuminating posts, I surely will bookmark your website.Best Regards!