
If you are currently in Newfoundland you may hate me a bit for posting this “summer wreath” as summer is totally MIA in these parts. Parts of our beautiful province got snow last night. Before you feel the need to check your calendar, lovelies, it’s June 26th.
Last night I decided to make a wreath for our front door. I have wreaths on many doors in our house, and I change them out pretty frequently, so now I have a new one in the rotation. The wreath we had up was red and gold and simply looked too Christmasey.
A couple of years ago Michael’s had these beautiful wooden wreaths on sale for $4.99 each. I think regular price was around $20 at the time. I stocked up! I bought 8 of them. This one was a bit of an ulgy duckling wreath, with an irregular shape, so it ended up not being used. Until now, that is.
![]()
Last week at Michael’s I went to the clearance section where they have all of their florals at a pretty substantial discount. I think it was 60% off. I picked up a couple of large flowers, some greenery (not from the clearance section) and a few “filler” flowers and buds.

The materials you will need for this tutorial are:
- Wreath
- Flowers
- Glue gun
- Glue sticks
- Wire cutter (maybe!)
To start I removed all of the stems from the flowers and buds. Most just pull off quite easily but some do require wire cutters.
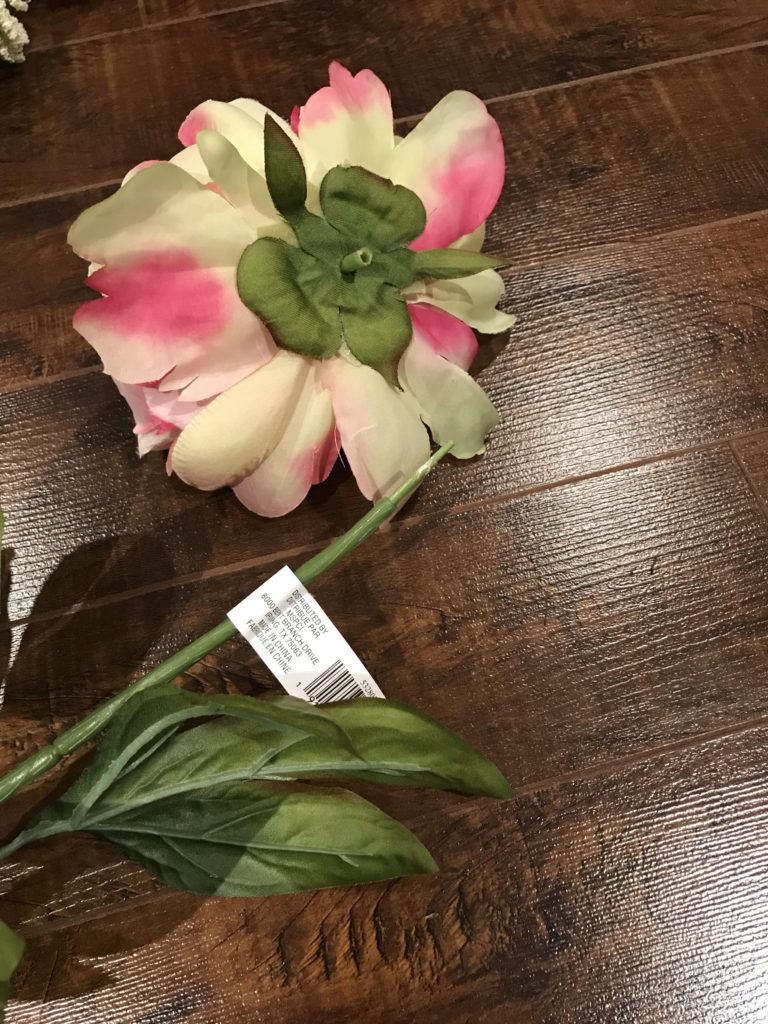
When pulling the flower off the stem, do so very gently so you don’t separate the individual petals. If you can’t pull it off cleanly like in this photo (with some stem attached), opt for wire cutters.
I had a vision of having the dangling greenery coming from the top of the wreath, so I started there. Most times I lay out all flowers on the wreath before I start gluing, but in this case there weren’t a lot of options for the hanging greenery so I went for it.
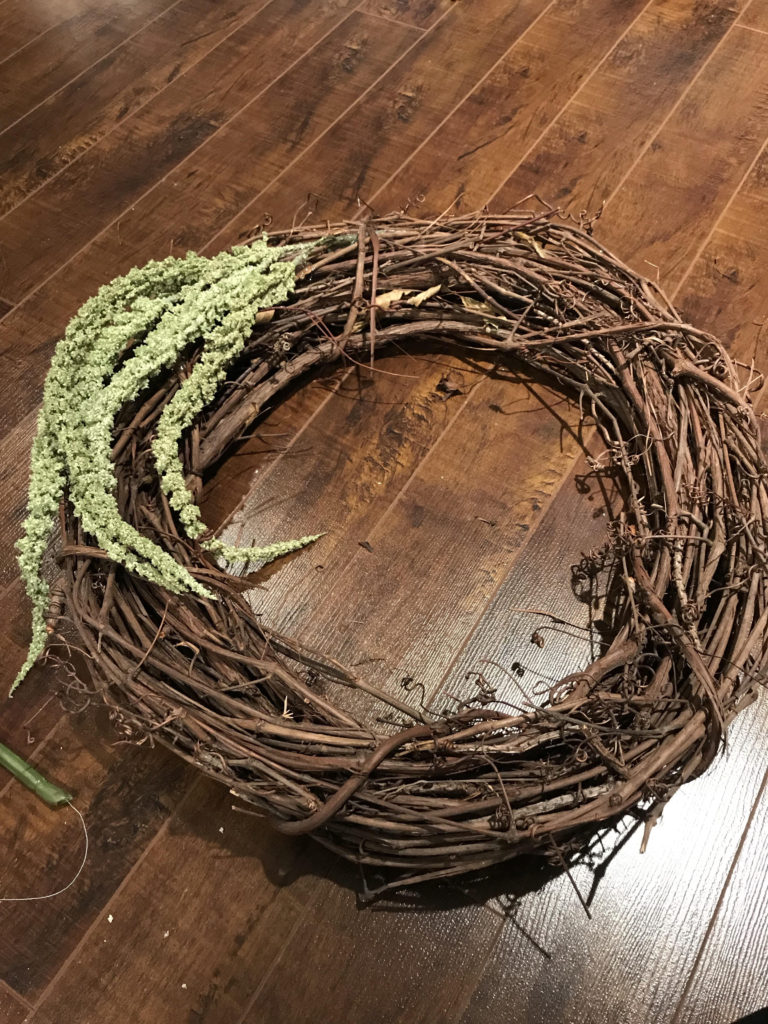
Though it needed to be secured to the wreath, I wanted the greenery to sway a little in the wind so I weaved the stem back through some of the wooden frame and glued that in place. Then glued just 3 of the long strands down along the side of the wreath, allowing the rest to have lots of movement.
Next I pulled the leaves off of the flower stems and glued them along the top. I knew I was going to place my flowers at the top of the wreath and I do find having some leaves there can set a nice little backdrop for the flowers.
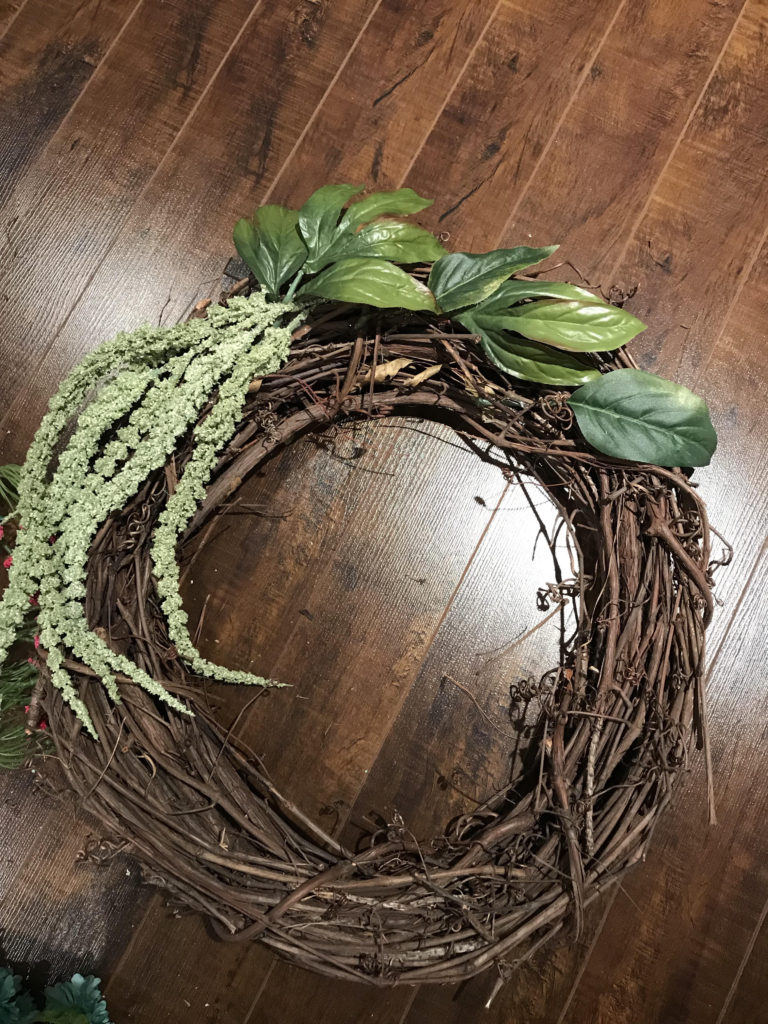
So you’re gluing the stems in place but trying not to glue the actual leaves too much because you do want them to look a little natural, not plastered in place.
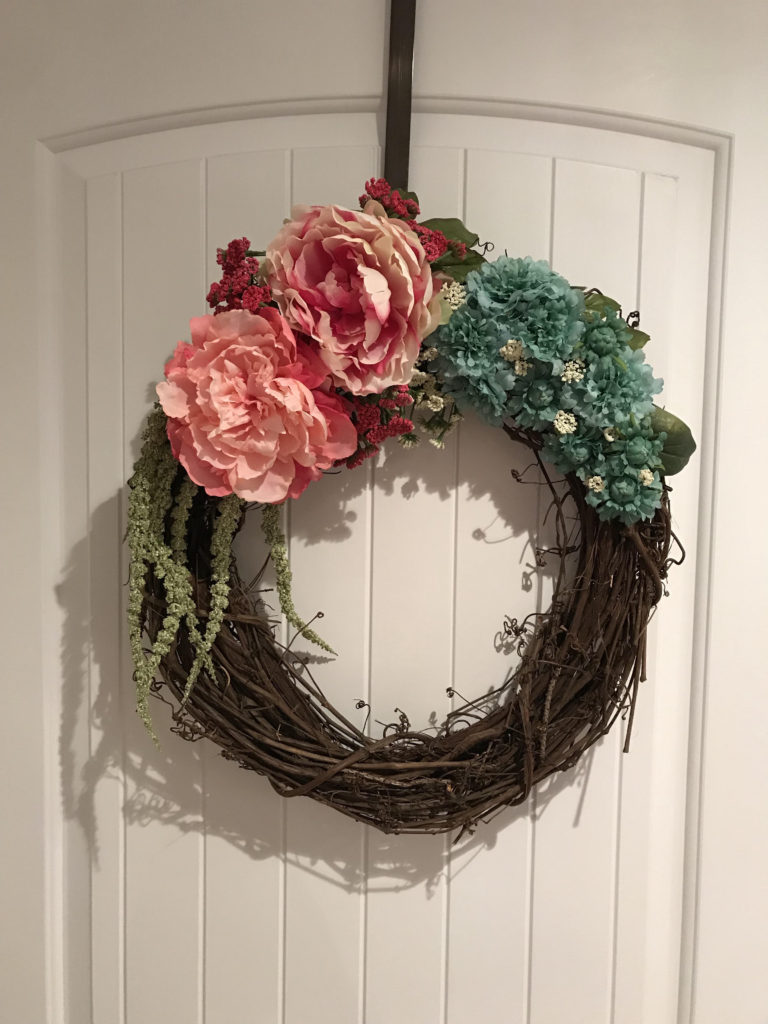
From there I began adding flowers, and kept adding flowers and buds until I was happy with the result. I didn’t use all of the materials in the end.
As you’re adding, hang the wreath up a time or two to ensure things are hanging properly and not “sagging” away from the wreath. Taking opportunities to step back along the way to ensure you’re on the right path will give you a better shot at being pleased with your final product.
I wouldn’t dare hang this on my front door last night because, well, it’s so cold and rainy I didn’t want to OPEN the door.
This is a really simple tutorial that can be made pretty inexpensively, but it really does give your front door a quick facelift.
Thanks for checking out my post today.
Heather
Beautiful!
Thank you for the sensible critique. Me & my neighbor were just preparing to do a little research on this. We got a grab a book from our area library but I think I learned more from this post. I am very glad to see such wonderful info being shared freely out there.